Skip to content

FAN control OMV Auyfan 0.10.12: gitlab-ci-linux-build-184, Kernel 5.6

Linux
  • Hey,

    I will do it in english, hope it is okay. Thanks, for very informative forum.

    My question is, is it possible to control the FAN in the newest OMV Auyfan 0.10.12: gitlab-ci-linux-build-184, Kernel 5.6?
    The install was very easy no problems at all, the only problem is i did try some different commands to reach the fan, but was not able to get it going. Do somebody know how? Thanks.

    Best Regards.
    Soeren

  • Hi Soeren,

    I have this succesfully running.

    Kind Regards
    Martin

  • @mabs sagte in FAN control OMV Auyfan 0.10.12: gitlab-ci-linux-build-184, Kernel 5.6:

    Hi Soeren,

    I have this succesfully running.

    Kind Regards
    Martin

    Thanks, i will try the fan tool again. I'm almost sure i did try without luck, have you edited something in the fan tool conf..?

  • Hi,

    I only played with two parameters.

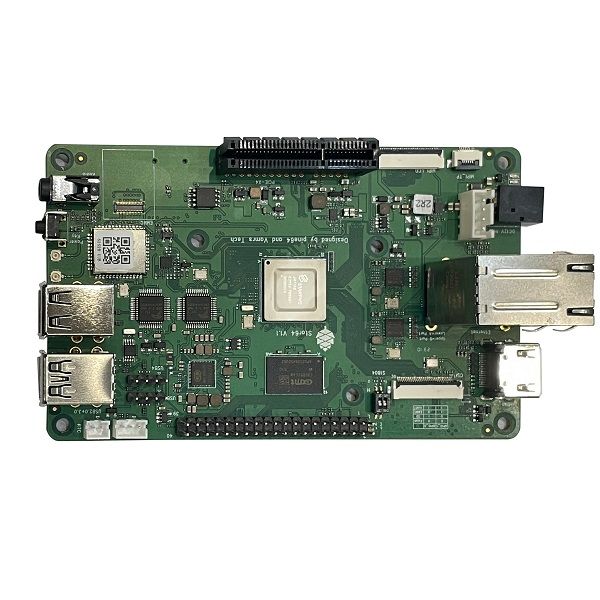
    I have two rockpro64 boards, currently one has a small fan and the other one has a large fan.

    Therefore I changed PROFILE_NR accordingly.

    Also I have ALWAYS_ON on true on the one with the large fan, but don't see a difference. The fan goes on and off still, maybe I misinterpreted the parameter.

    Also I just noticed now that the CTL settings of the version on github changed slightly, but I think this only improved the detection depending of the kernel settings.

    M

  • @mabs

    With the new OMV kernel 5.6 image from Auyfan, i can't get the FAN to spin - If the fan spins it runs really slow, no sound from the fan.

    With the FAN tool the master installation "failed" and with the release installation it did report "active"..
    I have installed a 92mm FAN inside the NAS case, it runs on Armbian with kernel 5.4.32

    I will open op the case later today to be sure. Thanks.

  • Hi,

    Now i did find the fan, here it goes "nano /sys/devices/platform/pwm-fan/hwmon/hwmon3/pwm1" it is at "0" can be controlled to "255"

    Best Regards.

  • Yes that is basically the way ATS is doing the changing as well I think, as those /sys entries are in the _CTL variables.

    good that you got it working, or are you only half way?

    M

  • @mabs

    The tool works on all image under 5.4 or so for me. But yes i am at the finish line, just wanted the fan to be always on. Just wanted to share, if someone will run in the same problems. Thanks.

  • Helpful Thread!

    But, ATS don't work for me on kernel 5.6 with ayufan release. Only this command works.

    nano /sys/devices/platform/pwm-fan/hwmon/hwmon3/pwm1
    

    Thanks @soerenderfor for the hint.

  • Ok, problem in ATS is this?

    -- FAN Control[ String ]
    	PWM_CTL		= {
    			"/sys/class/hwmon/hwmon0/pwm1",
    			"/sys/devices/platform/pwm-fan/hwmon/hwmon0/pwm1",
    			"/sys/devices/platform/pwm-fan/hwmon/hwmon1/pwm1"
    	},
    
  • @FrankM - did you try fix the ATS tool, if yes. Will it Work?

    Best Regards.

  • Hi,

    since I'm currently change my rockpro64 setup I came across this.

    With the kernel from ayufan you need to set PWM_CTL to

    /sys/devices/platform/pwm-fan/hwmon/hwmon3/pwm1
    

    for my self compiled one I need

    /sys/devices/platform/pwm-fan/hwmon/hwmon0/pwm1
    

    But I got it only working with one entry for PWM_CTL e.g.

    PWM_CTL		= "/sys/devices/platform/pwm-fan/hwmon/hwmon0/pwm1",
    

    after that you need to start ats again

    sudo systemctl stop ats
    sudo systemctl start ats
    

    initially the fan should start immediately for a short period of time.

    In case it is even a different one on your kernel you can find the right one using this command.

    sudo find /sys -name pwm1 | grep hwmon
    

    So far I'm not sure which kernel parameter or modul changes this.

    Martin

  • Rest-Server v0.13.0 released

    Restic
    2
    0 Stimmen
    2 Beiträge
    274 Aufrufe
    FrankMF
    Download Rest-Server und installieren

    Im Github Repository den aktuellen Release suchen. Hier am Beispiel der aktuellen Version 0.13.0 (27.07.2024) Datei herunterladen

    wget https://github.com/restic/rest-server/releases/download/v0.13.0/rest-server_0.13.0_linux_amd64.tar.gz

    Die Datei entpacken

    tar -xf rest-server_0.13.0_linux_amd64.tar.gz

    Ins Verzeichnis wechseln

    cd rest-server_0.13.0_linux_amd64

    Wenn der Rest-Server läuft, dann muss man diesen erst mal stoppen.

    systemctl stop rest-server

    Danach kopiert man das File nach bin. Wer mag sichert vorher das alte File.

    cp rest-server /usr/local/bin

    Danach kann man den Rest-Server wieder starten.

    systemctl start rest-server

    Versionskontrolle

    root@rest-server:~# rest-server -v rest-server version rest-server 0.13.0 compiled with go1.22.5 on linux/amd64

    Die Hilfe vom Rest-Server

    root@rest-server:~# rest-server -h Run a REST server for use with restic Usage: rest-server [flags] Flags: --append-only enable append only mode --cpu-profile string write CPU profile to file --debug output debug messages -h, --help help for rest-server --htpasswd-file string location of .htpasswd file (default: "<data directory>/.htpasswd)" --listen string listen address (default ":8000") --log filename write HTTP requests in the combined log format to the specified filename (use "-" for logging to stdout) --max-size int the maximum size of the repository in bytes --no-auth disable .htpasswd authentication --no-verify-upload do not verify the integrity of uploaded data. DO NOT enable unless the rest-server runs on a very low-power device --path string data directory (default "/tmp/restic") --private-repos users can only access their private repo --prometheus enable Prometheus metrics --prometheus-no-auth disable auth for Prometheus /metrics endpoint --tls turn on TLS support --tls-cert string TLS certificate path --tls-key string TLS key path -v, --version version for rest-server Systemd

    Wer noch ein passendes systemd File benötigt.

    [Unit] Description=Rest Server After=syslog.target After=network.target [Service] Type=simple User=rest-server Group=rest-server ExecStart=/usr/local/bin/rest-server --private-repos --tls --tls-cert /mnt/rest-server/<DOMAIN>/fullchain.pem --tls-key /mnt/rest-server/<DOMAIN>/key.pem --path /mnt/rest-server Restart=always RestartSec=5 # Optional security enhancements NoNewPrivileges=yes PrivateTmp=yes ProtectSystem=strict ProtectHome=yes ReadWritePaths=/mnt/rest-server [Install] WantedBy=multi-user.target
  • Redis Stack?

    Redis
    1
    0 Stimmen
    1 Beiträge
    120 Aufrufe
    Niemand hat geantwortet
  • Update 1.30.3 released

    Vaultwarden
    1
    0 Stimmen
    1 Beiträge
    95 Aufrufe
    Niemand hat geantwortet
  • Nextcloud - Collabora Installation Debian Bookworm 12

    Nextcloud
    2
    0 Stimmen
    2 Beiträge
    780 Aufrufe
    FrankMF

    Ok, ich war leider nicht in der Lage den CODE-Server hinter einem Proxy zu installieren. Das CODE-Team scheint Docker zu lieben und das andere nur am Rande zu machen. Ohne Liebe 🙂

    Da ich extrem lange Ladezeiten hatte und die Software insgesamt nicht den Eindruck machte, das man das gerne produktiv auf einem Server nutzen möchte, habe ich den Server eben wieder gelöscht.

    Jetzt fehlt mir leider, die deepl.com Anbindung, aber das kann man ja auch über die Webseite nutzen.

    Ich nutze jetzt wieder den eingebauten CODE-Server, der eigentlich ein App-Image ist.

    28c41010-5ce1-4f7c-89d5-1c9b253011d0-grafik.png

    Der klare Vorteil, es läuft incl. Dokumenten Freigabe 🙂

    Nicht vergessen, unter Allow list for WOPI requests kommen die Server Adressen des Nextcloud-Webservers rein!

    c1a06c2c-86b5-4750-a062-7ba9d8dd8253-grafik.png

  • NiceGUI

    Linux
    2
    0 Stimmen
    2 Beiträge
    310 Aufrufe
    FrankMF

    Ich habe mir das jetzt einige Tage gegeben und habe mich dagegen entschieden. Werde weiterhin PyWebIO benutzen. Hauptgrund ist die wesentlich bessere Dokumentation -> https://pywebio.readthedocs.io/en/latest/index.html

    Da kann ich mir auch mit meinem Python Kenntnisstand die Informationen holen, die ich brauche um es einzusetzen.

  • NodeBB - Update auf v1.18.6

    NodeBB
    1
    0 Stimmen
    1 Beiträge
    135 Aufrufe
    Niemand hat geantwortet
  • Wireguard 1.0.0

    Wireguard
    1
    0 Stimmen
    1 Beiträge
    257 Aufrufe
    Niemand hat geantwortet
  • Liste von Linuxbefehlen

    Angeheftet Linux
    3
    0 Stimmen
    3 Beiträge
    678 Aufrufe
    FrankMF
    systemd Anzeige der geladenen Dienste root@host:/etc/systemd/system# systemctl --type=service UNIT LOAD ACTIVE SUB DESCRIPTION atd.service loaded active running Deferred execution scheduler blk-availability.service loaded active exited Availability of block devices cloud-config.service loaded active exited Apply the settings specified in cloud-config cloud-final.service loaded active exited Execute cloud user/final scripts cloud-init-local.service loaded active exited Initial cloud-init job (pre-networking) cloud-init.service loaded active exited Initial cloud-init job (metadata service crawler) console-setup.service loaded active exited Set console font and keymap cron.service loaded active running Regular background program processing daemon crowdsec-firewall-bouncer.service loaded active running The firewall bouncer for CrowdSec crowdsec.service loaded active running Crowdsec agent dbus.service loaded active running D-Bus System Message Bus getty@tty1.service loaded active running Getty on tty1 ifupdown-pre.service loaded active exited Helper to synchronize boot up for ifupdown keyboard-setup.service loaded active exited Set the console keyboard layout kmod-static-nodes.service loaded active exited Create List of Static Device Nodes lvm2-monitor.service loaded active exited Monitoring of LVM2 mirrors, snapshots etc. using dmeventd or progress polling mariadb.service loaded active running MariaDB 10.11.3 database server networking.service loaded active exited Raise network interfaces nginx.service loaded active running A high performance web server and a reverse proxy server qemu-guest-agent.service loaded active running QEMU Guest Agent resolvconf.service loaded active exited Nameserver information manager semaphore.service loaded active running Ansible Semaphore serial-getty@ttyS0.service loaded active running Serial Getty on ttyS0 ssh.service loaded active running OpenBSD Secure Shell server systemd-binfmt.service loaded active exited Set Up Additional Binary Formats systemd-fsck@dev-disk-by\x2duuid-1E22\x2dDC00.service loaded active exited File System Check on /dev/disk/by-uuid/1E22-DC00 systemd-journal-flush.service loaded active exited Flush Journal to Persistent Storage systemd-journald.service loaded active running Journal Service systemd-logind.service loaded active running User Login Management systemd-modules-load.service loaded active exited Load Kernel Modules systemd-random-seed.service loaded active exited Load/Save Random Seed systemd-remount-fs.service loaded active exited Remount Root and Kernel File Systems systemd-sysctl.service loaded active exited Apply Kernel Variables systemd-sysusers.service loaded active exited Create System Users systemd-timesyncd.service loaded active running Network Time Synchronization systemd-tmpfiles-setup-dev.service loaded active exited Create Static Device Nodes in /dev systemd-tmpfiles-setup.service loaded active exited Create Volatile Files and Directories systemd-udev-trigger.service loaded active exited Coldplug All udev Devices systemd-udevd.service loaded active running Rule-based Manager for Device Events and Files systemd-update-utmp.service loaded active exited Record System Boot/Shutdown in UTMP systemd-user-sessions.service loaded active exited Permit User Sessions ufw.service loaded active exited Uncomplicated firewall user-runtime-dir@0.service loaded active exited User Runtime Directory /run/user/0 user@0.service loaded active running User Manager for UID 0 LOAD = Reflects whether the unit definition was properly loaded. ACTIVE = The high-level unit activation state, i.e. generalization of SUB. SUB = The low-level unit activation state, values depend on unit type. 44 loaded units listed. Pass --all to see loaded but inactive units, too. To show all installed unit files use 'systemctl list-unit-files'.