Ich bin mit der Lernkurve noch nicht so richtig zufrieden. Eine Frage die sich mir stellte, geht das einfacher? Der Ursprung meiner Datenbank Struktur liegt in einem anderen Projekt, wo ich versucht habe Daten permanent in einem File zu speichern. Dazu hatte ich damals JSON genommen. Deswegen auch diese Zeilen
self.project = str(db_client.json().get('settings', '$..project')[0]) or self.project
Gut, ich hatte dann mal ChatGPT gefragt, wie macht man das so 'normalerweise'? es kam eine Klasse heraus, die ich dann intensiv ausprobiert habe, ein wenig umgebaut usw. So lange, bis ich der Meinung war, ok ich habe es verstanden. Jetzt nutzte der Code auch mehr Redis Funktionen, wie
self.client.hset('settings', name, json.dumps(data))
Es waren jetzt folgende Funktionen drin
hset
hexists
hdel
hget
Dokumentation -> https://redis.io/commands/hset/
Beim Durchlesen des Codes hatte ich jetzt mehr das Gefühl, so muss das sein
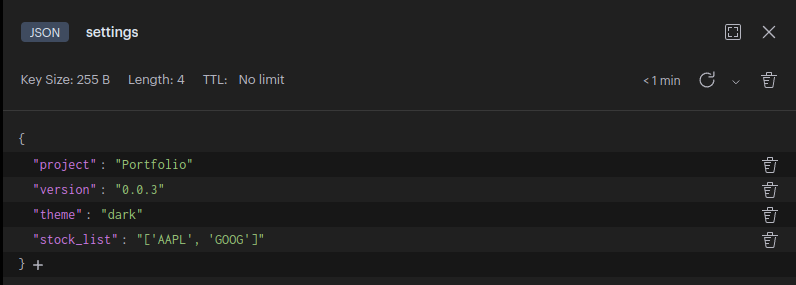
In RedisInsight sieht das dann jetzt so aus.
[image: 1695479582374-393195f7-1017-4285-8fca-734ee6b4bff7-grafik.png]
Klasse
class PortfolioSettings:
def __init__(self, host='172.17.0.2', port=6379, db=0):
if args.test_mode == 1:
self.client = redis.StrictRedis(host=SERVER_IP, port=port, db=TEST[0])
else:
self.client = redis.StrictRedis(host=SERVER_IP, port=port, db=LIVE[0])
def set_settings(self, name, data):
"""Init settings if db don't exist"""
if not self.client.hexists('settings', name):
self.client.hset('settings', name, json.dumps(data))
return True
return False
def edit_setting(self, name, data):
"""Edit an entry in settings"""
if self.client.hexists('settings', name):
self.client.hset('settings', name, json.dumps(data))
return True
return False
def delete_setting(self, name):
"""Delete an entry in settings"""
return self.client.hdel('settings', name)
def get_setting(self, name):
"""Get an entry in settings"""
setting = self.client.hget('settings', name)
return json.loads(setting) if setting else None
def get_all_settings(self):
"""Get all entries in settings"""
settings = self.client.hgetall('settings')
return {k.decode(): json.loads(v) for k, v in settings.items()}
Und hier die Initialisierung
settings_data = PortfolioSettings()
#####################
# Will only be executed if DB is not available!
#####################
if not settings_data.get_all_settings():
# Settings initialisieren
print("INIT")
settings_data.set_settings("project", "Portfolio")
settings_data.set_settings("version", "0.0.3")
settings_data.set_settings("theme", "dark")
settings_data.set_settings("url_list", ["https://www.onvista.de/aktien/Deutsche-Telekom-Aktie-DE0005557508"])
settings_data.set_settings("exchange_list", ['DKB','Smartbroker','BUX'])
Teile der Klasse sind [KI-generiert]
Ich war zufrieden und habe die Klasse dann in mein Projekt übernommen und den Code überall entsprechend angepasst.