Skip to content

Restic - Ein Backupkonzept - Automatisieren!

Verschoben Restic
  • Nach der Erstellung von folgendem Artikel Restic - Ein Backupkonzept habe ich eine Zeit lang gebraucht um mir ein vernünftiges Konzept zu erstellen. Backup's sind eine relativ komplexe und schwierige Materie. Wo lagert man? Was lagert man? Wie sichert man die Daten? usw.

    Wichtige Daten in der eigenen Wohnung zu sichern ist so lange eine gute Idee, bis die Wohnung mal brennt oder die Datenspeicher gestohlen werden. Auf dem Smartphone, das wäre auch noch eine Lösung. In der Cloud!? Hat was, aber ich traue allen kommerziellen Anbietern nicht über den Weg. Was machen? Man nimmt was eigenes, z.B. eine Nextcloud Installation. Da hat man weitestgehend alles in der eigenen Hand. Bleibt das Problem, das wir sehr wichtige Daten NUR verschlüsselt in der Cloud ablegen. Wir wollen es einem evt. Eindringling ja nicht zu einfach machen 😉

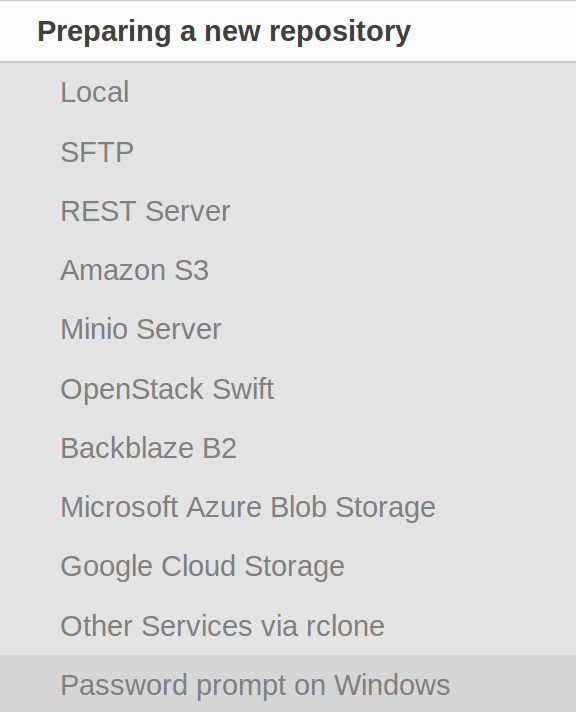
    Gut, das mit der Verschlüsselung haben wir ja gelöst, Restic speichert alle Backup's verschlüsselt. Bei der Suche nach einem Konzept bin ich in der Bedienungsanleitung über die Backends gestolpert, die Restic alle so unterstützt.

    0_1524762108060_restic_backends.png

    Die kommerziellen Sachen scheiden aus usw. Am Ende bin ich über Rclone gestolpert.

    Rclone is a command line program to sync files and directories to and from

    Rclone syncronisiert also einen Ordner mit einem Clouddienst. Und da kommt nun Restic ins Spiel, Restic nutzt Rclone zum Speichern der Daten in der Cloud. RClone unterstützt Nextcloud (natürlich auch Owncloud). Somit hätten wir ein gutes Team um Daten verschlüsselt in der Cloud abzulegen, welches sich auch relativ einfach automatisieren lassen sollte. Ok, fangen wir vorne an. Ich gehe von einer funktionierenden Restic Installation aus. Als Backend sollte eine Nextcloud Installation irgendwo im Netz laufen. Auf geht's...

    Rclone Installation

    Dieses Script installiert Rclone auf dem Rechner.

    curl https://rclone.org/install.sh | sudo bash
    

    Nach der erfolgreichen Installation kommt folgendes

    rclone v1.40 has successfully installed.
    Now run "rclone config" for setup. Check https://rclone.org/docs/ for more details.
    

    Rclone konfigurieren

    Mit

    rclone config
    

    stellt man die wichtigsten Parameter für Rclone ein.

    • Den Namen der Remoteverbindung - nextcloud
    • Den Type des Datenspeichers - 20 (Webdav)
    • URL of http Host - Den Webdav Pfad zu Eurer Nextcloud Installation
    • Name des Webdav Services - 1 (Nextcloud)
    • User Name - User Name (In Nextcloud festlegen!)
    • Passwort - Passwort (In Nextcloud festlegen)

    Das ganze bestätigen und kurz testen.

    rclone ls nextcloud:
    

    Nun sollte der Inhalt des Verzeichnisses ausgegeben werden.

    frank@frank-MS-7A34 ~ $ rclone ls nextcloud:
    5 TESTING.txt
    

    Erledigt, Rclone läuft. Nun der Teil mit Restic....

    Restic

    Nun schauen wir uns das mal mit Restic etwas genauer an.

    Beim ersten Test bekam ich immer eine Fehlermeldung

    frank@frank-MS-7A34 ~ $ restic -r rclone:nextcloud init
    Fatal: create repository at rclone:nextcloud failed: invalid backend
    If the repo is in a local directory, you need to add a 'local:' prefix
    

    Ok, kurz gegrübelt, das Backend ist drin auf github gecheckt. Klick, ich hatte eine alte Version installiert. Also schnell die neue Version gebaut und das Ganze sah schon besser aus.

    frank@frank-MS-7A34 ~/restic $ restic -r rclone:nextcloud:TEST init
    enter password for new repository:
    enter password again:
    created restic repository 7d6d14e068 at rclone:nextcloud:TEST
    

    Gut, läuft so weit. Kurz noch einen Anmerkung zum Pfad. Nehmen wir folgende Rclone Einstellung an.

    https://PFAD_zu_NEXTCLOUD/remote.php/webdav/BACKUP
    

    Der Restic Aufruf

    rclone:nextcloud:TEST
    

    zeigt auf einen Ordner innerhalb des Ordners Backup. Als Pfadangabe:

    https://PFAD_zu_NEXTCLOUD/remote.php/webdav/BACKUP/TEST
    

    Somit hätten wir jetzt das Repo vorbereitet und können jetzt unsere Daten dort speichern.

    frank@frank-MS-7A34 ~/restic $ restic -r rclone:nextcloud:TEST backup /home/frank/Bilder/21.04/
    enter password for repository:
    password is correct
    found 2 old cache directories in /home/frank/.cache/restic, pass --cleanup-cache to remove them
    

    Hier sieht man einen Aufruf um aus dem Ordner 21.04 die Bilder in Nextcloud zu sichern.Das Passwort wird abgefragt, und wenn korrekt wird gesichert. Im Beispiel tauchen noch alte Cache Dateien auf, hiermit bekommt man die weg.

    restic -r rclone:nextcloud:TEST backup /home/frank/Bilder/21.04/ --cleanup-cache
    

    Cronjob anlegen

    Schnell ein Script für den Cron schreiben. Das Script heißt backup.sh

    #!/bin/bash
    # Script um mit Restic & Rclone Daten automatisiert zu sichern!
    
    # PW hinterlegen
    export RESTIC_PASSWORD=12345678
    
    #Was soll gesichert werden?
    backup_pfad=/media/NAS/
    
    #Programm Start
    restic -r rclone:nextcloud:Daten backup $backup_pfad
    

    Einen Cronjob anlegen

    crontab -e
    

    Folgendes eingeben

    # m h  dom mon dow   command
    00 20 * * * /home/frank/backup.sh
    

    Speichern - Fertig! 😇

    Jeden Tag um 20:00 Uhr werden die Daten entsprechend gesichert!

  • 0 Stimmen
    1 Beiträge
    55 Aufrufe
    Niemand hat geantwortet
  • Restic - Migrate

    Restic
    1
    0 Stimmen
    1 Beiträge
    154 Aufrufe
    Niemand hat geantwortet
  • Linux Mint Cinnamon 20.2 "Uma" released

    Linux
    3
    0 Stimmen
    3 Beiträge
    234 Aufrufe
    FrankMF

    Was noch gestört hatte, war der Scrollbalken im FF. Der war zu schmal, konnte man schlecht erwischen.

    8e403120-11e2-413f-a479-0ebc3002e6d4-grafik.png

    Quelle: https://forums.linuxmint.com/viewtopic.php?f=47&t=330849&sid=1c7c71850931d5c34d8a0dd41ff57679

  • Restic v0.11.0 released

    Restic
    1
    0 Stimmen
    1 Beiträge
    184 Aufrufe
    Niemand hat geantwortet
  • Nextcloud - Upgrade auf 19.0.1

    Nextcloud
    1
    0 Stimmen
    1 Beiträge
    212 Aufrufe
    Niemand hat geantwortet
  • 1 Stimmen
    1 Beiträge
    199 Aufrufe
    Niemand hat geantwortet
  • Restic - forget --keep-last 3 --prune

    Restic
    2
    0 Stimmen
    2 Beiträge
    572 Aufrufe
    FrankMF

    Ich habe mich damit noch ein wenig beschäftigt, die letzten drei zu behalten, ist nicht so optimal. Da es viele Optionen bei dem Befehl gibt, hier ein Ausschnitt

    Flags: -l, --keep-last n keep the last n snapshots -H, --keep-hourly n keep the last n hourly snapshots -d, --keep-daily n keep the last n daily snapshots -w, --keep-weekly n keep the last n weekly snapshots -m, --keep-monthly n keep the last n monthly snapshots -y, --keep-yearly n keep the last n yearly snapshots

    habe ich das ein wenig so angepasst, das ich denke es passt für mich.

    restic --password-file /root/passwd -r /media/NAS_neu/Restic/Home/ forget --keep-last 3 --keep-monthly 3 --prune

    Damit behalte ich auch die jeweils eines pro Monat. Und die letzten drei. Das sieht dann so aus.

    root@debian:~# ./backup2.sh repository 2f3f6147 opened successfully, password is correct Files: 38 new, 100 changed, 13268 unmodified Dirs: 0 new, 1 changed, 0 unmodified Added to the repo: 10.166 GiB processed 13406 files, 50.324 GiB in 3:24 snapshot 849f614c saved repository 2f3f6147 opened successfully, password is correct Applying Policy: keep the last 3 snapshots, 3 monthly snapshots snapshots for (host [debian], paths [/home/frank]): keep 5 snapshots: ID Time Host Tags Reasons Paths ------------------------------------------------------------------------------------ a7251cfd 2019-11-28 17:00:01 debian monthly snapshot /home/frank 283d4027 2019-12-31 17:00:01 debian monthly snapshot /home/frank ae2b96ec 2020-01-01 21:47:46 debian last snapshot /home/frank 079e00a6 2020-01-02 17:00:01 debian last snapshot /home/frank 849f614c 2020-01-03 21:08:45 debian last snapshot /home/frank monthly snapshot ------------------------------------------------------------------------------------ 5 snapshots remove 26 snapshots: ID Time Host Tags Paths ------------------------------------------------------------------ 896f16c2 2019-11-07 22:23:40 debian /home/frank b21bcf6d 2019-11-11 17:00:01 debian /home/frank f89248fb 2019-11-12 17:00:01 debian /home/frank 123ab546 2019-11-13 17:00:01 debian /home/frank b82d87d0 2019-11-18 17:00:01 debian /home/frank 040b0ab7 2019-11-19 17:00:01 debian /home/frank 7221d8ef 2019-11-20 17:00:01 debian /home/frank 84132a25 2019-11-21 17:00:01 debian /home/frank b558a52c 2019-11-25 17:00:01 debian /home/frank e5cc0c3e 2019-12-02 17:00:01 debian /home/frank 22423fa5 2019-12-03 17:00:01 debian /home/frank 39df1ab9 2019-12-04 17:00:01 debian /home/frank 98843457 2019-12-05 17:00:01 debian /home/frank b0cdd4b6 2019-12-09 17:00:01 debian /home/frank 828414f9 2019-12-10 17:00:01 debian /home/frank e34a27c3 2019-12-11 17:00:01 debian /home/frank 6e488c3b 2019-12-12 17:00:01 debian /home/frank 17898403 2019-12-16 17:00:01 debian /home/frank 1973305a 2019-12-17 17:00:01 debian /home/frank 9553bedd 2019-12-18 17:00:01 debian /home/frank fedf749d 2019-12-19 17:00:01 debian /home/frank 8e7cb876 2019-12-23 17:00:01 debian /home/frank 0bd0d102 2019-12-25 17:00:01 debian /home/frank 13d348b0 2019-12-26 17:00:01 debian /home/frank c7d960aa 2019-12-30 17:00:01 debian /home/frank f6ea9118 2020-01-01 17:00:01 debian /home/frank ------------------------------------------------------------------ 26 snapshots 26 snapshots have been removed, running prune counting files in repo building new index for repo [0:35] 100.00% 7806 / 7806 packs repository contains 7806 packs (46537 blobs) with 41.110 GiB processed 46537 blobs: 0 duplicate blobs, 0 B duplicate load all snapshots find data that is still in use for 5 snapshots [0:01] 100.00% 5 / 5 snapshots found 32654 of 46537 data blobs still in use, removing 13883 blobs will remove 0 invalid files will delete 715 packs and rewrite 752 packs, this frees 5.027 GiB [2:28] 100.00% 752 / 752 packs rewritten counting files in repo [0:01] 100.00% 6571 / 6571 packs finding old index files saved new indexes as [d137b425 f7caee99 a6e9711a] remove 35 old index files [1:13] 100.00% 1467 / 1467 packs deleted done using temporary cache in /tmp/restic-check-cache-916655151 repository 2f3f6147 opened successfully, password is correct created new cache in /tmp/restic-check-cache-916655151 create exclusive lock for repository load indexes check all packs check snapshots, trees and blobs read all data [7:47] 100.00% 6571 / 6571 items duration: 7:47 no errors were found root@debian:~#

    Am Ende seht ihr noch, wie Restic alle Files testet. Mein Script sieht jetzt so aus.

    #!/bin/bash # Script um mit Restic Daten automatisiert zu sichern! # Dient zum Sichern der Homepartition auf dem ROCKPro64 NAS! # Was soll gesichert werden? backup_pfad=/home/frank # Programm Start restic --password-file /root/passwd -r /media/NAS_neu/Restic/Home/ backup $backup_pfad --exclude-file=excludes.txt restic --password-file /root/passwd -r /media/NAS_neu/Restic/Home/ forget --keep-last 3 --keep-monthly 3 --prune # Testen restic --password-file /root/passwd -r /media/NAS_neu/Restic/Home/ check --read-data

    Das dann schön mit einem Cronjob laufen lassen und die Datensicherung ist erledigt 😉

  • Restic - Update

    Restic
    1
    0 Stimmen
    1 Beiträge
    391 Aufrufe
    Niemand hat geantwortet