ReactPHP auf einem ROCKPro64 testen
-
Meine Inspiration für diesen Beitrag
https://www.youtube.com/watch?time_continue=2&v=XoDBtz5P8q8&feature=emb_logoHardware
ROCKPro64
Betriebssystem
Debian Buster 10 Minimal von Kamil
root@rockpro64:/var/www/html# uname -a
Linux rockpro64 4.4.197-1236-rockchip-ayufan-g30faab37e339 #1 SMP Tue Oct 22 11:35:10 UTC 2019 aarch64 GNU/Linux
Installation PHP
https://forum.frank-mankel.org/topic/730/php-installation
Installation NGINX (Mainline Version)
apt install curl gnupg2 ca-certificates lsb-release
echo "deb http://nginx.org/packages/mainline/debian `lsb_release -cs` nginx"     | sudo tee /etc/apt/sources.list.d/nginx.list
curl -fsSL https://nginx.org/keys/nginx_signing.key | sudo apt-key add -
sudo apt-key fingerprint ABF5BD827BD9BF62
apt update && apt install nginx
Testen
root@rockpro64:/var/www/html# nginx -v
nginx version: nginx/1.14.2
Jetzt wird es wieder interessant.
root@rockpro64:/var/www/html# ls -lha /usr/share/nginx/html/
total 12K
drwxr-xr-x 2 root root 4.0K Dec 31 09:14 .
drwxr-xr-x 4 root root 4.0K Dec 31 09:10 ..
-rw-r--r-- 1 root root  646 Dec 31 09:14 index.php
Aber, dieser Ordner zieht nicht

Dieser Ordner zieht.
root@rockpro64:/var/www/html# ls
index.php
Immer wieder interessant, wie das je nach Plattform sich ändert. Der Pfad wird bei dieser Installation hier festgelegt.
/etc/nginx/sites-enabled/defaultWir halten fest, dieser wird gebraucht.
/var/www/htmlFür unseren Testserver sollte das erst mal egal sein.
React Voraussetzungen
Composer
Für reactPHP brauchen wir als erstes den Composer Was ist das? Composer ist ein Paketmanager für PHP, ok nicht ganz korrekt.
Composer is not a package manager in the same sense as Yum or Apt are. Yes, it deals with "packages" or libraries, but it manages them on a per-project basis, installing them in a directory (e.g. vendor) inside your project. By default it does not install anything globally. Thus, it is a dependency manager. It does however support a "global" project for convenience via the global command.
Composer Installation
apt install curl php-cli php-mbstring git unzip
curl -sS https://getcomposer.org/installer -o composer-setup.php
Aktuellen Hash von der Downloadseite besorgen!
HASH=48e3236262b34d30969dca3c37281b3b4bbe3221bda826ac6a9a62d6444cdb0dcd0615698a5cbe587c3f0fe57a54d8f5Hash checken!
php -r "if (hash_file('SHA384', 'composer-setup.php') === '$HASH') { echo 'Installer verified'; } else { echo 'Installer corrupt'; unlink('composer-setup.php'); } echo PHP_EOL;"Ausgabe
Installer verifiedComposer global installieren!!!
php composer-setup.php --install-dir=/usr/local/bin --filename=composerAusgabe:
All settings correct for using Composer
Downloading...

Composer (version 1.9.1) successfully installed to: /usr/local/bin/composer
Use it: php /usr/local/bin/composer
Ok, testen
root@rockpro64:~# composer
Do not run Composer as root/super user! See https://getcomposer.org/root for details
   ______
  / ____/___  ____ ___  ____  ____  ________  _____
 / /   / __ \/ __ `__ \/ __ \/ __ \/ ___/ _ \/ ___/
/ /___/ /_/ / / / / / / /_/ / /_/ (__  )  __/ /
\____/\____/_/ /_/ /_/ .___/\____/____/\___/_/
                    /_/
Composer version 1.9.1 2019-11-01 17:20:17

Usage:
  command [options] [arguments]

Options:
  -h, --help                     Display this help message
  -q, --quiet                    Do not output any message
  -V, --version                  Display this application version
      --ansi                     Force ANSI output
      --no-ansi                  Disable ANSI output
  -n, --no-interaction           Do not ask any interactive question
      --profile                  Display timing and memory usage information
      --no-plugins               Whether to disable plugins.
  -d, --working-dir=WORKING-DIR  If specified, use the given directory as working directory.
      --no-cache                 Prevent use of the cache
  -v|vv|vvv, --verbose           Increase the verbosity of messages: 1 for normal output, 2 for more verbose output and 3 for debug
[...gekürzt...]
ReactPHP
Dann mal das erste ReactPHP Testprojekt installieren
 Laut der ReactPHP Webseite brauchen wir für einen HTTP Server, das Paket http, das man wie folgt installiert.
Wir wechseln in unser Testverzeichnis /var/www/html
composer require react/http:^0.8.5Ausgabe:
root@rockpro64:/var/www/html# composer require react/http:^0.8.5
Do not run Composer as root/super user! See https://getcomposer.org/root for details

./composer.json has been created
Loading composer repositories with package information
Updating dependencies (including require-dev)
Package operations: 12 installs, 0 updates, 0 removals
  - Installing react/promise (v2.7.1): Downloading (100%)
  - Installing evenement/evenement (v3.0.1): Downloading (100%)
  - Installing react/event-loop (v1.1.0): Downloading (100%)
  - Installing react/stream (v1.1.0): Downloading (100%)
  - Installing react/promise-stream (v1.2.0): Downloading (100%)
  - Installing react/promise-timer (v1.5.1): Downloading (100%)
  - Installing react/cache (v1.0.0): Downloading (100%)
  - Installing react/dns (v1.2.0): Downloading (100%)
  - Installing react/socket (v1.3.0): Downloading (100%)
  - Installing psr/http-message (1.0.1): Downloading (100%)
  - Installing ringcentral/psr7 (1.2.2): Downloading (100%)
  - Installing react/http (v0.8.5): Downloading (100%)
react/event-loop suggests installing ext-event (~1.0 for ExtEventLoop)
react/event-loop suggests installing ext-uv (* for ExtUvLoop)
Writing lock file
Generating autoload files
Ja, ich weiß, das macht man nicht als ROOT

chown -R www-data:www-data /var/www/htmlWir bearbeiten das File index.php, so mal als schnellen Test. Dazu nehmen wir vom Christian Lück, das Hello World Beispiel, ein Klassiker

<?php
use Psr\Http\Message\ServerRequestInterface;
use React\EventLoop\Factory;
use React\Http\Response;
use React\Http\Server;
require __DIR__ . '/../vendor/autoload.php';
$loop = Factory::create();
$server = new Server(function (ServerRequestInterface $request) {
    return new Response(
        200,
        array(
            'Content-Type' => 'text/plain'
        ),
        "Hello world\n"
    );
});
$socket = new \React\Socket\Server(isset($argv[1]) ? $argv[1] : '0.0.0.0:0', $loop);
$server->listen($socket);
echo 'Listening on ' . str_replace('tcp:', 'http:', $socket->getAddress()) . PHP_EOL;
$loop->run();
Quelle: https://github.com/reactphp/http/blob/master/examples/01-hello-world.php
Diese Dateien müssen gestartet werden, also so wie das
./nodebb startGut zu wissen. Christian macht das im Video mit
php index.phpErster Versuch
root@rockpro64:/var/www/html# php index.php
PHP Warning:  require(/var/www/html/../vendor/autoload.php): failed to open stream: No such file or directory in /var/www/html/index.php on line 6
PHP Fatal error:  require(): Failed opening required '/var/www/html/../vendor/autoload.php' (include_path='.:/usr/share/php') in /var/www/html/index.php on line 6
Das schaut nach falschem Pfad aus.
/var/www/html/../vendor/autoload.phpDann ändere ich den mal ab
require __DIR__ . '/vendor/autoload.php';Nächster Versuch
root@rockpro64:/var/www/html# php index.php
Listening on http://0.0.0.0:33100
Ok, der Server läuft, aber nur lokal auf meinem ROCKPro64, etwas blöd zum Testen. Grübel, wir ändern mal eben die Zeile.
$socket = new \React\Socket\Server(isset($argv[1]) ? $argv[1] : '0.0.0.0:0', $loop);in
$socket = new \React\Socket\Server(isset($argv[1]) ? $argv[1] : '192.168.3.7:0', $loop);Ich weiß, nicht so schön. Wenn die IP-Adresse des RockPro64 sich ändert usw. Aber für einen kurzen Test muss das mal eben reichen

Nächster Versuch
root@rockpro64:/var/www/html# php index.php
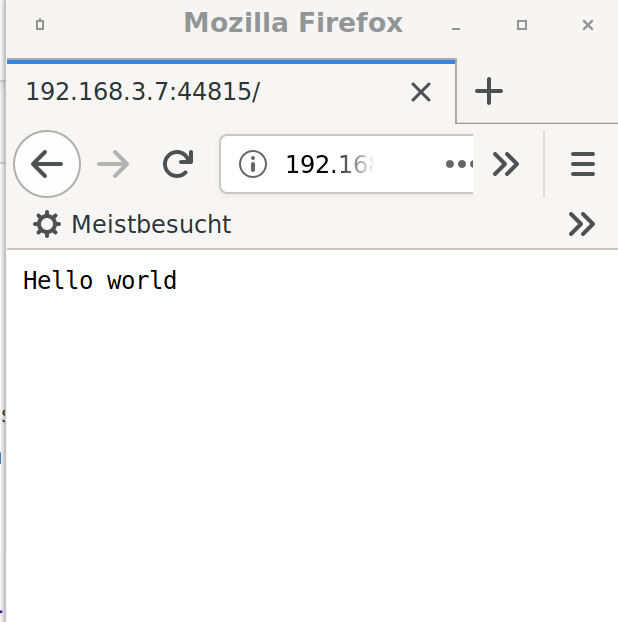
Listening on http://192.168.3.7:44815
Gut, damit kann man arbeiten.

