Skip to content

ReactPHP auf einem ROCKPro64 testen

Linux
  • Meine Inspiration für diesen Beitrag
    https://www.youtube.com/watch?time_continue=2&v=XoDBtz5P8q8&feature=emb_logo

    Hardware

    ROCKPro64

    Betriebssystem

    Debian Buster 10 Minimal von Kamil

    root@rockpro64:/var/www/html# uname -a
    Linux rockpro64 4.4.197-1236-rockchip-ayufan-g30faab37e339 #1 SMP Tue Oct 22 11:35:10 UTC 2019 aarch64 GNU/Linux
    

    Installation PHP

    https://forum.frank-mankel.org/topic/730/php-installation

    Installation NGINX (Mainline Version)

    apt install curl gnupg2 ca-certificates lsb-release
    echo "deb http://nginx.org/packages/mainline/debian `lsb_release -cs` nginx"     | sudo tee /etc/apt/sources.list.d/nginx.list
    curl -fsSL https://nginx.org/keys/nginx_signing.key | sudo apt-key add -
    sudo apt-key fingerprint ABF5BD827BD9BF62
    apt update && apt install nginx
    

    Testen

    root@rockpro64:/var/www/html# nginx -v
    nginx version: nginx/1.14.2
    

    Jetzt wird es wieder interessant.

    root@rockpro64:/var/www/html# ls -lha /usr/share/nginx/html/
    total 12K
    drwxr-xr-x 2 root root 4.0K Dec 31 09:14 .
    drwxr-xr-x 4 root root 4.0K Dec 31 09:10 ..
    -rw-r--r-- 1 root root  646 Dec 31 09:14 index.php
    

    Aber, dieser Ordner zieht nicht 😞

    Dieser Ordner zieht.

    root@rockpro64:/var/www/html# ls
    index.php
    

    Immer wieder interessant, wie das je nach Plattform sich ändert. Der Pfad wird bei dieser Installation hier festgelegt.

    /etc/nginx/sites-enabled/default
    

    Wir halten fest, dieser wird gebraucht.

    /var/www/html
    

    Für unseren Testserver sollte das erst mal egal sein.

    React Voraussetzungen

    Composer

    Für reactPHP brauchen wir als erstes den Composer Was ist das? Composer ist ein Paketmanager für PHP, ok nicht ganz korrekt.

    Composer is not a package manager in the same sense as Yum or Apt are. Yes, it deals with "packages" or libraries, but it manages them on a per-project basis, installing them in a directory (e.g. vendor) inside your project. By default it does not install anything globally. Thus, it is a dependency manager. It does however support a "global" project for convenience via the global command.

    Composer Installation

    apt install curl php-cli php-mbstring git unzip
    curl -sS https://getcomposer.org/installer -o composer-setup.php
    

    Aktuellen Hash von der Downloadseite besorgen!

    HASH=48e3236262b34d30969dca3c37281b3b4bbe3221bda826ac6a9a62d6444cdb0dcd0615698a5cbe587c3f0fe57a54d8f5
    

    Hash checken!

    php -r "if (hash_file('SHA384', 'composer-setup.php') === '$HASH') { echo 'Installer verified'; } else { echo 'Installer corrupt'; unlink('composer-setup.php'); } echo PHP_EOL;"
    

    Ausgabe

    Installer verified
    

    Composer global installieren!!!

    php composer-setup.php --install-dir=/usr/local/bin --filename=composer
    

    Ausgabe:

    All settings correct for using Composer
    Downloading...
    
    Composer (version 1.9.1) successfully installed to: /usr/local/bin/composer
    Use it: php /usr/local/bin/composer
    

    Ok, testen

    root@rockpro64:~# composer
    Do not run Composer as root/super user! See https://getcomposer.org/root for details
       ______
      / ____/___  ____ ___  ____  ____  ________  _____
     / /   / __ \/ __ `__ \/ __ \/ __ \/ ___/ _ \/ ___/
    / /___/ /_/ / / / / / / /_/ / /_/ (__  )  __/ /
    \____/\____/_/ /_/ /_/ .___/\____/____/\___/_/
                        /_/
    Composer version 1.9.1 2019-11-01 17:20:17
    
    Usage:
      command [options] [arguments]
    
    Options:
      -h, --help                     Display this help message
      -q, --quiet                    Do not output any message
      -V, --version                  Display this application version
          --ansi                     Force ANSI output
          --no-ansi                  Disable ANSI output
      -n, --no-interaction           Do not ask any interactive question
          --profile                  Display timing and memory usage information
          --no-plugins               Whether to disable plugins.
      -d, --working-dir=WORKING-DIR  If specified, use the given directory as working directory.
          --no-cache                 Prevent use of the cache
      -v|vv|vvv, --verbose           Increase the verbosity of messages: 1 for normal output, 2 for more verbose output and 3 for debug
    [...gekürzt...]
    

    ReactPHP

    Dann mal das erste ReactPHP Testprojekt installieren 🙂 Laut der ReactPHP Webseite brauchen wir für einen HTTP Server, das Paket http, das man wie folgt installiert.

    Wir wechseln in unser Testverzeichnis /var/www/html

    composer require react/http:^0.8.5
    

    Ausgabe:

    root@rockpro64:/var/www/html# composer require react/http:^0.8.5
    Do not run Composer as root/super user! See https://getcomposer.org/root for details
    
    ./composer.json has been created
    Loading composer repositories with package information
    Updating dependencies (including require-dev)
    Package operations: 12 installs, 0 updates, 0 removals
      - Installing react/promise (v2.7.1): Downloading (100%)         
      - Installing evenement/evenement (v3.0.1): Downloading (100%)         
      - Installing react/event-loop (v1.1.0): Downloading (100%)         
      - Installing react/stream (v1.1.0): Downloading (100%)         
      - Installing react/promise-stream (v1.2.0): Downloading (100%)         
      - Installing react/promise-timer (v1.5.1): Downloading (100%)         
      - Installing react/cache (v1.0.0): Downloading (100%)         
      - Installing react/dns (v1.2.0): Downloading (100%)         
      - Installing react/socket (v1.3.0): Downloading (100%)         
      - Installing psr/http-message (1.0.1): Downloading (100%)         
      - Installing ringcentral/psr7 (1.2.2): Downloading (100%)         
      - Installing react/http (v0.8.5): Downloading (100%)         
    react/event-loop suggests installing ext-event (~1.0 for ExtEventLoop)
    react/event-loop suggests installing ext-uv (* for ExtUvLoop)
    Writing lock file
    Generating autoload files
    

    Ja, ich weiß, das macht man nicht als ROOT 😊

    chown -R www-data:www-data /var/www/html
    

    Wir bearbeiten das File index.php, so mal als schnellen Test. Dazu nehmen wir vom Christian Lück, das Hello World Beispiel, ein Klassiker 🙂

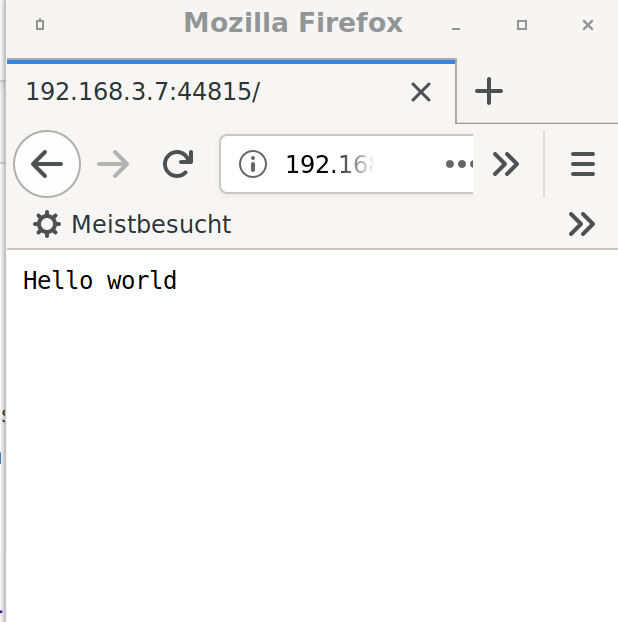
    <?php
    use Psr\Http\Message\ServerRequestInterface;
    use React\EventLoop\Factory;
    use React\Http\Response;
    use React\Http\Server;
    require __DIR__ . '/../vendor/autoload.php';
    $loop = Factory::create();
    $server = new Server(function (ServerRequestInterface $request) {
        return new Response(
            200,
            array(
                'Content-Type' => 'text/plain'
            ),
            "Hello world\n"
        );
    });
    $socket = new \React\Socket\Server(isset($argv[1]) ? $argv[1] : '0.0.0.0:0', $loop);
    $server->listen($socket);
    echo 'Listening on ' . str_replace('tcp:', 'http:', $socket->getAddress()) . PHP_EOL;
    $loop->run();
    

    Quelle: https://github.com/reactphp/http/blob/master/examples/01-hello-world.php

    Diese Dateien müssen gestartet werden, also so wie das

    ./nodebb start
    

    Gut zu wissen. Christian macht das im Video mit

    php index.php
    

    Erster Versuch

    root@rockpro64:/var/www/html# php index.php 
    PHP Warning:  require(/var/www/html/../vendor/autoload.php): failed to open stream: No such file or directory in /var/www/html/index.php on line 6
    PHP Fatal error:  require(): Failed opening required '/var/www/html/../vendor/autoload.php' (include_path='.:/usr/share/php') in /var/www/html/index.php on line 6
    

    Das schaut nach falschem Pfad aus.

    /var/www/html/../vendor/autoload.php
    

    Dann ändere ich den mal ab

    require __DIR__ . '/vendor/autoload.php';
    

    Nächster Versuch

    root@rockpro64:/var/www/html# php index.php 
    Listening on http://0.0.0.0:33100
    

    Ok, der Server läuft, aber nur lokal auf meinem ROCKPro64, etwas blöd zum Testen. Grübel, wir ändern mal eben die Zeile.

     $socket = new \React\Socket\Server(isset($argv[1]) ? $argv[1] : '0.0.0.0:0', $loop);
    

    in

    $socket = new \React\Socket\Server(isset($argv[1]) ? $argv[1] : '192.168.3.7:0', $loop);
    

    Ich weiß, nicht so schön. Wenn die IP-Adresse des RockPro64 sich ändert usw. Aber für einen kurzen Test muss das mal eben reichen 😁

    Nächster Versuch

    root@rockpro64:/var/www/html# php index.php 
    Listening on http://192.168.3.7:44815
    

    Gut, damit kann man arbeiten.

    b08824fe-d87b-4be2-a89c-66d647b9d58d-image.png

  • 0 Stimmen
    6 Beiträge
    2k Aufrufe
    I

    Vielen lieben Dank Nico!
    Jetzt läuft vaultwarden.

  • 0 Stimmen
    4 Beiträge
    284 Aufrufe
    FrankMF

    Es geht weiter, der erste ☕ und ich bin mit der Lösung nicht so richtig zufrieden, also suchen.

    Als erstes habe ich heute Morgen ein frisches SD-Karten Image mit Docker von FreindlyWrt genommen und auf meinem Test NanoPi R5S installiert. Dort mal die Config angeschaut um zu sehen, ob der Eintrag standardmäßig gesetzt ist. Doch dort taucht dann einmal eine ganz ander Config auf 🙄

    # The following settings require a restart of docker to take full effect, A reload will only have partial or no effect: # bip # blocked_interfaces # extra_iptables_args # device config globals 'globals' # option alt_config_file '/etc/docker/daemon.json' option enable '1' option data_root '/mnt/nvme_part2/docker' option log_level 'warn' option iptables '1' #list hosts 'unix:///var/run/docker.sock' # option bip '172.18.0.1/24' # option fixed_cidr '172.17.0.0/16' # option fixed_cidr_v6 'fc00:1::/80' # option ipv6 '1' # option ip '::ffff:0.0.0.0' # list dns '172.17.0.1' # list registry_mirrors 'https://<my-docker-mirror-host>' list registry_mirrors 'https://hub.docker.com' option remote_endpoint '0' # option bridge 'br-container' # Docker ignores fw3 rules and by default all external source IPs are allowed to connect to the Docker host. # See https://docs.docker.com/network/iptables/ for more details. # firewall config changes are only additive i.e firewall will need to be restarted first to clear old changes, # then docker restarted to load in new changes. config firewall 'firewall' option device 'docker0' list blocked_interfaces 'wan' option extra_iptables_args '--match conntrack ! --ctstate RELATED,ESTABLISHED' # allow outbound connections

    Das interessiert uns jetzt

    list blocked_interfaces 'wan' option extra_iptables_args '--match conntrack ! --ctstate RELATED,ESTABLISHED' # allow outbound connections

    Wenn ich das jetzt alles richtig verstehe, muss WAN geblockt sein, weil sonst der Docker Host offen im Netz steht (Hierbei bin ich mir nicht 100% sicher)
    Die zweite Zeile ist eine iptables Regel, die es den Containern dann ermöglicht das Internet zu erreichen.

    Das habe ich jetzt so eingestellt und getestet.

    root@b9ffae24913a:/# ping 1.1.1.1 PING 1.1.1.1 (1.1.1.1): 56 data bytes 64 bytes from 1.1.1.1: icmp_seq=0 ttl=57 time=17.151 ms 64 bytes from 1.1.1.1: icmp_seq=1 ttl=57 time=16.553 ms 64 bytes from 1.1.1.1: icmp_seq=2 ttl=57 time=20.630 ms 64 bytes from 1.1.1.1: icmp_seq=3 ttl=57 time=13.948 ms ^C--- 1.1.1.1 ping statistics --- 4 packets transmitted, 4 packets received, 0% packet loss round-trip min/avg/max/stddev = 13.948/17.071/20.630/2.382 ms root@b9ffae24913a:/# ping google.de PING google.de (142.250.185.195): 56 data bytes 64 bytes from 142.250.185.195: icmp_seq=0 ttl=58 time=23.797 ms 64 bytes from 142.250.185.195: icmp_seq=1 ttl=58 time=16.953 ms 64 bytes from 142.250.185.195: icmp_seq=2 ttl=58 time=19.441 ms ^C--- google.de ping statistics --- 3 packets transmitted, 3 packets received, 0% packet loss round-trip min/avg/max/stddev = 16.953/20.064/23.797/2.829 ms

    Ich hoffe mal das ich diese Thema jetzt zu den Akten legen kann.

    Wenn was falsch ist, bitte hier kommentieren, damit ich das ändern kann.

  • 0 Stimmen
    2 Beiträge
    369 Aufrufe
    FrankMF

    Ja, ich kann bestätigen, es funktioniert und startet einwandfrei!

  • Kopia 0.6.x released

    Kopia
    3
    0 Stimmen
    3 Beiträge
    229 Aufrufe
    FrankMF

    0.6.3 released

    c142598 Disable blob deletion in 0.6 unless KOPIA_ENABLE_BLOB_DELETION is set to true (#552)

    Aufpassen, es gibt da wohl ein Problem, was zu Datenverlust führen könnte!

  • 0 Stimmen
    17 Beiträge
    1k Aufrufe
    FrankMF

    Durch diesen Beitrag ist mir mal wieder eingefallen, das wir das erneut testen könnten 😉

    Also die aktuellen Daten von Debian gezogen. Das Image gebaut, könnt ihr alles hier im ersten Beitrag nachlesen. Da die eingebaute Netzwerkschnittstelle nicht erkannt wurde, habe ich mal wieder den USB-to-LAN Adapter eingesetzt.

    Bus 005 Device 002: ID 0b95:1790 ASIX Electronics Corp. AX88179 Gigabit Ethernet

    Die Installation wollte ich auf einem NVMe Riegel installieren.

    Die Debian Installation durchgezogen und nach erfolgreicher Installation neugestartet. Und siehe da, ohne das man alles möglich ändern musste, bootete die NVMe SSD 🤓

    Eingesetzter uboot -> 2020.01-ayufan-2013......

    Die nicht erkannte LAN-Schnittstelle müsste an nicht freien Treibern liegen, hatte ich da irgendwo kurz gelesen. Beim Schreiben dieses Satzes kam die Nacht und ich konnte noch mal drüber schlafen. Heute Morgen, beim ersten Kaffee, dann noch mal logischer an die Sache ran gegangen.

    Wir schauen uns mal die wichtigsten Dinge an.

    root@debian:~# ip a 1: lo: <LOOPBACK,UP,LOWER_UP> mtu 65536 qdisc noqueue state UNKNOWN group default qlen 1000 link/loopback 00:00:00:00:00:00 brd 00:00:00:00:00:00 inet 127.0.0.1/8 scope host lo valid_lft forever preferred_lft forever inet6 ::1/128 scope host valid_lft forever preferred_lft forever 2: eth0: <BROADCAST,MULTICAST> mtu 1500 qdisc noop state DOWN group default qlen 1000 link/ether 62:03:b0:d6:dc:b3 brd ff:ff:ff:ff:ff:ff 3: enx000acd26e2c8: <BROADCAST,MULTICAST,UP,LOWER_UP> mtu 1500 qdisc pfifo_fast state UP group default qlen 1000 link/ether 00:0a:cd:26:e2:c8 brd ff:ff:ff:ff:ff:ff inet 192.168.3.208/24 brd 192.168.3.255 scope global dynamic enx000acd26e2c8 valid_lft 42567sec preferred_lft 42567sec inet6 fd8a:6ff:2880:0:20a:cdff:fe26:e2c8/64 scope global dynamic mngtmpaddr valid_lft forever preferred_lft forever inet6 2a02:908:1260:13bc:20a:xxxx:xxxx:xxxx/64 scope global dynamic mngtmpaddr valid_lft 5426sec preferred_lft 1826sec inet6 fe80::20a:cdff:fe26:e2c8/64 scope link valid_lft forever preferred_lft forever

    Ok, er zeigt mir die Schnittstelle eth0 ja an, dann kann es an fehlenden Treibern ja nicht liegen. Lässt dann auf eine fehlerhafte Konfiguration schließen. Nächster Halt wäre dann /etc/network/interfaces

    Das trägt Debian ein

    # This file describes the network interfaces available on your system # and how to activate them. For more information, see interfaces(5). source /etc/network/interfaces.d/* # The loopback network interface auto lo iface lo inet loopback # The primary network interface allow-hotplug enx000acd26e2c8 iface enx000acd26e2c8 inet dhcp # This is an autoconfigured IPv6 interface iface enx000acd26e2c8 inet6 auto

    Gut, bei der Installation hat Debian ja nur die zusätzliche Netzwerkschnittstelle erkannt, folgerichtig ist die auch als primäre Schnittstelle eingetragen. Dann ändern wir das mal...

    # This file describes the network interfaces available on your system # and how to activate them. For more information, see interfaces(5). source /etc/network/interfaces.d/* # The loopback network interface auto lo iface lo inet loopback # The primary network interface #allow-hotplug enx000acd26e2c8 allow-hotplug eth0 #iface enx000acd26e2c8 inet dhcp iface eth0 inet dhcp # This is an autoconfigured IPv6 interface #iface enx000acd26e2c8 inet6 auto iface eth0 inet6 auto

    Danach einmal alles neu starten bitte 😉

    systemctl status networking

    Da fehlte mir aber jetzt die IPv4 Adresse, so das ich einmal komplett neugestartet habe. Der Ordnung halber, so hätte man die IPv4 Adresse bekommen.

    dhclient eth0

    Nachdem Neustart kam dann das

    root@debian:/etc/network# ip a 1: lo: <LOOPBACK,UP,LOWER_UP> mtu 65536 qdisc noqueue state UNKNOWN group default qlen 1000 link/loopback 00:00:00:00:00:00 brd 00:00:00:00:00:00 inet 127.0.0.1/8 scope host lo valid_lft forever preferred_lft forever inet6 ::1/128 scope host valid_lft forever preferred_lft forever 2: eth0: <BROADCAST,MULTICAST,UP,LOWER_UP> mtu 1500 qdisc mq state UP group default qlen 1000 link/ether 62:03:b0:d6:dc:b3 brd ff:ff:ff:ff:ff:ff inet 192.168.3.172/24 brd 192.168.3.255 scope global dynamic eth0 valid_lft 42452sec preferred_lft 42452sec inet6 fd8a:6ff:2880:0:6003:b0ff:fed6:dcb3/64 scope global dynamic mngtmpaddr valid_lft forever preferred_lft forever inet6 2a02:908:1260:13bc:6003:xxxx:xxxx:xxxx/64 scope global dynamic mngtmpaddr valid_lft 5667sec preferred_lft 2067sec inet6 fe80::6003:b0ff:fed6:dcb3/64 scope link valid_lft forever preferred_lft forever 3: enx000acd26e2c8: <BROADCAST,MULTICAST> mtu 1500 qdisc noop state DOWN group default qlen 1000 link/ether 00:0a:cd:26:e2:c8 brd ff:ff:ff:ff:ff:ff

    Fertig, eth0 läuft. Nun kann man den zusätzlichen Adapter entfernen oder halt konfigurieren, wenn man ihn braucht.

    Warum der Debian Installer die eth0 nicht erkennt verstehe ich nicht, aber vielleicht wird das irgendwann auch noch gefixt. Jetzt habe ich erst mal einen Workaround um eine Installation auf den ROCKPro64 zu bekommen.

  • DNS testen

    Linux
    1
    0 Stimmen
    1 Beiträge
    94 Aufrufe
    Niemand hat geantwortet
  • Logger

    Linux
    1
    0 Stimmen
    1 Beiträge
    392 Aufrufe
    Niemand hat geantwortet
  • NodeBB - Upgrade auf v1.9.0

    NodeBB
    2
    0 Stimmen
    2 Beiträge
    793 Aufrufe
    FrankMF

    Da oben fehlt ein Schritt.

    cd nodebb (or path to where nodebb is installed) ./nodebb stop git fetch git checkout v1.12.x git merge origin/v1.12.x ./nodebb upgrade

    Beim nächsten Upgrade testen.