Unterstützung Lüfter
ROCKPro64
5
Beiträge
1
Kommentatoren
1.7k
Aufrufe
-
schrieb am 30. Juli 2018, 14:55 zuletzt editiert von FrankM 8. März 2018, 19:21
Kamil hat die Funktion des Lüfters als Kernelupdate eingebaut.
rock64@rockpro64v2_1:~$ uname -a
Linux rockpro64v2_1 4.4.132-1077-rockchip-ayufan-gbaf35a9343cb #1 SMP Mon Jul 30 14:06:57 UTC 2018 aarch64 aarch64 aarch64 GNU/Linux
Updaten
sudo apt-get update
apt-cache search linux-image
Dann den Kernel aussuchen, in diesem Fall
sudo apt-get install linux-image-4.4.132-1077-rockchip-ayufan-gbaf35a9343cbEinmal neustarten
sudo shutdown -r nowFertig!
-
schrieb am 10. Aug. 2018, 13:47 zuletzt editiert von
Lüfter angekommen
")
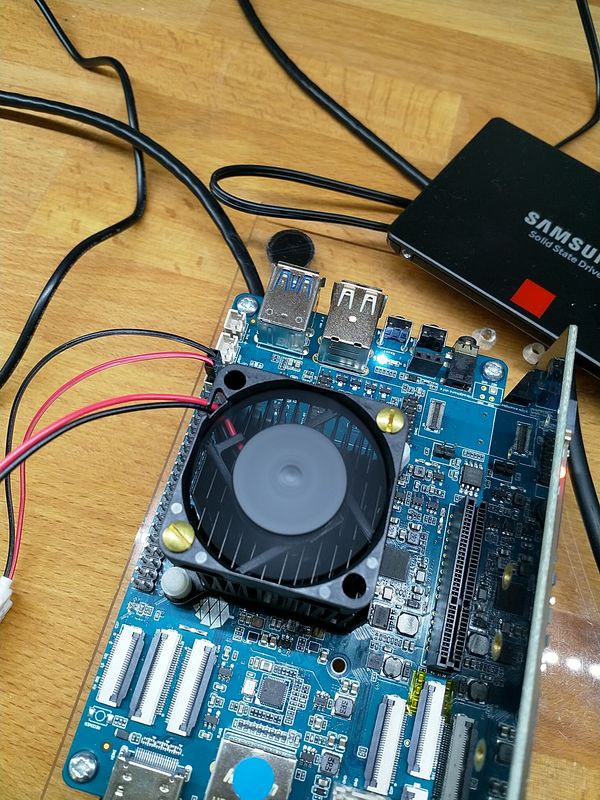
Die Befestigung ist böse improvisiert")
Mit armbianmonitor die Temperatur kontrolliert.
rock64@rockpro64v2_0:/usr/local/sbin$ sudo ./armbianmonitor -m
Stop monitoring using [ctrl]-[c]
Stop monitoring using [ctrl]-[c]
Time       big.LITTLE   load %cpu %sys %usr %nice %io %irq   CPU  C.St.

15:15:23:  816/1200MHz  0.00   0%   0%   0%   0%   0%   0% 40.0°C  0/3
15:15:28:  408/ 408MHz  0.00   0%   0%   0%   0%   0%   0% 41.1°C  0/3
15:15:33:  408/ 408MHz  0.00   0%   0%   0%   0%   0%   0% 41.1°C  0/3
15:15:38:  408/ 408MHz  0.00   0%   0%   0%   0%   0%   0% 41.1°C  0/3
15:15:43:  408/ 408MHz  0.00   0%   0%   0%   0%   0%   0% 41.1°C  0/3
15:15:48:  408/ 408MHz  0.00   0%   0%   0%   0%   0%   0% 41.1°C  0/3
15:15:53:  408/ 408MHz  0.00   0%   0%   0%   0%   0%   0% 41.1°C  0/3
Lüfter eingebaut. Einige Zeit laufen lassen. Ergebnis. (Wert 50)
15:31:48:  408/ 408MHz  0.02   0%   0%   0%   0%   0%   0% 34.4°C  0/3
15:31:53:  408/ 408MHz  0.02   0%   0%   0%   0%   0%   0% 34.4°C  0/3
15:31:58:  408/ 408MHz  0.01   0%   0%   0%   0%   0%   0% 34.4°C  0/3
15:32:03:  408/ 408MHz  0.01   0%   0%   0%   0%   0%   0% 34.4°C  0/3
15:32:08:  408/ 408MHz  0.01   0%   0%   0%   0%   0%   0% 34.4°C  0/3
15:32:14:  408/ 408MHz  0.01   0%   0%   0%   0%   0%   0% 34.4°C  0/3
15:32:19:  408/ 408MHz  0.01   0%   0%   0%   0%   0%   0% 35.0°C  0/3
15:32:24:  408/ 408MHz  0.01   0%   0%   0%   0%   0%   0% 35.0°C  0/3
Aktuell müssen wir die Geschwindigkeit des Lüfters noch von Hand einstellen. Dazu findet man unter
rock64@rockpro64v2_0:/sys/class/hwmon/hwmon0die Datei pwm1. Diese öffnen wir mal mit einem Editor.
rock64@rockpro64v2_0:/sys/class/hwmon/hwmon0$ sudo nano pwm1In dieser Datei steht nur eine 0. Der Wert ist einstellbar von 0 - 255. Hier mal die Ausgabe, wenn das Ding mit 255 einige Zeit läuft.
15:42:18:  408/ 408MHz  0.02   0%   0%   0%   0%   0%   0% 32.8°C  3/3
15:42:23:  408/ 408MHz  0.01   0%   0%   0%   0%   0%   0% 32.8°C  3/3
15:42:28:  408/ 408MHz  0.01   0%   0%   0%   0%   0%   0% 33.3°C  3/3
15:42:34:  408/ 408MHz  0.01   0%   0%   0%   0%   0%   0% 32.8°C  3/3
15:42:39:  408/ 408MHz  0.01   0%   0%   0%   0%   0%   0% 32.8°C  3/3
15:42:44:  408/ 408MHz  0.01   0%   0%   0%   0%   0%   0% 33.3°C  3/3
15:42:49:  408/ 408MHz  0.01   0%   0%   0%   0%   0%   0% 32.8°C  3/3
15:42:54:  408/ 408MHz  0.01   0%   0%   0%   0%   0%   0% 32.8°C  3/3
15:42:59:  408/ 408MHz  0.01   0%   0%   0%   0%   0%   0% 32.8°C  3/3
Das war's, weiter runter komme ich hier wohl nicht.
-
schrieb am 11. Aug. 2018, 16:34 zuletzt editiert von
Aktuell geht das nur mit Kernel 4.4.x Mit Kernel 4.18.x bekomme ich den Lüfter, mit dem Wert 255, nur kurz zum Laufen.
Es scheint so, das irgendein Dienst in die Datei nach kurzer Zeit wieder eine 0 rein schreibt !?!?Im Gegensatz zum Kernel 4.4.x, läuft der Lüfter mit Wert 50 nicht an. Da muss ich nochmal nachfragen.
-
schrieb am 2. Sept. 2018, 05:51 zuletzt editiert von
Wenn jemand einen Dienst braucht, der den Lüfter automatisch steuert, da hat jemand was gebastelt
GitHub - tuxd3v/ats
Contribute to tuxd3v/ats development by creating an account on GitHub.

GitHub (github.com)
Sieht nicht zu kompliziert aus, sollte man hin bekommen. Bei Gelegenheit werde ich mal testen.
-
schrieb am 3. Mai 2020, 06:35 zuletzt editiert von FrankM 5. März 2020, 08:56
Mit dem neuen Release hatte jemand das mal ausprobiert -> https://forum.frank-mankel.org/topic/795/fan-control-omv-auyfan-0-10-12-gitlab-ci-linux-build-184-kernel-5-6/6
Dieser Kernel kam zur Anwendung
Linux rockpro64 5.6.0-1137-ayufan-ge57f05e7bf8f #ayufan SMP Wed Apr 15 10:16:02 UTC 2020 aarch64 GNU/LinuxDort stellt man dann fest, das sich eine Kleinigkeit geändert hat. Der Pfad und der Dateiname hat sich geändert.
Kontrollieren kann man das mit
nano /sys/devices/platform/pwm-fan/hwmon/hwmon3/pwm1Der Wert geht von 0 - 255, wie gehabt.