Skip to content

Unterstützung Lüfter

ROCKPro64
5 1 1.7k
  • Kamil hat die Funktion des Lüfters als Kernelupdate eingebaut.

    rock64@rockpro64v2_1:~$ uname -a
    Linux rockpro64v2_1 4.4.132-1077-rockchip-ayufan-gbaf35a9343cb #1 SMP Mon Jul 30 14:06:57 UTC 2018 aarch64 aarch64 aarch64 GNU/Linux
    

    Updaten

    sudo apt-get update
    apt-cache search linux-image
    

    Dann den Kernel aussuchen, in diesem Fall

    sudo apt-get install linux-image-4.4.132-1077-rockchip-ayufan-gbaf35a9343cb
    

    Einmal neustarten

     sudo shutdown -r now
    

    Fertig!

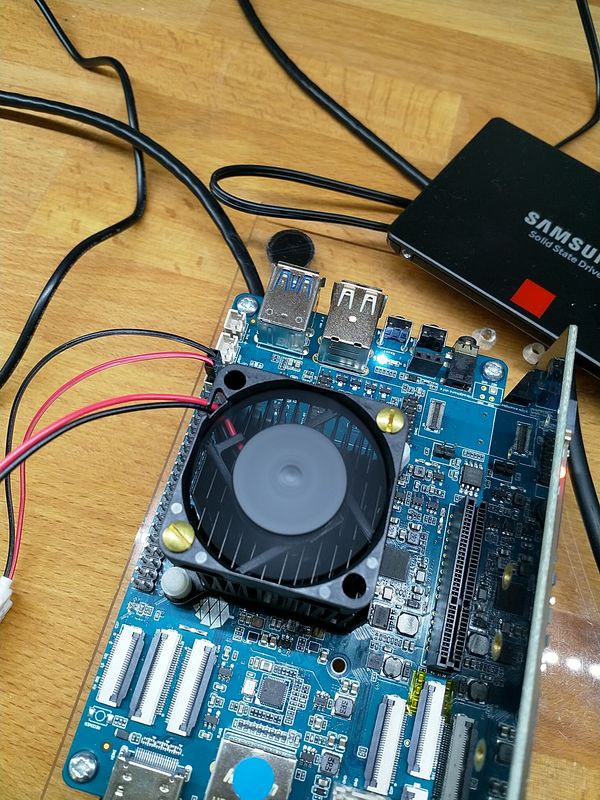
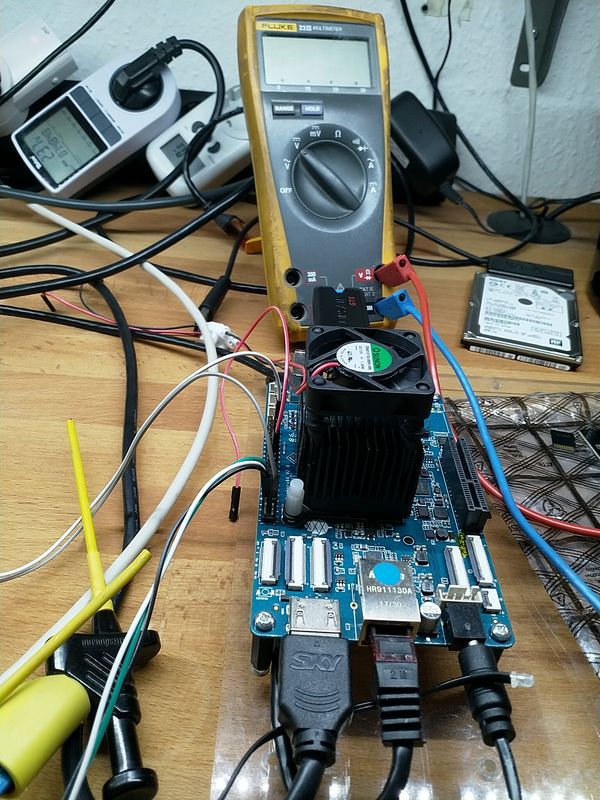
  • Lüfter angekommen 😉

    0_1533908727391_Lüfter_ergebnis.jpg
    Die Befestigung ist böse improvisiert 🙂

    Mit armbianmonitor die Temperatur kontrolliert.

    rock64@rockpro64v2_0:/usr/local/sbin$ sudo ./armbianmonitor -m
    Stop monitoring using [ctrl]-[c]
    Stop monitoring using [ctrl]-[c]
    Time       big.LITTLE   load %cpu %sys %usr %nice %io %irq   CPU  C.St.
    
    15:15:23:  816/1200MHz  0.00   0%   0%   0%   0%   0%   0% 40.0°C  0/3
    15:15:28:  408/ 408MHz  0.00   0%   0%   0%   0%   0%   0% 41.1°C  0/3
    15:15:33:  408/ 408MHz  0.00   0%   0%   0%   0%   0%   0% 41.1°C  0/3
    15:15:38:  408/ 408MHz  0.00   0%   0%   0%   0%   0%   0% 41.1°C  0/3
    15:15:43:  408/ 408MHz  0.00   0%   0%   0%   0%   0%   0% 41.1°C  0/3
    15:15:48:  408/ 408MHz  0.00   0%   0%   0%   0%   0%   0% 41.1°C  0/3
    15:15:53:  408/ 408MHz  0.00   0%   0%   0%   0%   0%   0% 41.1°C  0/3
    

    Lüfter eingebaut. Einige Zeit laufen lassen. Ergebnis. (Wert 50)

    15:31:48:  408/ 408MHz  0.02   0%   0%   0%   0%   0%   0% 34.4°C  0/3
    15:31:53:  408/ 408MHz  0.02   0%   0%   0%   0%   0%   0% 34.4°C  0/3
    15:31:58:  408/ 408MHz  0.01   0%   0%   0%   0%   0%   0% 34.4°C  0/3
    15:32:03:  408/ 408MHz  0.01   0%   0%   0%   0%   0%   0% 34.4°C  0/3
    15:32:08:  408/ 408MHz  0.01   0%   0%   0%   0%   0%   0% 34.4°C  0/3
    15:32:14:  408/ 408MHz  0.01   0%   0%   0%   0%   0%   0% 34.4°C  0/3
    15:32:19:  408/ 408MHz  0.01   0%   0%   0%   0%   0%   0% 35.0°C  0/3
    15:32:24:  408/ 408MHz  0.01   0%   0%   0%   0%   0%   0% 35.0°C  0/3
    

    Aktuell müssen wir die Geschwindigkeit des Lüfters noch von Hand einstellen. Dazu findet man unter

    rock64@rockpro64v2_0:/sys/class/hwmon/hwmon0
    

    die Datei pwm1. Diese öffnen wir mal mit einem Editor.

    rock64@rockpro64v2_0:/sys/class/hwmon/hwmon0$ sudo nano pwm1
    

    In dieser Datei steht nur eine 0. Der Wert ist einstellbar von 0 - 255. Hier mal die Ausgabe, wenn das Ding mit 255 einige Zeit läuft.

    15:42:18:  408/ 408MHz  0.02   0%   0%   0%   0%   0%   0% 32.8°C  3/3
    15:42:23:  408/ 408MHz  0.01   0%   0%   0%   0%   0%   0% 32.8°C  3/3
    15:42:28:  408/ 408MHz  0.01   0%   0%   0%   0%   0%   0% 33.3°C  3/3
    15:42:34:  408/ 408MHz  0.01   0%   0%   0%   0%   0%   0% 32.8°C  3/3
    15:42:39:  408/ 408MHz  0.01   0%   0%   0%   0%   0%   0% 32.8°C  3/3
    15:42:44:  408/ 408MHz  0.01   0%   0%   0%   0%   0%   0% 33.3°C  3/3
    15:42:49:  408/ 408MHz  0.01   0%   0%   0%   0%   0%   0% 32.8°C  3/3
    15:42:54:  408/ 408MHz  0.01   0%   0%   0%   0%   0%   0% 32.8°C  3/3
    15:42:59:  408/ 408MHz  0.01   0%   0%   0%   0%   0%   0% 32.8°C  3/3
    

    Das war's, weiter runter komme ich hier wohl nicht.

  • Aktuell geht das nur mit Kernel 4.4.x Mit Kernel 4.18.x bekomme ich den Lüfter, mit dem Wert 255, nur kurz zum Laufen.
    Es scheint so, das irgendein Dienst in die Datei nach kurzer Zeit wieder eine 0 rein schreibt !?!?

    Im Gegensatz zum Kernel 4.4.x, läuft der Lüfter mit Wert 50 nicht an. Da muss ich nochmal nachfragen.

  • Wenn jemand einen Dienst braucht, der den Lüfter automatisch steuert, da hat jemand was gebastelt 😉

    Sieht nicht zu kompliziert aus, sollte man hin bekommen. Bei Gelegenheit werde ich mal testen.

  • Mit dem neuen Release hatte jemand das mal ausprobiert -> https://forum.frank-mankel.org/topic/795/fan-control-omv-auyfan-0-10-12-gitlab-ci-linux-build-184-kernel-5-6/6

    Dieser Kernel kam zur Anwendung

    Linux rockpro64 5.6.0-1137-ayufan-ge57f05e7bf8f #ayufan SMP Wed Apr 15 10:16:02 UTC 2020 aarch64 GNU/Linux
    

    Dort stellt man dann fest, das sich eine Kleinigkeit geändert hat. Der Pfad und der Dateiname hat sich geändert.

    Kontrollieren kann man das mit

    nano /sys/devices/platform/pwm-fan/hwmon/hwmon3/pwm1
    

    Der Wert geht von 0 - 255, wie gehabt.

  • ROCKPro64 - Release 0.10.6 Was geht?

    Angeheftet ROCKPro64 rockpro64
    1
    0 Stimmen
    1 Beiträge
    448 Aufrufe
    Niemand hat geantwortet
  • ROCKPro64 - Kernel 5.6 und Wireguard 1.0

    ROCKPro64 linux rockpro64 wireguard
    1
    0 Stimmen
    1 Beiträge
    348 Aufrufe
    Niemand hat geantwortet
  • ROCKPro64 - USB-C -> LAN

    ROCKPro64 rockpro64
    1
    0 Stimmen
    1 Beiträge
    336 Aufrufe
    Niemand hat geantwortet
  • Wireguard

    Verschoben Wireguard linux rockpro64 wireguard
    4
    0 Stimmen
    4 Beiträge
    968 Aufrufe
    FrankMF
    Etwas schnellerer Weg den Tunnel aufzubauen, Voraussetzung wireguard modul installiert Keys erzeugt Danach dann einfach ip link add wg0 type wireguard wg setconf wg0 /etc/wireguard/wg0.conf Datei /etc/wireguard/wg0.conf [Interface] PrivateKey = <Private Key> ListenPort = 60563 [Peer] PublicKey = <Public Key Ziel> Endpoint = <IPv4 Adresse Zielrechner>:58380 AllowedIPs = 10.10.0.1/32 Die Rechte der Dateien von wireguard müssen eingeschränkt werden. sudo chmod 0600 /etc/wireguard/wg0.conf Das ganze per rc.local beim Booten laden. Datei /root/wireguard_start.sh ############################################################################################### # Autor: Frank Mankel # Startup-Script # Wireguard # Kontakt: frank.mankel@gmail.com # ############################################################################################### ip link add wg0 type wireguard ip address add dev wg0 10.10.0.1/8 wg setconf wg0 /etc/wireguard/wg0.conf ip link set up dev wg0 Danach Datei ausführbar machen chmod +x /root/wireguard_start.sh In rc.local /root/wireguard_start.sh eintragen - Fertig!
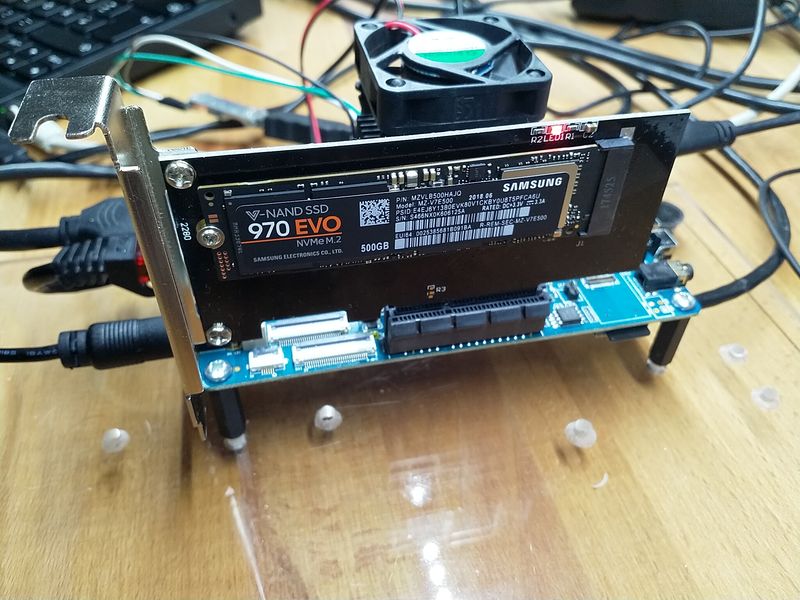
  • ROCKPro64 - Samsung 970 NVMe M.2 500GB

    Hardware hardware rockpro64
    1
    1
    0 Stimmen
    1 Beiträge
    1k Aufrufe
    Niemand hat geantwortet
  • Mainline Kernel 4.20.x

    Verschoben Images rockpro64
    26
    0 Stimmen
    26 Beiträge
    4k Aufrufe
    FrankMF
    4.20.0-1090-ayufan released Änderungen -> https://gitlab.com/ayufan-repos/rock64/linux-mainline-kernel/commits/master
  • ROCKPro64 - Der Bootvorgang

    Verschoben Hardware hardware rockpro64
    3
    0 Stimmen
    3 Beiträge
    2k Aufrufe
    FrankMF
    Um einen neuen Kernel booten zu können, brauche ich diese 4 Dateien unter /boot config-4.19.0-rc4-1065-ayufan-g72e04c7b3e06 initrd.img-4.19.0-rc4-1065-ayufan-g72e04c7b3e06 System.map-4.19.0-rc4-1065-ayufan-g72e04c7b3e06 vmlinuz-4.19.0-rc4-1065-ayufan-g72e04c7b3e06 Und den Ordner /boot/dtbs/4.19.0-rc4-1065-ayufan-g72e04c7b3e06 mit folgendem Inhalt rock64@rockpro64v2_0:/boot/dtbs/4.19.0-rc4-1065-ayufan-g72e04c7b3e06$ ls -la total 104 drwxr-xr-x 26 root root 4096 Sep 30 09:54 . drwxr-xr-x 6 root root 4096 Sep 30 09:55 .. drwxr-xr-x 2 root root 4096 Sep 30 09:54 al drwxr-xr-x 2 root root 4096 Sep 30 09:54 allwinner drwxr-xr-x 2 root root 4096 Sep 30 09:54 altera drwxr-xr-x 2 root root 4096 Sep 30 09:54 amd drwxr-xr-x 2 root root 4096 Sep 30 09:54 amlogic drwxr-xr-x 2 root root 4096 Sep 30 09:54 apm drwxr-xr-x 2 root root 4096 Sep 30 09:54 arm drwxr-xr-x 4 root root 4096 Sep 30 09:54 broadcom drwxr-xr-x 2 root root 4096 Sep 30 09:54 cavium drwxr-xr-x 2 root root 4096 Sep 30 09:54 exynos drwxr-xr-x 2 root root 4096 Sep 30 09:54 freescale drwxr-xr-x 2 root root 4096 Sep 30 09:54 hisilicon drwxr-xr-x 2 root root 4096 Sep 30 09:54 lg drwxr-xr-x 2 root root 4096 Sep 30 09:54 marvell drwxr-xr-x 2 root root 4096 Sep 30 09:54 mediatek drwxr-xr-x 2 root root 4096 Sep 30 09:54 nvidia drwxr-xr-x 2 root root 4096 Sep 30 09:54 qcom drwxr-xr-x 2 root root 4096 Sep 30 09:54 renesas drwxr-xr-x 2 root root 4096 Sep 30 09:54 rockchip drwxr-xr-x 2 root root 4096 Sep 30 09:54 socionext drwxr-xr-x 2 root root 4096 Sep 30 09:54 sprd drwxr-xr-x 2 root root 4096 Sep 30 09:54 synaptics drwxr-xr-x 2 root root 4096 Sep 30 09:54 xilinx drwxr-xr-x 2 root root 4096 Sep 30 09:54 zte Unter /boot/extlinux liegt dann die Datei extlinux.conf Die sieht bei mir dann so aus timeout 10 menu title select kernel label kernel-4.19.0-rc4-1065-ayufan-g72e04c7b3e06 kernel /boot/vmlinuz-4.19.0-rc4-1065-ayufan-g72e04c7b3e06 initrd /boot/initrd.img-4.19.0-rc4-1065-ayufan-g72e04c7b3e06 devicetreedir /boot/dtbs/4.19.0-rc4-1065-ayufan-g72e04c7b3e06 append rw panic=10 init=/sbin/init coherent_pool=1M ethaddr=${ethaddr} eth1addr=${eth1addr} serial=${serial#} cgroup_enable=cpuset cgroup_memory=1 cgroup_enable=memory swapaccount=1 root=LABEL=TEST rootwait rootfstype=ext4 label kernel-4.19.0-rc4-1065-ayufan-g72e04c7b3e06-memtest kernel /boot/vmlinuz-4.19.0-rc4-1065-ayufan-g72e04c7b3e06 initrd /boot/initrd.img-4.19.0-rc4-1065-ayufan-g72e04c7b3e06 devicetreedir /boot/dtbs/4.19.0-rc4-1065-ayufan-g72e04c7b3e06 append rw panic=10 init=/sbin/init coherent_pool=1M ethaddr=${ethaddr} eth1addr=${eth1addr} serial=${serial#} cgroup_enable=cpuset cgroup_memory=1 cgroup_enable=memory swapaccount=1 root=LABEL=TEST rootwait rootfstype=ext4 memtest Darunter kommen dann evt. die alten Kernel die installiert waren, das habe ich hier im Beispiel weg gelassen.
  • Shop-Bestellung

    ROCKPro64 rockpro64
    10
    1
    0 Stimmen
    10 Beiträge
    2k Aufrufe
    V
    @FrankM besten Dank für die ausführliche Infos.