Skip to content

Installation von Grav & NGinx & PHP7.2

Angeheftet Verschoben Grav
2 1 1.4k
  • Wird nochmal überarbeitet, da ich noch über einige Probleme gestolpert bin! Für Einsteiger im Moment nur bedingt zu empfehlen!

    Ich hatte schon mal auf einem Debian System PHP7 installiert -> https://frank-mankel.de/kategorien/15-joomla/202-debian-joomla-mit-php7-auf-nginx

    Nun habe ich das auf einem ROCKPro64 gemacht und ein wenig Kopfschmerzen bekommen 😉 Ziel des Ganzen ist es eine Grav-Installation zum Laufen zu bekommen.

    Hardware

    • ROCKPro64 v2.0

    Software

    Linux

    rock64@rockpro64v2_0:~$ uname -a
    Linux rockpro64v2_0 4.4.132-1081-rockchip-ayufan-g50be7e64a779 #1 SMP Tue Jul 31 20:09:25 UTC 2018 aarch64 aarch64 aarch64 GNU/Linux
    

    NGinx

    rock64@rockpro64:~$ nginx -v
    nginx version: nginx/1.14.0 (Ubuntu)
    

    PHP

     rock64@rockpro64:~$ php -v
     PHP 7.2.7-0ubuntu0.18.04.2 (cli) (built: Jul  4 2018 16:55:24) ( NTS )
     Copyright (c) 1997-2018 The PHP Group
     Zend Engine v3.2.0, Copyright (c) 1998-2018 Zend Technologies
         with Zend OPcache v7.2.7-0ubuntu0.18.04.2, Copyright (c) 1999-2018, by Zend Technologies
    

    Installation

    NGinx

    sudo apt-get install nginx 
    

    PHP

    sudo apt-get install php7.2
    

    Benötigte Module für PHP

    sudo apt-get install php7.2-mysql php7.2-opcache php7.2-readline php7.2-xml php7.2-xsl php7.2-zip
    sudo apt-get install php7.2-cli php7.2-curl php7.2-gd php7.2-geoip php7.2-intl php7.2-json php7.2-mbstring
    

    Konfiguration NGinx

    /etc/nginx/nginx.conf

    user www-data;
    worker_processes auto;
    worker_rlimit_nofile 8192; # should be bigger than worker_connections
    pid /run/nginx.pid;
    
    events {
        use epoll;
        worker_connections 8000;
        multi_accept on;
    }
    
    http {
        sendfile on;
        tcp_nopush on;
        tcp_nodelay on;
    
        keepalive_timeout 30; # longer values are better for each ssl client, but take up a worker connection longer
        types_hash_max_size 2048;
        server_tokens off;
    
        # maximum file upload size
        # update 'upload_max_filesize' & 'post_max_size' in /etc/php5/fpm/php.ini accordingly
        client_max_body_size 32m;
        # client_body_timeout 60s; # increase for very long file uploads
    
        # set default index file (can be overwritten for each site individually)
        index index.html;
    
        # load MIME types
        include mime.types; # get this file from https://github.com/h5bp/server-configs-nginx
        default_type application/octet-stream; # set default MIME type
    
        # logging
        access_log /var/log/nginx/access.log;
        error_log /var/log/nginx/error.log;
    
        # turn on gzip compression
        gzip on;
        gzip_disable "msie6";
        gzip_vary on;
        gzip_proxied any;
        gzip_comp_level 5;
        gzip_buffers 16 8k;
        gzip_http_version 1.1;
        gzip_min_length 256;
        gzip_types
            application/atom+xml
            application/javascript
            application/json
            application/ld+json
            application/manifest+json
            application/rss+xml
            application/vnd.geo+json
            application/vnd.ms-fontobject
            application/x-font-ttf
            application/x-web-app-manifest+json
            application/xhtml+xml
            application/xml
            font/opentype
            image/bmp
            image/svg+xml
            image/x-icon
            text/cache-manifest
            text/css
            text/plain
            text/vcard
            text/vnd.rim.location.xloc
            text/vtt
            text/x-component
            text/x-cross-domain-policy;
        
        # disable content type sniffing for more security
        add_header "X-Content-Type-Options" "nosniff";
        
        # force the latest IE version
        add_header "X-UA-Compatible" "IE=Edge";
        
        # enable anti-cross-site scripting filter built into IE 8+
        add_header "X-XSS-Protection" "1; mode=block";
        
        # include virtual host configs
        include sites-enabled/*;
    }
    

    Unter /etc/nginx/sites-available die Datei default löschen. Die Datei grav-site anlegen.

    /etc/nginx/sites-available/grav-site

    server {
        #listen 80;
        index index.html index.php;
    
        ## Begin - Server Info
        root /var/www/grav;
        server_name localhost;
        ## End - Server Info
    
        ## Begin - Index
        # for subfolders, simply adjust:
        # `location /subfolder {`
        # and the rewrite to use `/subfolder/index.php`
        location / {
            try_files $uri $uri/ /index.php?$query_string;
        }
        ## End - Index
    
        ## Begin - Security
        # deny all direct access for these folders
        location ~* /(\.git|cache|bin|logs|backup|tests)/.*$ { return 403; }
        # deny running scripts inside core system folders
        location ~* /(system|vendor)/.*\.(txt|xml|md|html|yaml|yml|php|pl|py|cgi|twig|sh|bat)$ { return 403; }
        # deny running scripts inside user folder
        location ~* /user/.*\.(txt|md|yaml|yml|php|pl|py|cgi|twig|sh|bat)$ { return 403; }
        # deny access to specific files in the root folder
        location ~ /(LICENSE\.txt|composer\.lock|composer\.json|nginx\.conf|web\.config|htaccess\.txt|\.htaccess) { return 403; }
        ## End - Security
    
        ## Begin - PHP
        location ~ \.php$ {
            # Choose either a socket or TCP/IP address
            #fastcgi_pass unix:/var/run/php/php7.0-fpm.sock;
             fastcgi_pass 127.0.0.1:9000;
    
            fastcgi_split_path_info ^(.+\.php)(/.+)$;
            fastcgi_index index.php;
            include fastcgi_params;
            fastcgi_param SCRIPT_FILENAME $document_root/$fastcgi_script_name;
        }
        ## End - PHP
    }
    

    Danach brauchen wir einen symbolischen Link in /etc/nginx/sites-enabled Nur dann funktioniert eine Seite.

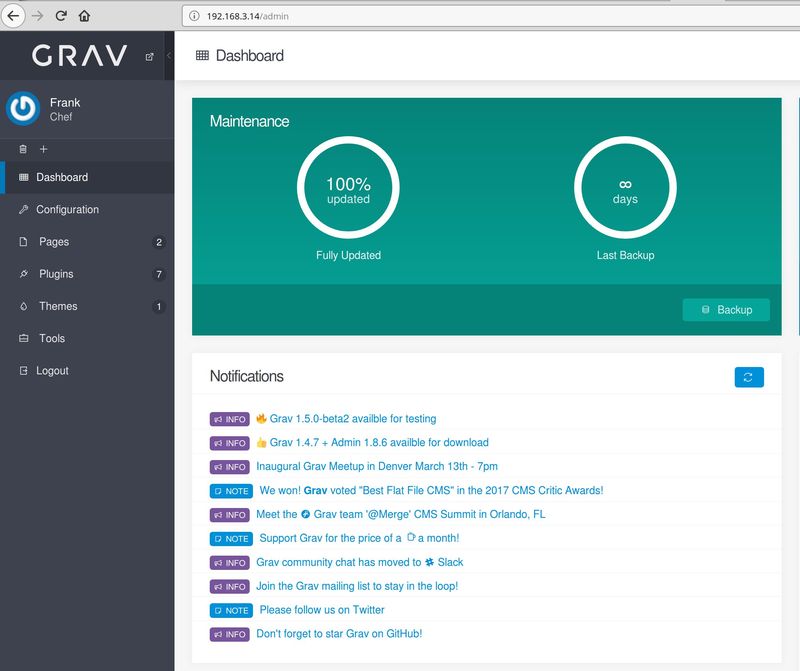
    sudo ln -s /etc/nginx/sites-available/grav-site /etc/nginx/sites-enabled/
    

    Installation Grav

    Core installieren
    Option 3 der Anleitung https://learn.getgrav.org/basics/installation

    Admin Panel installieren
    https://learn.getgrav.org/admin-panel/introduction

    Meine Grav-Installation liegt unter

     /var/www/grav
    

    Womit hatte ich nun Probleme? NGinx dient ja als Webserver, dieser Webserver muss jetzt die PHP-Dateien entsprechend verarbeiten können. Dazu gibt es folgenden Block in der Datei /etc/nginx/sites-available/grav-site

     ## Begin - PHP
         location ~ \.php$ {
             # Choose either a socket or TCP/IP address
             #fastcgi_pass unix:/var/run/php/php7.0-fpm.sock;
              fastcgi_pass 127.0.0.1:9000;
     
             fastcgi_split_path_info ^(.+\.php)(/.+)$;
             fastcgi_index index.php;
             include fastcgi_params;
             fastcgi_param SCRIPT_FILENAME $document_root/$fastcgi_script_name;
         }
         ## End - PHP
    

    Es war vorher folgendermaßen

    fastcgi_pass unix:/var/run/php/php7.2-fpm.sock;
    #fastcgi_pass 127.0.0.1:9000;
    

    Das hat nicht geklappt. Was sagt die Ubuntu Seite dazu?? Man soll folgendes machen. Datei /usr/local/bin/php-fastcgi anlegen.

     #!/bin/bash
     php-cgi -b 127.0.0.1:9000
    

    Ausführungsrechte

    chmod a+x /usr/local/bin/php-fastcgi 
    

    Danach starten

     sudo php-fastcgi 
    

    Das funktioniert aber nur, wenn folgendes eingestellt ist.

    #fastcgi_pass unix:/var/run/php/php7.2-fpm.sock;
    fastcgi_pass 127.0.0.1:9000;
    

    Damit wird PHP direkt an die FastCGI-Schnittstelle gebunden.

    Quelle: https://wiki.ubuntuusers.de/nginx/PHP/

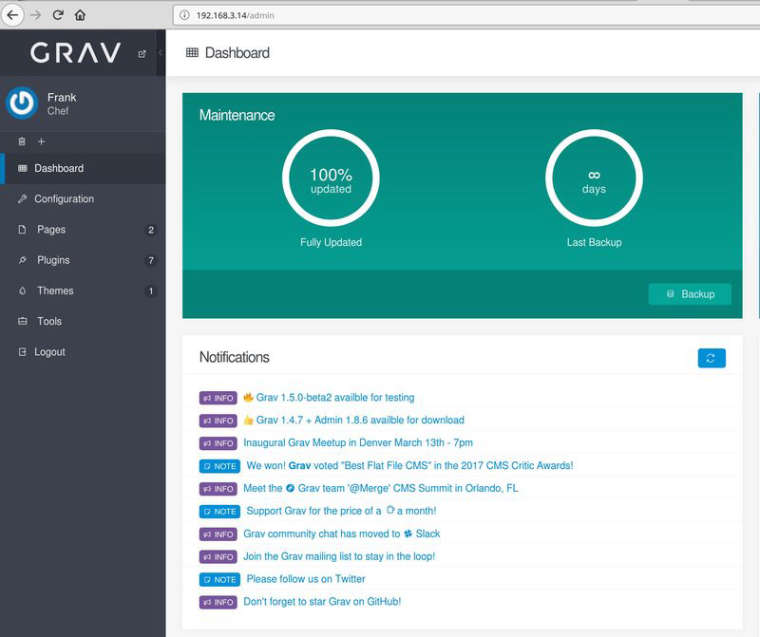
    Danach lief meine Grav-Installation.

    0_1532448808009_Grav_ergebnis.jpg

    So weit so gut. Ein kleiner Schönheitsfehler. Konsole zu beendet

    sudo php-fastcgi 
    

    dann war es das wieder mit NGinx. Die Lösung wir brauchen eine Datei /etc/rc.local

    #!/bin/bash
    #
    # rc.local - executed at the end of each multiuser runlevel
    #
    # Make sure that the script will "exit 0" on success or any other
    # value on error.
    php-fastcgi 
    exit 0
    

    Den Dienst dann nach dieser Anleitung einrichten

    Danach den Server neu starten und es funktioniert!

    Achtung! Nicht auf einem produktiven System einsetzen, ich bin mir nicht sicher ob das zu 100% sicher ist.

  • Nachdem ich den ROCKPro64 jetzt auf den Mainline umgestellt habe, lief meine Testinstallation von Grav nicht mehr.

    Hilfreiche Sache um das Problem zu lösen -> https://gist.github.com/GhazanfarMir/03bd1f1f770a3834d47274586d46ea62

    Ich bekam immer 502 Bad Gateway, Grund war ein nicht korrekt gestarteter php-pfm Service.

    rock64@rockpro64v2_0:/usr/local/bin$ sudo service php7.2-fpm start
    rock64@rockpro64v2_0:/usr/local/bin$ sudo service php7.2-fpm status
    ● php7.2-fpm.service - The PHP 7.2 FastCGI Process Manager
       Loaded: loaded (/lib/systemd/system/php7.2-fpm.service; enabled; vendor preset: enabled)
       Active: active (running) since Thu 2018-08-16 20:15:20 CEST; 21s ago
         Docs: man:php-fpm7.2(8)
     Main PID: 3206 (php-fpm7.2)
       Status: "Processes active: 0, idle: 2, Requests: 3, slow: 0, Traffic: 0.2req/sec"
        Tasks: 3 (limit: 4622)
       CGroup: /system.slice/php7.2-fpm.service
               ├─3206 php-fpm: master process (/etc/php/7.2/fpm/php-fpm.conf)
               ├─3207 php-fpm: pool www
               └─3208 php-fpm: pool www
    
    Aug 16 20:15:19 rockpro64v2_0 systemd[1]: Starting The PHP 7.2 FastCGI Process Manager...
    Aug 16 20:15:20 rockpro64v2_0 systemd[1]: Started The PHP 7.2 FastCGI Process Manager.
    
  • OpenCloud - Docker Compose local

    Verschoben OpenCloud opencloud linux
    3
    1
    0 Stimmen
    3 Beiträge
    430 Aufrufe
    FrankMF
    Noch was Wichtiges. Die Docker Installation nutzt folgende config. In meinem Beispiel findet man sie unter /home/frank/opencloud/deployments/examples/opencloud_full Darin liegt ein .env ## Basic Settings ## # Define the docker compose log driver used. # Defaults to local LOG_DRIVER= # If you're on an internet facing server, comment out following line. # It skips certificate validation for various parts of OpenCloud and is # needed when self signed certificates are used. INSECURE=true ## Traefik Settings ## # Note: Traefik is always enabled and can't be disabled. # Serve Traefik dashboard. # Defaults to "false". TRAEFIK_DASHBOARD= # Domain of Traefik, where you can find the dashboard. # Defaults to "traefik.opencloud.test" TRAEFIK_DOMAIN= # Basic authentication for the traefik dashboard. # Defaults to user "admin" and password "admin" (written as: "admin:$2y$05$KDHu3xq92SPaO3G8Ybkc7edd51pPLJcG1nWk3lmlrIdANQ/B6r5pq"). # To create user:password pair, it's possible to use this command: # echo $(htpasswd -nB user) | sed -e s/\\$/\\$\\$/g TRAEFIK_BASIC_AUTH_USERS= # Email address for obtaining LetsEncrypt certificates. # Needs only be changed if this is a public facing server. TRAEFIK_ACME_MAIL= # Set to the following for testing to check the certificate process: # "https://acme-staging-v02.api.letsencrypt.org/directory" # With staging configured, there will be an SSL error in the browser. # When certificates are displayed and are emitted by # "Fake LE Intermediate X1", # the process went well and the envvar can be reset to empty to get valid certificates. TRAEFIK_ACME_CASERVER= [....gekürzt....] Man kann dort etwas ändern und mittels docker compose up -d alles aktualisieren. Radicale OpenCloud nutzt im Moment folgendes https://radicale.org/v3.html als Backend Server für Kalender & Kontakte. Jemand hat mir dann erklärt, wie das so funktioniert. Danach hatte es dann klick gemacht. https://fosstodon.org/@h4kamp/114562514701351170 In der config findet man zum Beispiel die Konfiguration für radicale (Kalender- und Kontakte-App) Das ist nur eine rudimentäre Ablage, wird gesteuert über Clienten, z.B. die Thunderbird Kalender Funktion. ### Radicale Setting ### # Radicale is a small open-source CalDAV (calendars, to-do lists) and CardDAV (contacts) server. # When enabled OpenCloud is configured as a reverse proxy for Radicale, providing all authenticated # OpenCloud users access to a Personal Calendar and Addressbook RADICALE=:radicale.yml # Docker image to use for the Radicale Container #RADICALE_DOCKER_IMAGE=opencloudeu/radicale # Docker tag to pull for the Radicale Container #RADICALE_DOCKER_TAG=latest # Define the storage location for the Radicale data. Set the path to a local path. # Ensure that the configuration and data directories are owned by the user and group with ID 1000:1000. # This matches the default user inside the container and avoids permission issues when accessing files. # Leaving it default stores data in docker internal volumes. #RADICALE_DATA_DIR=/your/local/radicale/data In einer Standard Installation ist das auskommentiert. RADICALE=:radicale.yml Danach ein docker compose up -d und Eure Kalendereinträge (extern auf einem Clienten verwaltet) werden in der OpenCloud gesichert.
  • 0 Stimmen
    1 Beiträge
    40 Aufrufe
    Niemand hat geantwortet
  • Nextcloud - Collabora Installation Debian Bookworm 12

    Nextcloud nextcloud collabora linux
    2
    3
    0 Stimmen
    2 Beiträge
    1k Aufrufe
    FrankMF
    Ok, ich war leider nicht in der Lage den CODE-Server hinter einem Proxy zu installieren. Das CODE-Team scheint Docker zu lieben und das andere nur am Rande zu machen. Ohne Liebe Da ich extrem lange Ladezeiten hatte und die Software insgesamt nicht den Eindruck machte, das man das gerne produktiv auf einem Server nutzen möchte, habe ich den Server eben wieder gelöscht. Jetzt fehlt mir leider, die deepl.com Anbindung, aber das kann man ja auch über die Webseite nutzen. Ich nutze jetzt wieder den eingebauten CODE-Server, der eigentlich ein App-Image ist. [image: 1694677466020-28c41010-5ce1-4f7c-89d5-1c9b253011d0-grafik.png] Der klare Vorteil, es läuft incl. Dokumenten Freigabe Nicht vergessen, unter Allow list for WOPI requests kommen die Server Adressen des Nextcloud-Webservers rein! [image: 1694677621827-c1a06c2c-86b5-4750-a062-7ba9d8dd8253-grafik.png]
  • Kernel 5.19-rc1

    Quartz64 linux quartz64
    2
    0 Stimmen
    2 Beiträge
    214 Aufrufe
    FrankMF
    Man kann dann den aktuell Kernel [root@frank-pc ~]# uname -a Linux frank-pc 5.17.0-3-MANJARO-ARM-Q64 #1 SMP PREEMPT Sat Jun 4 14:34:03 UTC 2022 aarch64 GNU/Linux mit diesem Befehl aktualisieren sudo pacman -S linux-rc linux-rc-headers Man wechselt dann vom Zweig linux-quartz64 auf linux-rc. Der Zweig linux-rc entspricht dem Mainline Kernel. Achtung! Zum Zeitpunkt der Erstellung des Beitrages crasht das Eure Installation!! Ursache ist, das es aktuell diesen Kernel linux-rc-5.18.rc7-7-aarch64 installiert, dieser enthält aber keine Unterstützung für das Modell B. Und zum Nachschauen, ob schon was Neues da ist [root@frank-pc ~]# pacman -Ss linux-rc linux-rc-headers core/linux-rc-headers 5.18.rc7-7 Header files and scripts for building modules for linux kernel - AArch64 multi-platform (release candidate)
  • Ubuntu Cinnamon Remix 21.04

    Linux ubuntu cinnamon linux
    2
    1
    0 Stimmen
    2 Beiträge
    348 Aufrufe
    FrankMF
    Nach einem kurzen Test denke ich, das für das Projekt noch eine Menge Arbeit wartet. Verschlüsselte Installation Geht nicht, nach Reboot klappt die Passwortabfrage nicht Unverschlüsselte Installation Ok, nachdem ich dann die Zeichensatzprobleme im Griff hatte, warum bekommt man das eigentlich nicht in den Griff?, hatte ich nach der zweiten Installation eine funktionierende Installation. Kurz Fazit Dringend den Installer überarbeiten. Die Ubuntu Installation funktioniert auf dem Rechner problemlos. Der Desktop gefällt mir auf den ersten Blick ganz gut. Kein Wunder, man fühlt sich ja sofort zu Hause Aktuell in meinen Augen produktiv nicht einsetzbar! Und HiDPi habe ich noch gar nicht getestet...
  • ClusterSSH

    Angeheftet Linux linux
    4
    1
    0 Stimmen
    4 Beiträge
    1k Aufrufe
    FrankMF
    Mal wieder lange dran rumgefummelt, bis es passte. I have figured out how to use any font in xterm. So for the case of the mentioned Inconsolata font size 14, the following works: Add these 2 lines into ~/.Xresources (create it if it does not exist) XTermfaceName: Inconsolata XTermfaceSize: 14 Then, tell xterm to use this file: export XENVIRONMENT="${HOME}/.Xresources" Preferably add this export into .bashrc, so that it is persistent. comment out the font settings in ~/.clusterssh/config, if it exists: # terminal_font=6x13 Quelle: https://unix.stackexchange.com/questions/230106/cluster-ssh-specify-terminal-font
  • Debian 10.4 released und Wireguard kaputt :(

    Linux linux wireguard
    1
    0 Stimmen
    1 Beiträge
    282 Aufrufe
    Niemand hat geantwortet
  • checkmk - Dockerinstallation

    Verschoben checkmk checkmk linux
    9
    2
    0 Stimmen
    9 Beiträge
    1k Aufrufe
    FrankMF
    Und noch was Wichtiges. [image: 1628408271316-6777da6e-3b4f-41b9-bf6e-26496ae67cd8-grafik.png] Damit sichert man den Datenaustausch ab. Kapitel 7.4. Inbuilt encryption Den Ordner findet man hier -> /etc/check_mk/encryption.cfg