Skip to content

Debian 13 - Trixie

Linux
1 1 181
  • Minio - Objektspeicher selbst gehostet

    Linux minio linux restic
    1
    1
    0 Stimmen
    1 Beiträge
    162 Aufrufe
    Niemand hat geantwortet
  • Nextcloud - Upgrade Hub 9 (30.0.0)

    Nextcloud nextcloud linux
    3
    2
    0 Stimmen
    3 Beiträge
    1k Aufrufe
    FrankMF
    Ich habe dann mal weitergesucht, dank ein paar Tipps aus dem Fediverse, sehe ich jetzt was heller https://chaos.social/@towo/113152384137718991 Nachdem ich dann ein paar Apps gefunden und installiert hatte AppAPI Flow tauchte dann im Benutzermenü, rechts oben, folgendes auf. [image: 1726992766346-bildschirmfoto_20240922_101125.png] Das Interessante ist der Menüpunkt Externe Apps. Nun sollte ich diese Funktion verstanden haben. Das Nextcloud Team integriert also diese Windmill App via Docker Container und greift dann darauf zu. In der Videopräsentation war doch von in Nextcloud integriert die Werbeansprache!? Ein Docker Container ist für mich keine Integration. Ich habe einige rudimentäre Kenntnisse von Docker, ausschließlich lokal. Aber, ich komme nicht auf die Idee das auf einem produktiven Server zu installieren. Somit kann ich das Testen hier beenden und die Apps alle wieder deinstallieren. Jetzt habe ich noch im Kopf, ob man das mal mit einem Nextcloud-AIO testen soll? Natürlich auf einem Testsystem. https://github.com/nextcloud/all-in-one?tab=readme-ov-file#how-to-use-this
  • EndeavourOS - ein Test

    Linux endeavouros linux
    12
    0 Stimmen
    12 Beiträge
    516 Aufrufe
    FrankMF
    Ich möchte aus Fairness Gründen hier festhalten, das die Probleme mit dem Standby in Endeavour vermutlich kein Problem der Distrubution sind. Bitte dazu folgenden Beitrag von mir lesen. https://linux-nerds.org/topic/1397/debian-bookworm-12-test/3
  • 10G

    Linux 10g linux
    2
    0 Stimmen
    2 Beiträge
    202 Aufrufe
    FrankMF
    Bedingt durch ein paar Probleme mit der Forensoftware, habe ich einen kleinen Datenverlust erlitten. Dazu gehören auch hier einige Beiträge. Dann versuche ich das mal zu rekonstruieren. Oben hatten wir das SFP+ Modul ja getestet. Als nächsten Schritt habe ich die ASUS XG-C100F 10G SFP+ Netzwerkkarte in meinen Hauptrechner verbaut. [image: 1635752117002-20211028_162455_ergebnis.jpg] Die Verbindung zum Zyxel Switch erfolgt mit einem DAC-Kabel. Im Video zum Zyxel Switch wurde schön erklärt, das die DAC Verbindung stromsparender als RJ45 Adapter sind. Somit fiel die Wahl auf die DAC Verbindungen. Hier nochmal das Video. https://www.youtube.com/watch?v=59I-RlliRms So sieht so ein DAC Verbindungskabel aus. Die SFP+ Adapter sind direkt daran montiert. [image: 1635752308951-20211028_170118_ergebnis.jpg] ethtool root@frank-MS-7C37:/home/frank# ethtool enp35s0 Settings for enp35s0: Supported ports: [ FIBRE ] Supported link modes: 100baseT/Full 1000baseT/Full 10000baseT/Full 2500baseT/Full 5000baseT/Full Supported pause frame use: Symmetric Receive-only Supports auto-negotiation: Yes Supported FEC modes: Not reported Advertised link modes: 100baseT/Full 1000baseT/Full 10000baseT/Full 2500baseT/Full 5000baseT/Full Advertised pause frame use: Symmetric Advertised auto-negotiation: Yes Advertised FEC modes: Not reported Speed: 10000Mb/s Duplex: Full Port: FIBRE PHYAD: 0 Transceiver: internal Auto-negotiation: on Supports Wake-on: pg Wake-on: g Current message level: 0x00000005 (5) drv link Link detected: yes iperf3 ----------------------------------------------------------- Server listening on 5201 ----------------------------------------------------------- Accepted connection from 192.168.3.207, port 44570 [ 5] local 192.168.3.213 port 5201 connected to 192.168.3.207 port 44572 [ ID] Interval Transfer Bitrate Retr Cwnd [ 5] 0.00-1.00 sec 1.10 GBytes 9.43 Gbits/sec 46 1.59 MBytes [ 5] 1.00-2.00 sec 1.10 GBytes 9.42 Gbits/sec 0 1.60 MBytes [ 5] 2.00-3.00 sec 1.10 GBytes 9.42 Gbits/sec 3 1.60 MBytes [ 5] 3.00-4.00 sec 1.10 GBytes 9.42 Gbits/sec 0 1.60 MBytes [ 5] 4.00-5.00 sec 1.10 GBytes 9.42 Gbits/sec 0 1.61 MBytes [ 5] 5.00-6.00 sec 1.10 GBytes 9.42 Gbits/sec 0 1.63 MBytes [ 5] 6.00-7.00 sec 1.10 GBytes 9.42 Gbits/sec 0 1.63 MBytes [ 5] 7.00-8.00 sec 1.09 GBytes 9.41 Gbits/sec 0 1.68 MBytes [ 5] 8.00-9.00 sec 1.10 GBytes 9.42 Gbits/sec 0 1.68 MBytes [ 5] 9.00-10.00 sec 1.10 GBytes 9.42 Gbits/sec 0 1.68 MBytes [ 5] 10.00-10.02 sec 22.5 MBytes 9.45 Gbits/sec 0 1.68 MBytes - - - - - - - - - - - - - - - - - - - - - - - - - [ ID] Interval Transfer Bitrate Retr [ 5] 0.00-10.02 sec 11.0 GBytes 9.42 Gbits/sec 49 sender
  • Hetzner Cloud Server auf Debian 11 upgraden

    Linux bullseye debian
    3
    0 Stimmen
    3 Beiträge
    2k Aufrufe
    M
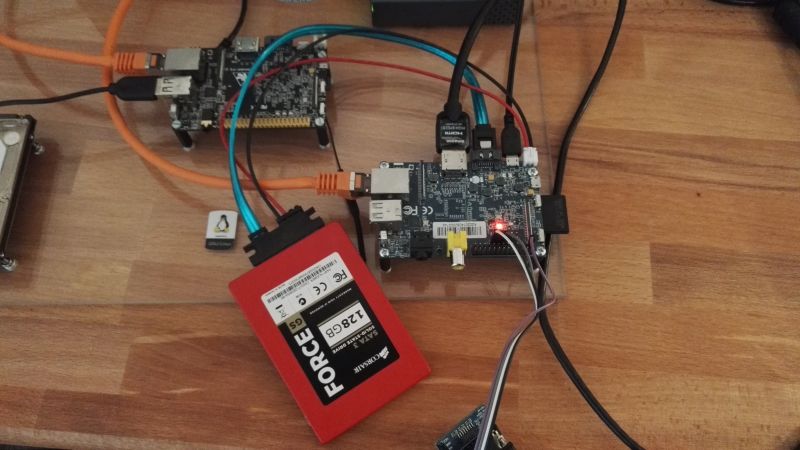
    @frankm Habe neulich auch einen meiner rockpro64 neu mit Debian 11 installiert, und dabei auch die festplatte (NVMe eigentlich) verschlüsselt. War mir erst unsicher das ich dann immer eine serielle Console brauch bei reboot. Man kann aber auch dropbear (SSH server) in die initram integrieren und dann während das booten den Server erreichen und die Passphrase für das Laufwerk eingeben. Diese 2 links waren hilfreich. https://salsa.debian.org/debian/dropbear/blob/debian/2018.76-5/debian/README.initramfs https://unix.stackexchange.com/questions/411945/luks-ssh-unlock-strange-behaviour-invalid-authorized-keys-file M
  • Vorstellung Ubiquiti ER-X

    Verschoben OpenWRT & Ubiquiti ER-X openwrt linux er-x
    1
    1
    0 Stimmen
    1 Beiträge
    397 Aufrufe
    Niemand hat geantwortet
  • Cockpit

    Linux linux
    1
    1
    0 Stimmen
    1 Beiträge
    267 Aufrufe
    Niemand hat geantwortet
  • Restic - forget --keep-last 3 --prune

    Restic linux restic
    2
    0 Stimmen
    2 Beiträge
    667 Aufrufe
    FrankMF
    Ich habe mich damit noch ein wenig beschäftigt, die letzten drei zu behalten, ist nicht so optimal. Da es viele Optionen bei dem Befehl gibt, hier ein Ausschnitt Flags: -l, --keep-last n keep the last n snapshots -H, --keep-hourly n keep the last n hourly snapshots -d, --keep-daily n keep the last n daily snapshots -w, --keep-weekly n keep the last n weekly snapshots -m, --keep-monthly n keep the last n monthly snapshots -y, --keep-yearly n keep the last n yearly snapshots habe ich das ein wenig so angepasst, das ich denke es passt für mich. restic --password-file /root/passwd -r /media/NAS_neu/Restic/Home/ forget --keep-last 3 --keep-monthly 3 --prune Damit behalte ich auch die jeweils eines pro Monat. Und die letzten drei. Das sieht dann so aus. root@debian:~# ./backup2.sh repository 2f3f6147 opened successfully, password is correct Files: 38 new, 100 changed, 13268 unmodified Dirs: 0 new, 1 changed, 0 unmodified Added to the repo: 10.166 GiB processed 13406 files, 50.324 GiB in 3:24 snapshot 849f614c saved repository 2f3f6147 opened successfully, password is correct Applying Policy: keep the last 3 snapshots, 3 monthly snapshots snapshots for (host [debian], paths [/home/frank]): keep 5 snapshots: ID Time Host Tags Reasons Paths ------------------------------------------------------------------------------------ a7251cfd 2019-11-28 17:00:01 debian monthly snapshot /home/frank 283d4027 2019-12-31 17:00:01 debian monthly snapshot /home/frank ae2b96ec 2020-01-01 21:47:46 debian last snapshot /home/frank 079e00a6 2020-01-02 17:00:01 debian last snapshot /home/frank 849f614c 2020-01-03 21:08:45 debian last snapshot /home/frank monthly snapshot ------------------------------------------------------------------------------------ 5 snapshots remove 26 snapshots: ID Time Host Tags Paths ------------------------------------------------------------------ 896f16c2 2019-11-07 22:23:40 debian /home/frank b21bcf6d 2019-11-11 17:00:01 debian /home/frank f89248fb 2019-11-12 17:00:01 debian /home/frank 123ab546 2019-11-13 17:00:01 debian /home/frank b82d87d0 2019-11-18 17:00:01 debian /home/frank 040b0ab7 2019-11-19 17:00:01 debian /home/frank 7221d8ef 2019-11-20 17:00:01 debian /home/frank 84132a25 2019-11-21 17:00:01 debian /home/frank b558a52c 2019-11-25 17:00:01 debian /home/frank e5cc0c3e 2019-12-02 17:00:01 debian /home/frank 22423fa5 2019-12-03 17:00:01 debian /home/frank 39df1ab9 2019-12-04 17:00:01 debian /home/frank 98843457 2019-12-05 17:00:01 debian /home/frank b0cdd4b6 2019-12-09 17:00:01 debian /home/frank 828414f9 2019-12-10 17:00:01 debian /home/frank e34a27c3 2019-12-11 17:00:01 debian /home/frank 6e488c3b 2019-12-12 17:00:01 debian /home/frank 17898403 2019-12-16 17:00:01 debian /home/frank 1973305a 2019-12-17 17:00:01 debian /home/frank 9553bedd 2019-12-18 17:00:01 debian /home/frank fedf749d 2019-12-19 17:00:01 debian /home/frank 8e7cb876 2019-12-23 17:00:01 debian /home/frank 0bd0d102 2019-12-25 17:00:01 debian /home/frank 13d348b0 2019-12-26 17:00:01 debian /home/frank c7d960aa 2019-12-30 17:00:01 debian /home/frank f6ea9118 2020-01-01 17:00:01 debian /home/frank ------------------------------------------------------------------ 26 snapshots 26 snapshots have been removed, running prune counting files in repo building new index for repo [0:35] 100.00% 7806 / 7806 packs repository contains 7806 packs (46537 blobs) with 41.110 GiB processed 46537 blobs: 0 duplicate blobs, 0 B duplicate load all snapshots find data that is still in use for 5 snapshots [0:01] 100.00% 5 / 5 snapshots found 32654 of 46537 data blobs still in use, removing 13883 blobs will remove 0 invalid files will delete 715 packs and rewrite 752 packs, this frees 5.027 GiB [2:28] 100.00% 752 / 752 packs rewritten counting files in repo [0:01] 100.00% 6571 / 6571 packs finding old index files saved new indexes as [d137b425 f7caee99 a6e9711a] remove 35 old index files [1:13] 100.00% 1467 / 1467 packs deleted done using temporary cache in /tmp/restic-check-cache-916655151 repository 2f3f6147 opened successfully, password is correct created new cache in /tmp/restic-check-cache-916655151 create exclusive lock for repository load indexes check all packs check snapshots, trees and blobs read all data [7:47] 100.00% 6571 / 6571 items duration: 7:47 no errors were found root@debian:~# Am Ende seht ihr noch, wie Restic alle Files testet. Mein Script sieht jetzt so aus. #!/bin/bash # Script um mit Restic Daten automatisiert zu sichern! # Dient zum Sichern der Homepartition auf dem ROCKPro64 NAS! # Was soll gesichert werden? backup_pfad=/home/frank # Programm Start restic --password-file /root/passwd -r /media/NAS_neu/Restic/Home/ backup $backup_pfad --exclude-file=excludes.txt restic --password-file /root/passwd -r /media/NAS_neu/Restic/Home/ forget --keep-last 3 --keep-monthly 3 --prune # Testen restic --password-file /root/passwd -r /media/NAS_neu/Restic/Home/ check --read-data Das dann schön mit einem Cronjob laufen lassen und die Datensicherung ist erledigt