Skip to content

Hetzner - Backupspace - Borgbackup

Linux
4 1 1.1k
  • Mein Server ist von Hetzner, dort kann man Backupspace dazu buchen, teilweise ist er auch mit drin. Dann wollen wir das mal Testen.

    Die Anleitung

    Ich hatte erst eine andere Anleitung von Hetzner, wo das mit dem Port 23 nicht drin stand. Hat dann was länger gedauert, bis es ohne Passwort ging 😉 Aber, am Ende ging es dann mit

     sftp -P 23 u123456@u123456.your-backup.de
    

    Nun kann man mittels Borgbackup Daten verschlüsselt dort ablegen.

    INIT

     borg init --encryption=repokey ssh://u123456@u123456.your-backup.de:23/./backup
     Enter new passphrase: 
     Enter same passphrase again: 
     Do you want your passphrase to be displayed for verification? [yN]: N
     
     By default repositories initialized with this version will produce security
     errors if written to with an older version (up to and including Borg 1.0.8).
     
     If you want to use these older versions, you can disable the check by running:
     borg upgrade --disable-tam ssh://u123456@u123456.your-backup.de:23/./backup
     
     See https://borgbackup.readthedocs.io/en/stable/changes.html#pre-1-0-9-manifest-spoofing-vulnerability for details about the security implications.
     
     IMPORTANT: you will need both KEY AND PASSPHRASE to access this repo!
     Use "borg key export" to export the key, optionally in printable format.
     Write down the passphrase. Store both at safe place(s).
    

    CREATE

    borg create ssh://u123456@u123456.your-backup.de:23/./backup::initial /backup
       Enter passphrase for key ssh://u123456@u123456.your-backup.de:23/./backup: 
    

    Wenn man sehen will, was passiert kann man das so machen.

    borg create --list ssh://u123456@u123456.your-backup.de:23/./backup::initial /backup
    

    Dann zeigt Borg an was er die ganze Zeit macht.

    LIST

    borg list ssh://u123456@u123456.your-backup.de:23/./backup::initial
    

    Kleine Ergänzung. Das Backup heißt vm1

     borg list ssh://u123456@u123456.your-backup.de:23/./backup/vm1
    

    Das würde jetzt alle Backups auflisten.

    Der Inhalt würde ein Backup mit dem Namen vm1-2019-09-23T09:00:02 enthalten.

    borg list ssh://u123456@u123456.your-backup.de:23/./backup/vm1::vm1-2019-09-23T09:00:02
    

    Dann zeigt Borg den Inhalt des Backups an.

    DELETE

    borg delete ssh://u123456@u123456.your-backup.de:23/./backup::initial
    

    Anleitung

    Der Link zur Anleitung von Borgbackup

    Jetzt das Ganze noch automatisieren, das alle paar Tage die Daten automatisch gesichert werden.

  • Zum Automatisieren, das Script hier nehmen.

    Das ganz anpassen und einen crontab anlegen. Fertig! Sieht dann so aus.

    root@ ~ # ./borg.sh
    
    Sat 07 Sep 2019 04:24:40 PM CEST Starting backup
    
    Creating archive at "ssh://u123456@u123456.your-backup.de:23/./backups/01::01-2019-09-07T16:24:40"
    A /backup/dump/vzdump-qemu-103-2019_09_06-00_00_30.log
    ------------------------------------------------------------------------------
    Archive name: 01-2019-09-07T16:24:40
    Archive fingerprint: f66f5a895cd7xxxxxxxxxxxxxxxxxxx6ad974aec87bd
    Time (start): Sat, 2019-09-07 16:25:22
    Time (end):   Sat, 2019-09-07 16:25:22
    Duration: 0.14 seconds
    Number of files: 72
    Utilization of max. archive size: 0%
    ------------------------------------------------------------------------------
                           Original size      Compressed size    Deduplicated size
    This archive:              109.88 GB            108.55 GB                979 B
    All archives:              616.83 GB            610.37 GB            107.94 GB
    
                           Unique chunks         Total chunks
    Chunk index:                   41509               236521
    ------------------------------------------------------------------------------
    terminating with success status, rc 0
    
    Sat 07 Sep 2019 04:25:34 PM CEST Pruning repository
    
    Keeping archive: 01-2019-09-07T16:24:40           Sat, 2019-09-07 16:25:22 [f66f5a895cd7dc8f0cecxxxxxxxxxxxxxxxxxxxxxx76ad974aec87bd]
    Pruning archive: 01-2019-09-07T16:18:34           Sat, 2019-09-07 16:18:49 [c6803a17a72d5246bxxxxxxxxxxxxxxxxxxxxxxxxxx61d80b5c9210b6a00c11b] (1/1)
    terminating with success status, rc 0
    
  • Heute noch nachgesehen, ob der cron seine Arbeit gemacht hat. War alles erfolgreich 😉 Damit ist das kleine Projekt dann erfolgreich beendet. Die VMs werden jetzt einmal die Woche auf den externen Backup-Space, verschlüsselt abgelegt.

  • Ok, da gibt es doch wohl noch ein kleines Problem 🙂

    Hetzner hat die Dienste migriert und ich war der Meinung, der Borg funktioniert nicht mehr. Ok, das hat er auch gemacht, aber der Grund wurde mir dann vom Support mitgeteilt, Der Backup Space ist voll. Huch, was läuft denn da falsch!?

    Ich konnte den Backup Space noch per SFTP erreichen, Borg gab aber immer eine merkwürdige Fehlermeldung heraus.
    Also aufpassen, wenn ihr mal Probleme habt, schaut mal nach ob ihr noch genug Platz habt 😉

    Und jetzt muss ich das Script mal ein wenig überarbeiten, irgendwas läuft da nicht so, wie ich mir das vorstelle.

  • Pycharm - Nach Stromausfall startet es nicht mehr.

    Linux pycharm linux
    1
    0 Stimmen
    1 Beiträge
    156 Aufrufe
    Niemand hat geantwortet
  • Ansible - Hetzner Server erstellen

    Verschoben Ansible ansible linux hcloud
    1
    3
    0 Stimmen
    1 Beiträge
    366 Aufrufe
    Niemand hat geantwortet
  • Debian 12 Bookworm - Release 12.1

    Linux debian linux
    1
    0 Stimmen
    1 Beiträge
    176 Aufrufe
    Niemand hat geantwortet
  • ZFS - Wichtige Befehle

    Linux zfs linux
    3
    0 Stimmen
    3 Beiträge
    1k Aufrufe
    FrankMF
    Heute mal drüber gestolpert, das es auch so was geben kann. root@pve2:~# zpool status pool: pool_NAS state: ONLINE status: Some supported and requested features are not enabled on the pool. The pool can still be used, but some features are unavailable. action: Enable all features using 'zpool upgrade'. Once this is done, the pool may no longer be accessible by software that does not support the features. See zpool-features(7) for details. scan: scrub repaired 0B in 00:20:50 with 0 errors on Sun Apr 13 00:44:51 2025 config: NAME STATE READ WRITE CKSUM pool_NAS ONLINE 0 0 0 mirror-0 ONLINE 0 0 0 ata-WDC_WDS100T1R0A-68A4W0_230520800733 ONLINE 0 0 0 ata-WDC_WDS100T1R0A-68A4W0_230520801376 ONLINE 0 0 0 errors: No known data errors Was machen? Als erstes mal ein Backup angestoßen. Danach root@pve2:~# zpool get all pool_NAS | grep feature pool_NAS feature@async_destroy enabled local pool_NAS feature@empty_bpobj active local pool_NAS feature@lz4_compress active local pool_NAS feature@multi_vdev_crash_dump enabled local pool_NAS feature@spacemap_histogram active local pool_NAS feature@enabled_txg active local pool_NAS feature@hole_birth active local pool_NAS feature@extensible_dataset active local pool_NAS feature@embedded_data active local pool_NAS feature@bookmarks enabled local pool_NAS feature@filesystem_limits enabled local pool_NAS feature@large_blocks enabled local pool_NAS feature@large_dnode enabled local pool_NAS feature@sha512 enabled local pool_NAS feature@skein enabled local pool_NAS feature@edonr enabled local pool_NAS feature@userobj_accounting active local pool_NAS feature@encryption enabled local pool_NAS feature@project_quota active local pool_NAS feature@device_removal enabled local pool_NAS feature@obsolete_counts enabled local pool_NAS feature@zpool_checkpoint enabled local pool_NAS feature@spacemap_v2 active local pool_NAS feature@allocation_classes enabled local pool_NAS feature@resilver_defer enabled local pool_NAS feature@bookmark_v2 enabled local pool_NAS feature@redaction_bookmarks enabled local pool_NAS feature@redacted_datasets enabled local pool_NAS feature@bookmark_written enabled local pool_NAS feature@log_spacemap active local pool_NAS feature@livelist enabled local pool_NAS feature@device_rebuild enabled local pool_NAS feature@zstd_compress enabled local pool_NAS feature@draid enabled local pool_NAS feature@zilsaxattr disabled local pool_NAS feature@head_errlog disabled local pool_NAS feature@blake3 disabled local pool_NAS feature@block_cloning disabled local pool_NAS feature@vdev_zaps_v2 disabled local Das kommt von neuen Funktionen, die zu ZFS hinzugefügt wurden und bei Erstellung des Pools nicht vorhanden waren. Dann upgraden wir mal root@pve2:~# zpool upgrade pool_NAS This system supports ZFS pool feature flags. Enabled the following features on 'pool_NAS': zilsaxattr head_errlog blake3 block_cloning vdev_zaps_v2 Kontrolle root@pve2:~# zpool status pool: pool_NAS state: ONLINE scan: scrub repaired 0B in 00:20:50 with 0 errors on Sun Apr 13 00:44:51 2025 config: NAME STATE READ WRITE CKSUM pool_NAS ONLINE 0 0 0 mirror-0 ONLINE 0 0 0 ata-WDC_WDS100T1R0A-68A4W0_230520800733 ONLINE 0 0 0 ata-WDC_WDS100T1R0A-68A4W0_230520801376 ONLINE 0 0 0 errors: No known data errors Features kontrollieren root@pve2:~# zpool get all pool_NAS | grep feature pool_NAS feature@async_destroy enabled local pool_NAS feature@empty_bpobj active local pool_NAS feature@lz4_compress active local pool_NAS feature@multi_vdev_crash_dump enabled local pool_NAS feature@spacemap_histogram active local pool_NAS feature@enabled_txg active local pool_NAS feature@hole_birth active local pool_NAS feature@extensible_dataset active local pool_NAS feature@embedded_data active local pool_NAS feature@bookmarks enabled local pool_NAS feature@filesystem_limits enabled local pool_NAS feature@large_blocks enabled local pool_NAS feature@large_dnode enabled local pool_NAS feature@sha512 enabled local pool_NAS feature@skein enabled local pool_NAS feature@edonr enabled local pool_NAS feature@userobj_accounting active local pool_NAS feature@encryption enabled local pool_NAS feature@project_quota active local pool_NAS feature@device_removal enabled local pool_NAS feature@obsolete_counts enabled local pool_NAS feature@zpool_checkpoint enabled local pool_NAS feature@spacemap_v2 active local pool_NAS feature@allocation_classes enabled local pool_NAS feature@resilver_defer enabled local pool_NAS feature@bookmark_v2 enabled local pool_NAS feature@redaction_bookmarks enabled local pool_NAS feature@redacted_datasets enabled local pool_NAS feature@bookmark_written enabled local pool_NAS feature@log_spacemap active local pool_NAS feature@livelist enabled local pool_NAS feature@device_rebuild enabled local pool_NAS feature@zstd_compress enabled local pool_NAS feature@draid enabled local pool_NAS feature@zilsaxattr enabled local pool_NAS feature@head_errlog active local pool_NAS feature@blake3 enabled local pool_NAS feature@block_cloning enabled local pool_NAS feature@vdev_zaps_v2 enabled local So, alle neuen Features aktiviert. Jetzt kann der Pool weiterhin seine Arbeit machen.
  • Restic v0.12.0 released

    Restic linux restic
    1
    0 Stimmen
    1 Beiträge
    260 Aufrufe
    Niemand hat geantwortet
  • Debian 10 Buster 10.5 released

    Linux debian linux
    1
    0 Stimmen
    1 Beiträge
    242 Aufrufe
    Niemand hat geantwortet
  • LUKS verschlüsselte Platte mounten

    Linux linux
    2
    1
    0 Stimmen
    2 Beiträge
    1k Aufrufe
    FrankMF
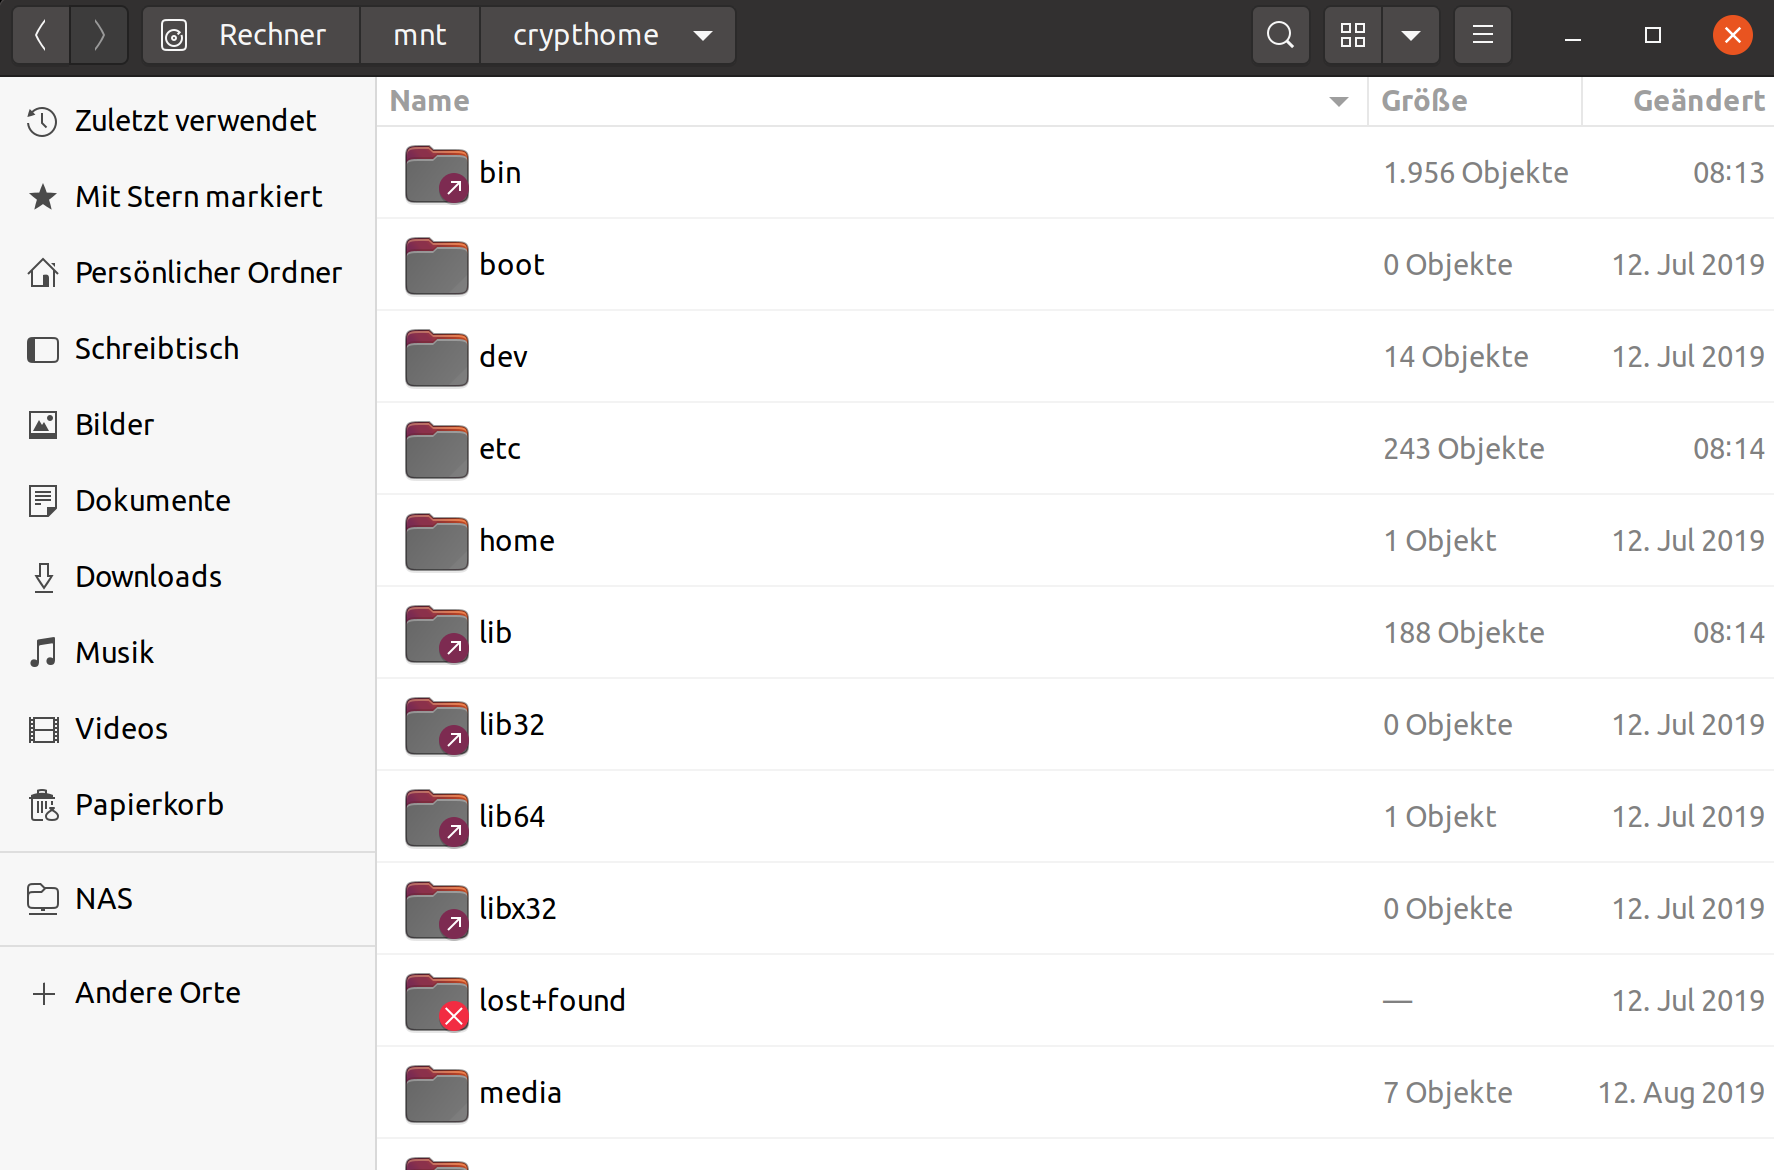
    So, jetzt das ganze noch einen Ticken komplizierter Ich habe ja heute, für eine Neuinstallation von Ubuntu 20.04 Focal eine zweite NVMe SSD eingebaut. Meinen Bericht zu dem Thema findet ihr hier. Aber, darum soll es jetzt hier nicht gehen. Wir haben jetzt zwei verschlüsselte Ubuntu NVMe SSD Riegel im System. Jetzt klappt die ganze Sache da oben nicht mehr. Es kommt immer einen Fehlermeldung. unbekannter Dateisystemtyp „LVM2_member“. Ok, kurz googlen und dann findet man heraus, das es nicht klappen kann, weil beide LVM Gruppen, den selben Namen benutzen. root@frank-MS-7C37:/mnt/crypthome/root# vgdisplay --- Volume group --- VG Name vgubuntu2 System ID Format lvm2 Metadata Areas 1 Metadata Sequence No 4 VG Access read/write VG Status resizable MAX LV 0 Cur LV 2 Open LV 1 Max PV 0 Cur PV 1 Act PV 1 VG Size <464,53 GiB PE Size 4,00 MiB Total PE 118919 Alloc PE / Size 118919 / <464,53 GiB Free PE / Size 0 / 0 VG UUID lpZxyv-cNOS-ld2L-XgvG-QILa-caHS-AaIC3A --- Volume group --- VG Name vgubuntu System ID Format lvm2 Metadata Areas 1 Metadata Sequence No 3 VG Access read/write VG Status resizable MAX LV 0 Cur LV 2 Open LV 2 Max PV 0 Cur PV 1 Act PV 1 VG Size <475,71 GiB PE Size 4,00 MiB Total PE 121781 Alloc PE / Size 121781 / <475,71 GiB Free PE / Size 0 / 0 VG UUID jRYTXL-zjpY-lYr6-KODT-u0LJ-9fYf-YVDna7 Hier oben sieht man das schon mit geändertem Namen. Der VG Name muss unterschiedlich sein. Auch dafür gibt es ein Tool. root@frank-MS-7C37:/mnt/crypthome/root# vgrename --help vgrename - Rename a volume group Rename a VG. vgrename VG VG_new [ COMMON_OPTIONS ] Rename a VG by specifying the VG UUID. vgrename String VG_new [ COMMON_OPTIONS ] Common options for command: [ -A|--autobackup y|n ] [ -f|--force ] [ --reportformat basic|json ] Common options for lvm: [ -d|--debug ] [ -h|--help ] [ -q|--quiet ] [ -v|--verbose ] [ -y|--yes ] [ -t|--test ] [ --commandprofile String ] [ --config String ] [ --driverloaded y|n ] [ --nolocking ] [ --lockopt String ] [ --longhelp ] [ --profile String ] [ --version ] Use --longhelp to show all options and advanced commands. Das muss dann so aussehen! vgrename lpZxyv-cNOS-ld2L-XgvG-QILa-caHS-AaIC3A vgubuntu2 ACHTUNG Es kann zu Datenverlust kommen, also wie immer, Hirn einschalten! Ich weiß, das die erste eingebaute Platte mit der Nummer /dev/nvme0n1 geführt wird. Die zweite, heute verbaute, hört dann auf den Namen /dev/nvme1n1. Die darf ich nicht anpacken, weil sonst das System nicht mehr startet. /etc/fstab # /etc/fstab: static file system information. # # Use 'blkid' to print the universally unique identifier for a # device; this may be used with UUID= as a more robust way to name devices # that works even if disks are added and removed. See fstab(5). # # <file system> <mount point> <type> <options> <dump> <pass> /dev/mapper/vgubuntu-root / ext4 errors=remount-ro 0 1 # /boot was on /dev/nvme1n1p2 during installation UUID=178c7e51-a1d7-4ead-bbdf-a956eb7b754f /boot ext4 defaults 0 2 # /boot/efi was on /dev/nvme0n1p1 during installation UUID=7416-4553 /boot/efi vfat umask=0077 0 1 /dev/mapper/vgubuntu-swap_1 none swap sw 0 0 Jo, wenn jetzt die Partition /dev/mapper/vgubuntu2-root / anstatt /dev/mapper/vgubuntu-root / heißt läuft nichts mehr. Nur um das zu verdeutlichen, auch das könnte man problemlos reparieren. Aber, ich möchte nur warnen!! Nachdem die Änderung durchgeführt wurde, habe ich den Rechner neugestartet. Puuh, Glück gehabt, richtige NVMe SSD erwischt Festplatte /dev/mapper/vgubuntu2-root: 463,58 GiB, 497754832896 Bytes, 972177408 Sektoren Einheiten: Sektoren von 1 * 512 = 512 Bytes Sektorgröße (logisch/physikalisch): 512 Bytes / 512 Bytes E/A-Größe (minimal/optimal): 512 Bytes / 512 Bytes Nun können wir die Platte ganz normal, wie oben beschrieben, mounten. Nun kann ich noch ein paar Dinge kopieren
  • SSHFS

    Linux linux
    1
    0 Stimmen
    1 Beiträge
    362 Aufrufe
    Niemand hat geantwortet