Skip to content

Python3 - VSCodium Language Settings

Python3
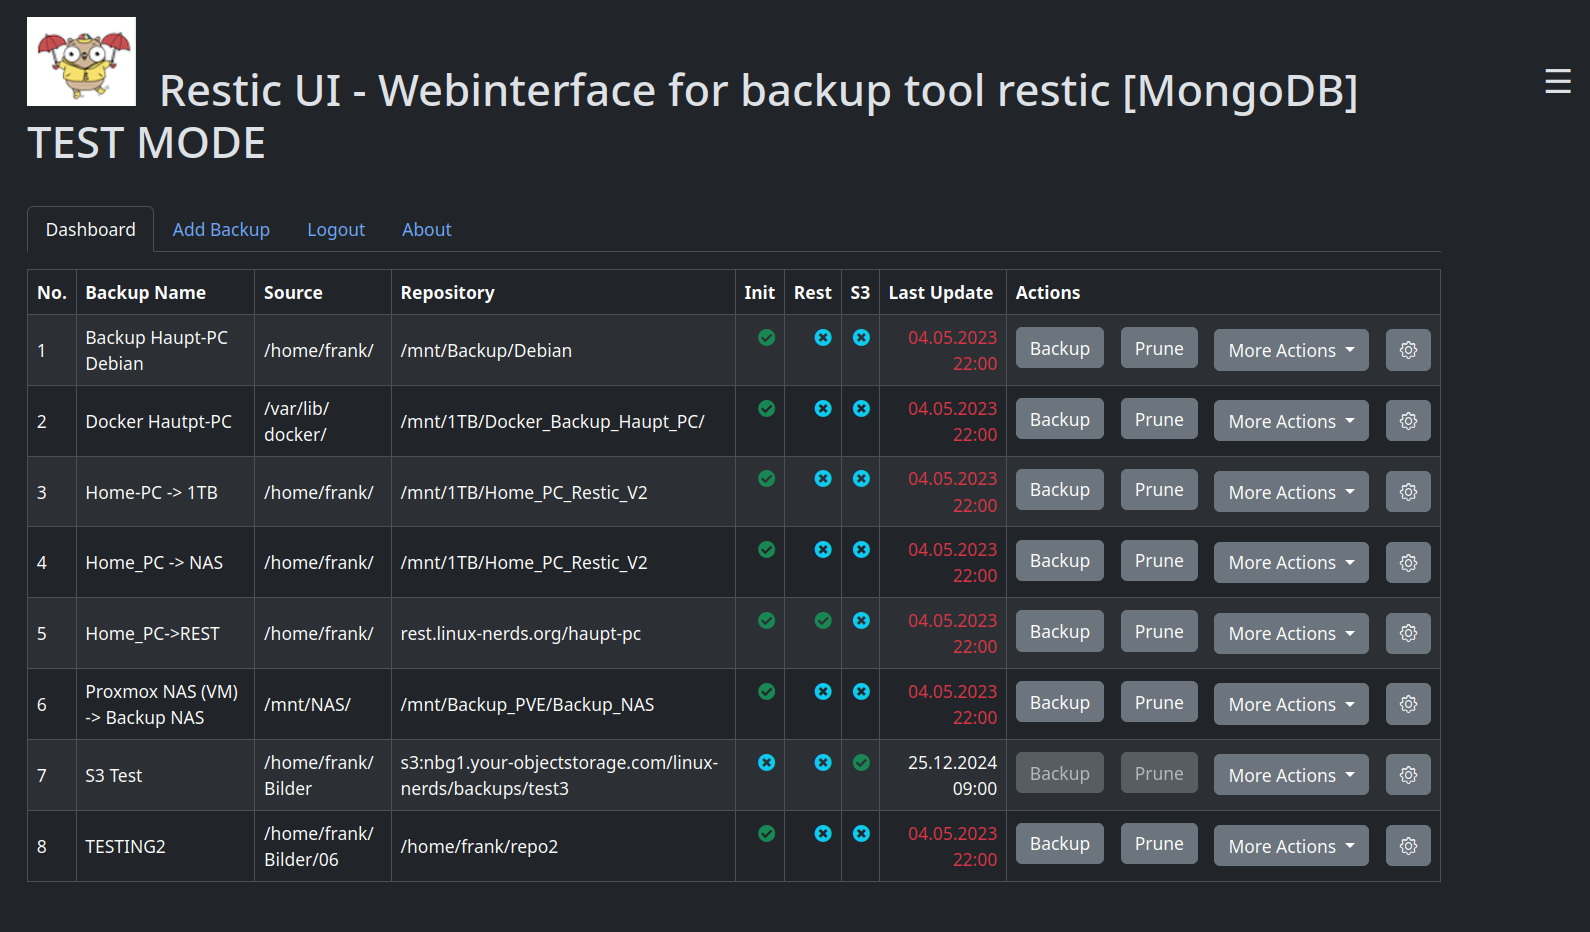
  • Heute stand ich mal wieder vor einem kleinen Problem.

    af55c0ce-9250-46e8-ab9b-4e040c9943e5-grafik.png

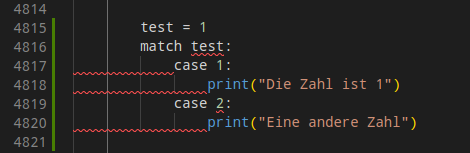
    Meine eingesetzte Python Version

    (restic-ui-public_3_10) [frankm@frank-ms7c92 restic-ui-public]$ python -V
    Python 3.10.5
    

    Somit sollte das eigentlich unterstützt sein. Ein wenig Suchen im Netz und ich wusste wo man da ran muss.

    aabc955b-a2cf-4db6-b8cb-882d534f7f3b-grafik.png

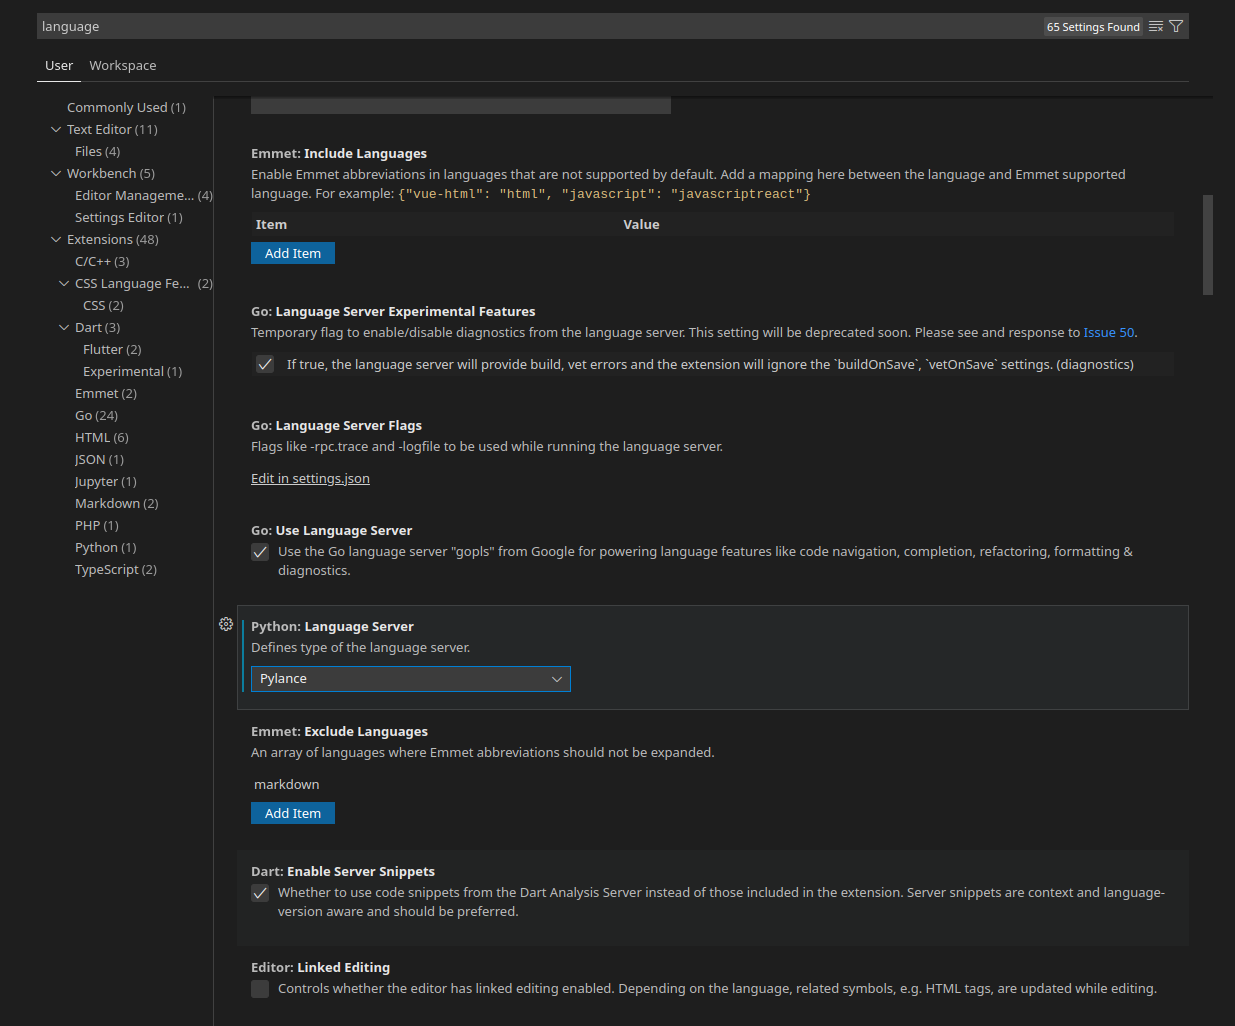
    Wenn es nicht sofort geht, VSCodium einmal neustarten.

    ad1a4558-fe69-42fb-9f12-4b947365c663-grafik.png

  • Danach geht Microsofts IntelliSense nicht mehr. Ich habe gelesen, das das von M$ für Nicht-VSCode Instanzen geblockt wird. Kann ich mir gar nicht vorstellen, das das wahr ist!?

  • Ich habe da jetzt gestern stundenlang mit rum gespielt, insbesondere Deinstallation, Neuinstallation, VSCode Installation usw. Das ging einfach nicht.

    Irgendwo meine ich dann gelesen zu haben, das VSCode auf python 3.9 festgenagelt ist und deswegen so einige Dinge nicht gehen.

    Nagelt mich darauf nicht fest, ich bin in dieser Coding Welt kein Profi.

    Dann fiel mir ein, das ich schon vor einigen Monaten mal kurz einen Blick in Pycharm geworfen hatte. Gefiel mir damals gar nicht.

    Das habe ich heute mal auf die Platte geworfen um zu schauen, ob das vernünftig mit dem o.g. Problem umgehen kann.

    6f1c3906-05a3-4126-81d4-7fdf6aa27faa-grafik.png

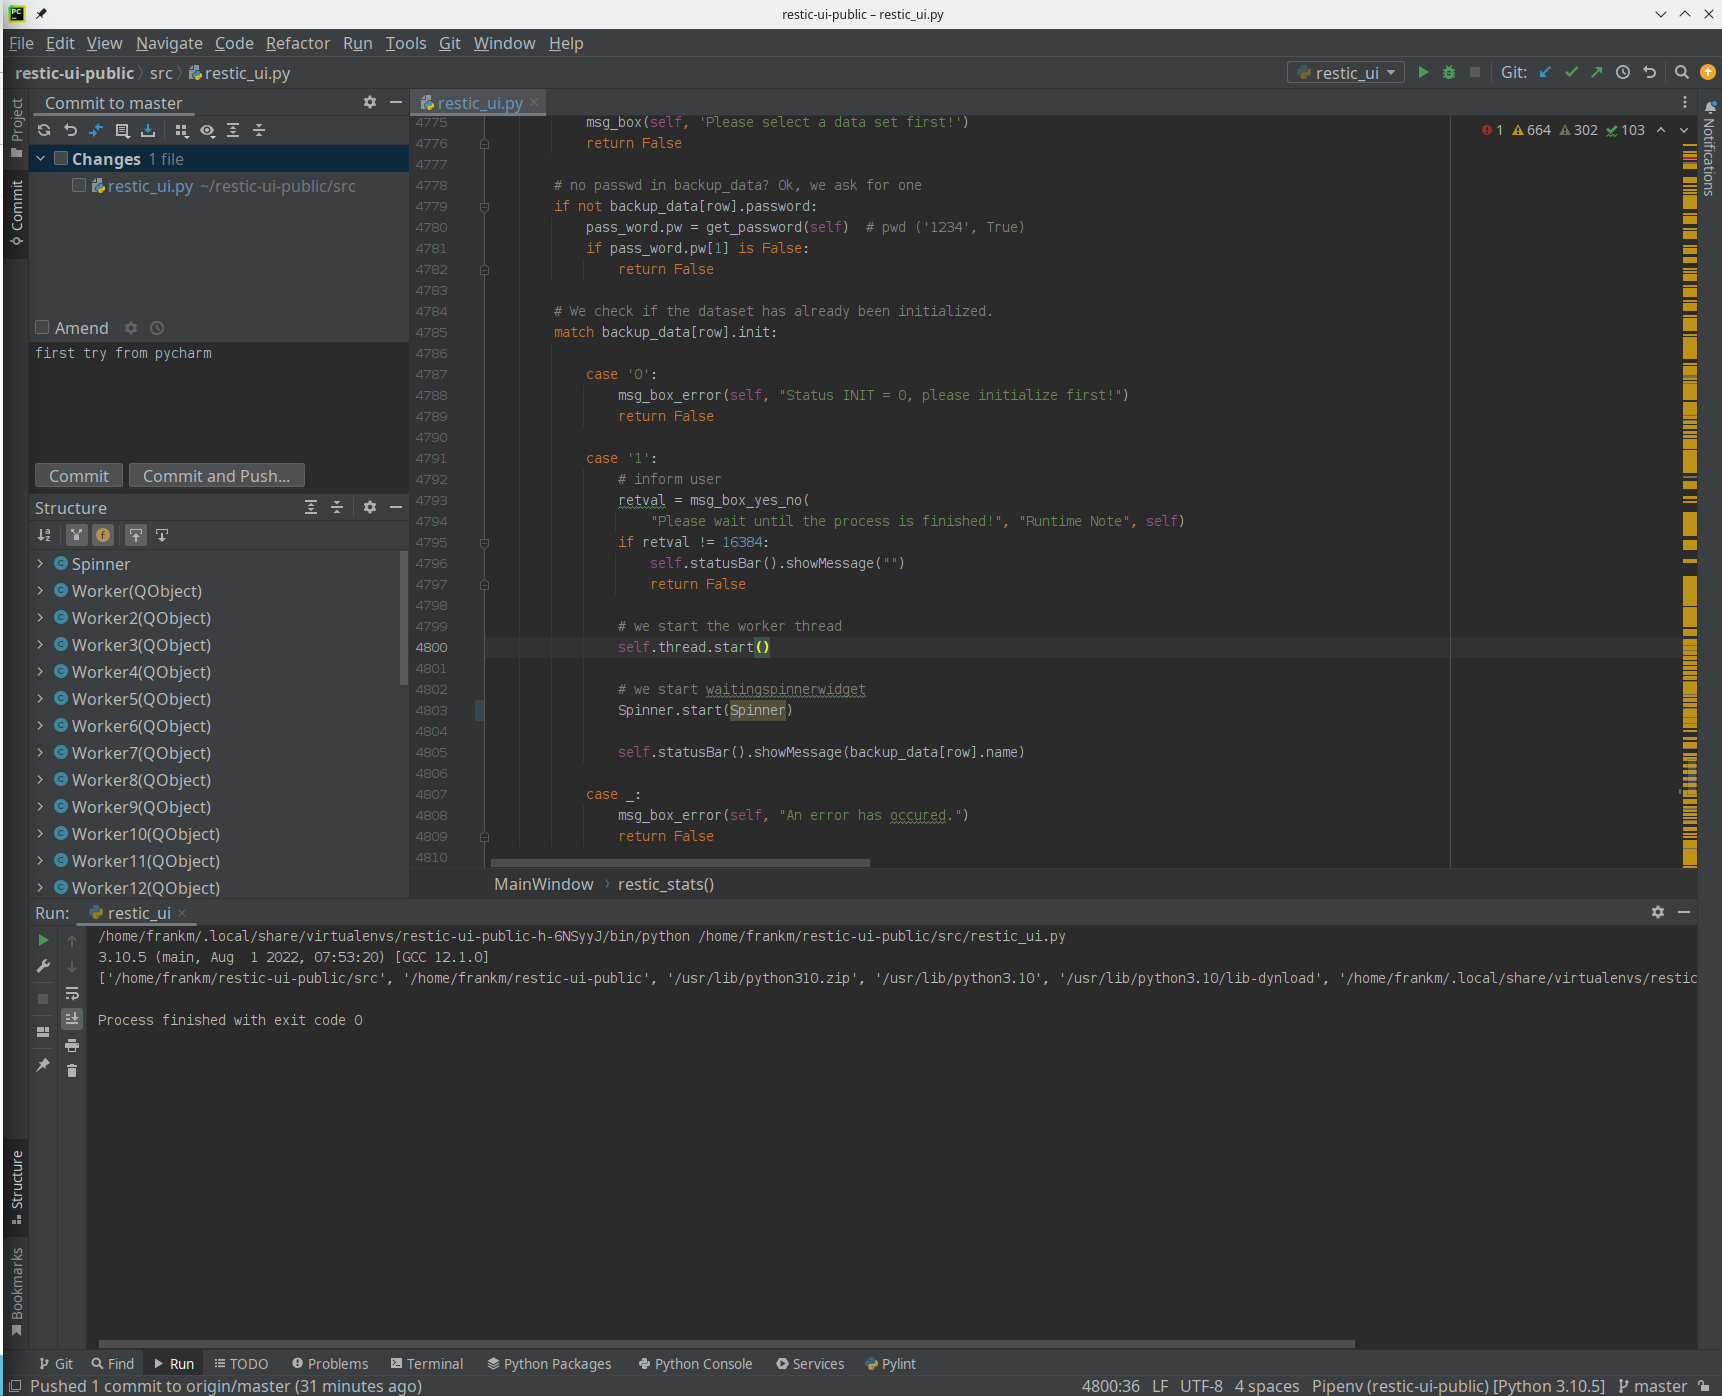
    Puuuh, da kann man ja noch viel mehr einstellen als bei VSCode, oder mindestens ähnlich viel. Das kann einen ganz schön überfordern. Also Stück für Stück die nächsten Tage.

    Was ist mir positiv aufgefallen?

    Wenn ich VSCodium neu installiert habe, habe ich unheimlich mit Python Versionen, pipenv usw. zu kämpfen gehabt. Bis da mein Projekt wieder lief, konnte schon mal was Zeit vergehen.

    Mit Pycharm Ordner ausgewählt, angeklickt das man dem Coder vertraut. Noch eine Python Version ausgewählt, danach fragt er das er eine pipenv Umgebung gefunden hat und diese nutzen möchte. Ja angeklickt und fertig. Keine zwei Minuten und das Projekt lief wieder 🤓

    Erster Git Commit ging auch sofort und ohne Murren.

    Schon mal ganz viele Pluspunkte gesammelt.

    Was mich aktuell beschäftigt, ist der Tab Problems, da hatte ich vorher deutlich weniger. Da muss ich mich noch was einarbeiten und schauen, wo man das alles einstellen kann.

    Ich halte euch auf dem Laufenden..

    Vielleicht fliegt ja das VSCo** Zeug runter!? Mal sehen..

  • FrankMF FrankM hat am auf dieses Thema verwiesen

  • 0 Stimmen
    5 Beiträge
    140 Aufrufe
    FrankMF

    Hab ChatGPT nochmal nach der Installation auf einem Production Server befragt.

    ChatGPT

    Certainly! Here's a short example of the steps you can follow to deploy a Flask application on a production server using Nginx and Gunicorn:

    Prepare your server:

    Set up a server (e.g., using a cloud provider like AWS, DigitalOcean, or a dedicated server) and ensure it has a clean, up-to-date installation of a Linux distribution (e.g., Ubuntu or CentOS).

    Install required software:

    Install necessary software packages on your server. You'll need Python, pip (Python package manager), Nginx, and Gunicorn. You can use your distribution's package manager (e.g., apt for Ubuntu or yum for CentOS) to install these dependencies.

    Deploy your Flask application:

    Copy your Flask application code and any required dependencies to your server.

    Set up a virtual environment (optional but recommended):

    Create a virtual environment for your Flask application to isolate its dependencies. You can use venv or virtualenv for this purpose.

    Install Flask and any required Python packages within your virtual environment:

    pip install flask

    Test your Flask application:

    Ensure your Flask application runs correctly within your server's virtual environment.

    Configure Gunicorn:

    Create a Gunicorn configuration file (e.g., gunicorn_config.py) to specify the settings for running your Flask application. Here's a simple example: workers = 4 # Number of Gunicorn worker processes bind = '0.0.0.0:8000' # The address and port Gunicorn should listen on

    Start Gunicorn:

    Start Gunicorn with your Flask application: gunicorn -c gunicorn_config.py your_app:app

    Configure Nginx:

    Create an Nginx server block (often located in /etc/nginx/sites-available) to define how Nginx should handle incoming requests. Here's a simplified example: server { listen 80; server_name your_domain.com www.your_domain.com; location / { proxy_pass http://127.0.0.1:8000; # Pass requests to Gunicorn proxy_set_header Host $host; proxy_set_header X-Real-IP $remote_addr; } }

    Enable the Nginx server block and restart Nginx:

    sudo ln -s /etc/nginx/sites-available/your_config /etc/nginx/sites-enabled/ sudo nginx -t # Test Nginx configuration sudo systemctl restart nginx

    Configure your DNS:

    Point your domain name to your server's IP address.

    Secure your server (optional but recommended):

    Set up SSL/TLS certificates for your domain to enable HTTPS. You can use Let's Encrypt for free SSL certificates.

    Monitor your application:

    Set up monitoring tools and logs to keep track of your application's performance and troubleshoot any issues.

    These are the basic steps to deploy a Flask application on a production server with Nginx and Gunicorn. Please note that this is a simplified example, and there are many additional considerations, such as database configuration, security, and optimization, depending on your specific application and requirements. It's also important to keep your server and software up to date and follow security best practices to ensure the stability and security of your production environment.

    Das werde ich doch mal ausprobieren 😎

  • Python - Formatumwandlung str -> float

    Python3
    1
    0 Stimmen
    1 Beiträge
    161 Aufrufe
    Niemand hat geantwortet
  • Python - Frameworks

    Python3
    2
    0 Stimmen
    2 Beiträge
    76 Aufrufe
    FrankMF

    Und mal hier parken

  • 0 Stimmen
    7 Beiträge
    148 Aufrufe
    FrankMF

    Link Preview Image Merge branch 'master' into 'main' (45c83cd8) · Commits · Frank / restic_ui_pywebio · GitLab

    Fix some bugs See merge request Bullet64/restic_ui_pywebio!71

    favicon

    GitLab (gitlab.com)

  • Python - Dict -> JSON und umgekehrt

    Python3
    1
    0 Stimmen
    1 Beiträge
    192 Aufrufe
    Niemand hat geantwortet
  • ResticUI with PyWebIO - Repo

    PyWebIO
    1
    0 Stimmen
    1 Beiträge
    83 Aufrufe
    Niemand hat geantwortet
  • Python - Match-Case Statement

    Python3
    1
    0 Stimmen
    1 Beiträge
    83 Aufrufe
    Niemand hat geantwortet
  • Python und GUI

    Verschoben Python3
    1
    0 Stimmen
    1 Beiträge
    155 Aufrufe
    Niemand hat geantwortet