Skip to content

ZFS-Pool - Do not use (sda & sdb) to create a pool!

Linux
  • Was ist passiert?

    root@pve:~# zpool status
      pool: ZFS-Pool
     state: DEGRADED
    status: One or more devices could not be used because the label is missing or
    	invalid.  Sufficient replicas exist for the pool to continue
    	functioning in a degraded state.
    action: Replace the device using 'zpool replace'.
       see: https://openzfs.github.io/openzfs-docs/msg/ZFS-8000-4J
      scan: resilvered 841G in 01:52:53 with 0 errors on Sun Oct 17 10:18:42 2021
    config:
    
    	NAME                                          STATE     READ WRITE CKSUM
    	ZFS-Pool                                      DEGRADED     0     0     0
    	  mirror-0                                    DEGRADED     0     0     0
    	    ata-WDC_WD40EZRZ-00GXCB0_WD-WCC7K6XD2C26  ONLINE       0     0     0
    	    8992518921607088473                       UNAVAIL      0     0     0  was /dev/sdb1
    
    errors: No known data errors
    

    Ich hatte die Tage den ZFS-Pool für meinen Proxmox mit einer Devicebezeichnung /dev/sdb angelegt. Wie ich schon kurz danach begriffen hatte, keine gute Idee. Ich war aber in der Annahme, das das nicht so häufig passiert, das die Laufwerksbezeichnungen sich verschieben.

    Da ich heute das Gehäuse komplett fertig montiert habe, Laufwerke festgemacht usw. , habe ich bewusst kein SATA-Kabel angefasst, ausgesteckt usw. Es hat nichts geholfen, nach einen Neustart des Proxmox waren die Laufwerksbezeichnungen durcheinander.

    dev.png

    Ich habe zwei ZFS_Pools, der ZFS-Pool für den Proxmox und einen Pool, der an eine VM durchgereicht wird. Den hatte ich korrekt mit den IDs aus /dev/disk/by-id angelegt. Darum ist der auch noch intakt.

    root@debian1:~# zpool status
      pool: NAS
     state: ONLINE
      scan: resilvered 232K in 00:00:01 with 0 errors on Sun Oct 17 16:38:46 2021
    config:
    
    	NAME                                      STATE     READ WRITE CKSUM
    	NAS                                       ONLINE       0     0     0
    	  mirror-0                                ONLINE       0     0     0
    	    scsi-0QEMU_QEMU_HARDDISK_drive-scsi1  ONLINE       0     0     0
    	    scsi-0QEMU_QEMU_HARDDISK_drive-scsi2  ONLINE       0     0     0
    
    errors: No known data errors
    

    Ok, wie bekommen wir das gefixt? Der Fehler schreibt ja genau, was zu machen ist.

    ZFS zeigt uns genau die Ursache

    status: One or more devices could not be used because the label is missing or
        	invalid.  Sufficient replicas exist for the pool to continue
        	functioning in a degraded state.
    

    und das was man machen soll.

    action: Replace the device using 'zpool replace'.
           see: https://openzfs.github.io/openzfs-docs/msg/ZFS-8000-4J
    

    Ich habe mich dafür entschieden, das hier zu machen.

     zpool replace test c0t0d1
    

    Ok, was brauche ich? Die ID der Platte.

    root@pve:/dev/disk/by-id# ls -lha
    total 0
    drwxr-xr-x 2 root root 860 Oct 18 09:03 .
    drwxr-xr-x 8 root root 160 Oct 18 09:03 ..
    lrwxrwxrwx 1 root root   9 Oct 18 09:03 ata-WDC_WD40EZRZ-00GXCB0_WD-WCC7K5PPSH52 -> ../../sdc
    lrwxrwxrwx 1 root root  10 Oct 18 09:03 ata-WDC_WD40EZRZ-00GXCB0_WD-WCC7K5PPSH52-part1 -> ../../sdc1
    lrwxrwxrwx 1 root root  10 Oct 18 09:03 ata-WDC_WD40EZRZ-00GXCB0_WD-WCC7K5PPSH52-part9 -> ../../sdc9
    lrwxrwxrwx 1 root root   9 Oct 18 09:03 ata-WDC_WD40EZRZ-00GXCB0_WD-WCC7K6XD2C26 -> ../../sda
    lrwxrwxrwx 1 root root  10 Oct 18 09:03 ata-WDC_WD40EZRZ-00GXCB0_WD-WCC7K6XD2C26-part1 -> ../../sda1
    lrwxrwxrwx 1 root root  10 Oct 18 09:03 ata-WDC_WD40EZRZ-00GXCB0_WD-WCC7K6XD2C26-part9 -> ../../sda9
    [..gekürzt..]
    

    zpool status zeigt mir an, welche Platte im Pool intakt ist.

    ata-WDC_WD40EZRZ-00GXCB0_WD-WCC7K6XD2C26
    

    Ok, dann brauche ich jetzt die andere

    ata-WDC_WD40EZRZ-00GXCB0_WD-WCC7K5PPSH52
    

    Soweit die Theorie. Nasse Hände? Ein wenig 🙂 Dann mal los....

    zpool replace ZFS-Pool ata-WDC_WD40EZRZ-00GXCB0_WD-WCC7K5PPSH52
    

    Ok, geht nicht.

    root@pve:/dev/disk/by-id# zpool replace ZFS-Pool ata-WDC_WD40EZRZ-00GXCB0_WD-WCC7K5PPSH52
    invalid vdev specification
    use '-f' to override the following errors:
    /dev/disk/by-id/ata-WDC_WD40EZRZ-00GXCB0_WD-WCC7K5PPSH52-part1 is part of active pool 'ZFS-Pool'
    

    Hmm, also nachdenken. Das Laufwerk muss raus aus dem Pool, also das hier 8992518921607088473

    root@pve:~# zpool detach ZFS-Pool 8992518921607088473
    

    Status danach

    root@pve:~# zpool status
      pool: ZFS-Pool
     state: ONLINE
      scan: resilvered 841G in 01:52:53 with 0 errors on Sun Oct 17 10:18:42 2021
    config:
    
    	NAME                                        STATE     READ WRITE CKSUM
    	ZFS-Pool                                    ONLINE       0     0     0
    	  ata-WDC_WD40EZRZ-00GXCB0_WD-WCC7K6XD2C26  ONLINE       0     0     0
    
    errors: No known data errors
    

    Gut, jetzt die richtige Platte wieder hinzufügen. Ich hatte erst noch einen Replace probiert, aber er meckert, logisch, über eine nicht vorhandene Platte im Pool. Also, wieder hinzufügen, so wie ich das am Anfang gemacht habe. Aber diesmal mit der richtigen ID.

    zpool attach ZFS-Pool ata-WDC_WD40EZRZ-00GXCB0_WD-WCC7K6XD2C26 ata-WDC_WD40EZRZ-00GXCB0_WD-WCC7K5PPSH52
    

    Kam nix, kein Fehler. Juhu! Kontrolle...

    root@pve:~# zpool status
      pool: ZFS-Pool
     state: ONLINE
    status: One or more devices is currently being resilvered.  The pool will
    	continue to function, possibly in a degraded state.
    action: Wait for the resilver to complete.
      scan: resilver in progress since Mon Oct 18 15:32:05 2021
    	52.7G scanned at 5.85G/s, 324K issued at 36K/s, 1.19T total
    	0B resilvered, 0.00% done, no estimated completion time
    config:
    
    	NAME                                          STATE     READ WRITE CKSUM
    	ZFS-Pool                                      ONLINE       0     0     0
    	  mirror-0                                    ONLINE       0     0     0
    	    ata-WDC_WD40EZRZ-00GXCB0_WD-WCC7K6XD2C26  ONLINE       0     0     0
    	    ata-WDC_WD40EZRZ-00GXCB0_WD-WCC7K5PPSH52  ONLINE       0     0     0
    
    errors: No known data errors
    

    Ok, der Pool wird wieder neu gespiegelt oder was auch immer 🙂 Fertig!!

    Merksatz

    NIE, NIE einen ZPoll mit Laufwerksbezeichnungen anlegen. Auch wenn das hunderte Webseiten so im Netz zeigen. NIEMALS! Immer die IDs benutzen!!
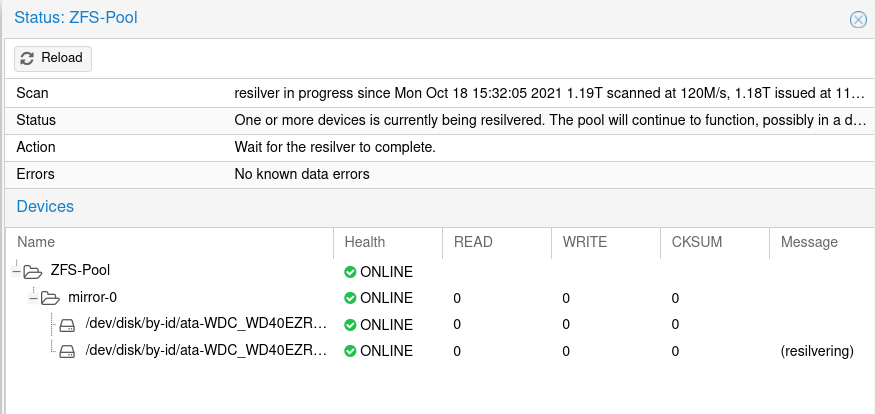
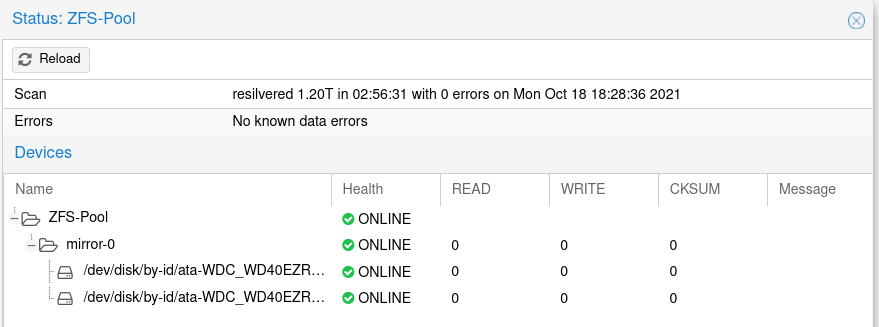
  • Hier kurz vor dem Abschluss der Spiegelung.

    d54abd23-aa52-482d-b9e1-52ece09106ec-grafik.png

    Und alles wieder gut und eine Menge gelernt 🤓

    594b6283-bbbe-4cec-8401-d57cce52012b-grafik.png

  • Proxmox 8.2 released

    Proxmox
    1
    0 Stimmen
    1 Beiträge
    156 Aufrufe
    Niemand hat geantwortet
  • NAS 2023 - Thema Datensicherung

    Verschoben Linux
    2
    0 Stimmen
    2 Beiträge
    140 Aufrufe
    FrankMF

    Bleibt noch etwas wichtiges. Die ganzen Konfigurationsdateien vom Proxmox Host. Sinnvoll, das man sich das sichert.

    #!/bin/bash # Script um mit Restic Daten automatisiert zu sichern! # Dient zum Sichern des Ordners /etc/pve! # Was soll gesichert werden? backup_pfad=/etc/pve # Programm Start restic --password-file /root/passwd -r /mnt/pve/Restic_Backups/pve backup $backup_pfad > backup_pve_001.log restic --password-file /root/passwd -r /mnt/pve/Restic_Backups/pve forget --keep-last 3 --keep-monthly 3 --prune >> backup_pve_002.log # Testen restic --password-file /root/passwd -r /mnt/pve/Restic_Backups/pve check --read-data >> backup_pve_003.log

    Crontab eingerichtet - fertig!

  • Proxmox - Windows Server 2019

    Proxmox
    2
    0 Stimmen
    2 Beiträge
    259 Aufrufe
    FrankMF

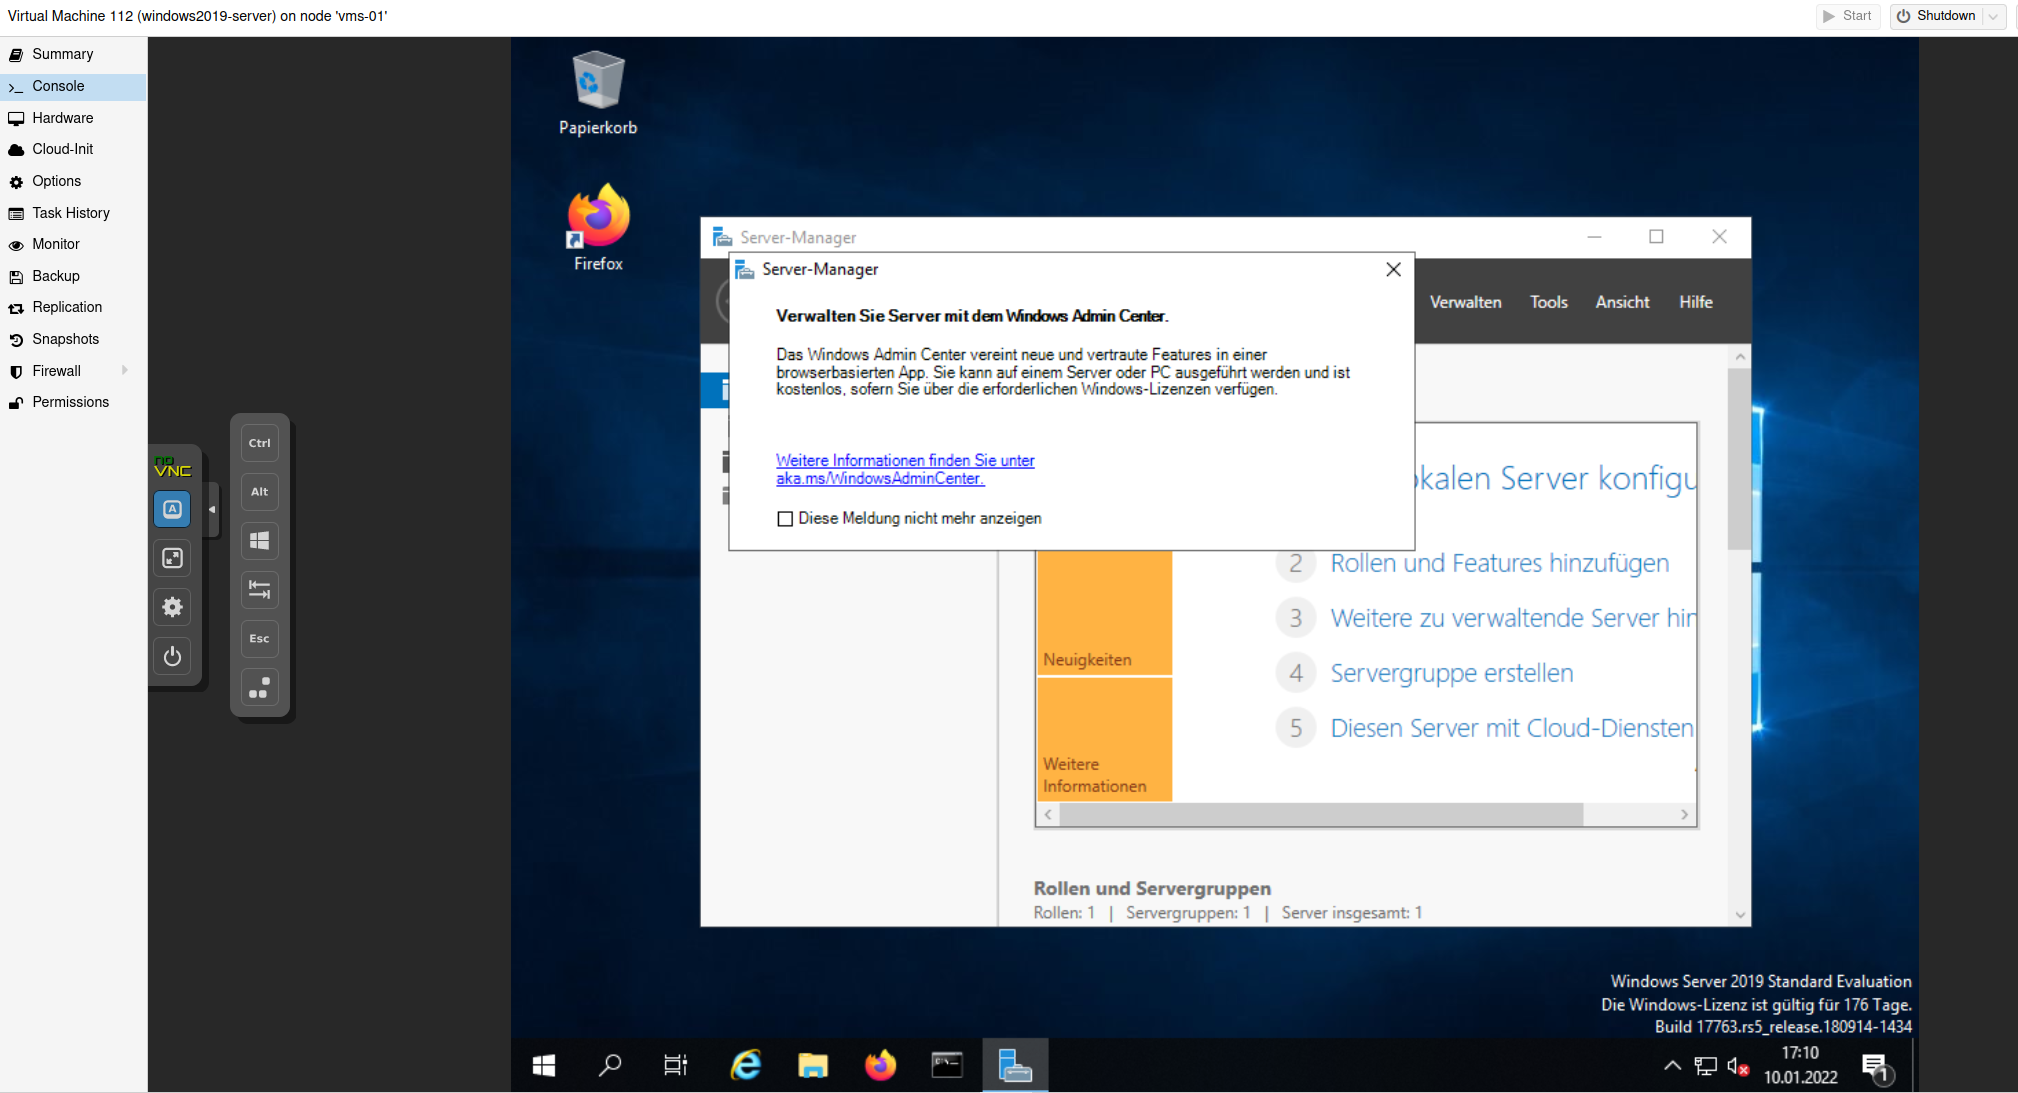
    Ich bin so froh, das ich das nicht mehr als Hauptsystem nutze.

    775556c8-e499-44f2-a891-4492295b7235-image.png

  • Proxmox - VM killen

    Proxmox
    2
    0 Stimmen
    2 Beiträge
    358 Aufrufe
    FrankMF

    Und wenn das auch nicht geht, dann geht das 🙂

    ps aux | grep "/usr/bin/kvm -id VMID" kill -9 PID
  • ZFS - One Disk Pool -> Mirror Pool

    Linux
    1
    0 Stimmen
    1 Beiträge
    158 Aufrufe
    Niemand hat geantwortet
  • Proxmox - Hetzner Storage Box in VM einbinden

    Proxmox
    1
    0 Stimmen
    1 Beiträge
    2k Aufrufe
    Niemand hat geantwortet
  • Proxmox - Qemu Guest Agent

    Proxmox
    1
    0 Stimmen
    1 Beiträge
    1k Aufrufe
    Niemand hat geantwortet
  • Proxmox - pfSense einrichten

    Verschoben pfSense
    5
    0 Stimmen
    5 Beiträge
    3k Aufrufe
    FrankMF

    Als kleine Ergänzung. Von einer VM aus zum Hauptrechner.

    frank@debian:~$ iperf3 -R -c 192.168.3.8 Connecting to host 192.168.3.8, port 5201 Reverse mode, remote host 192.168.3.8 is sending [ 5] local 192.168.3.213 port 42102 connected to 192.168.3.8 port 5201 [ ID] Interval Transfer Bitrate [ 5] 0.00-1.00 sec 112 MBytes 943 Mbits/sec [ 5] 1.00-2.00 sec 112 MBytes 941 Mbits/sec [ 5] 2.00-3.00 sec 112 MBytes 941 Mbits/sec [ 5] 3.00-4.00 sec 112 MBytes 941 Mbits/sec [ 5] 4.00-5.00 sec 112 MBytes 941 Mbits/sec [ 5] 5.00-6.00 sec 112 MBytes 941 Mbits/sec [ 5] 6.00-7.00 sec 112 MBytes 941 Mbits/sec [ 5] 7.00-8.00 sec 112 MBytes 941 Mbits/sec [ 5] 8.00-9.00 sec 112 MBytes 941 Mbits/sec [ 5] 9.00-10.00 sec 112 MBytes 941 Mbits/sec - - - - - - - - - - - - - - - - - - - - - - - - - [ ID] Interval Transfer Bitrate Retr [ 5] 0.00-10.04 sec 1.10 GBytes 940 Mbits/sec 10 sender [ 5] 0.00-10.00 sec 1.10 GBytes 941 Mbits/sec receiver iperf Done. frank@debian:~$ iperf3 -c 192.168.3.8 Connecting to host 192.168.3.8, port 5201 [ 5] local 192.168.3.213 port 42106 connected to 192.168.3.8 port 5201 [ ID] Interval Transfer Bitrate Retr Cwnd [ 5] 0.00-1.00 sec 114 MBytes 953 Mbits/sec 0 281 KBytes [ 5] 1.00-2.00 sec 112 MBytes 940 Mbits/sec 0 293 KBytes [ 5] 2.00-3.00 sec 112 MBytes 944 Mbits/sec 0 293 KBytes [ 5] 3.00-4.00 sec 112 MBytes 938 Mbits/sec 0 293 KBytes [ 5] 4.00-5.00 sec 113 MBytes 945 Mbits/sec 0 293 KBytes [ 5] 5.00-6.00 sec 112 MBytes 939 Mbits/sec 0 293 KBytes [ 5] 6.00-7.00 sec 112 MBytes 944 Mbits/sec 0 305 KBytes [ 5] 7.00-8.00 sec 112 MBytes 939 Mbits/sec 0 305 KBytes [ 5] 8.00-9.00 sec 113 MBytes 945 Mbits/sec 0 305 KBytes [ 5] 9.00-10.00 sec 113 MBytes 947 Mbits/sec 0 438 KBytes - - - - - - - - - - - - - - - - - - - - - - - - - [ ID] Interval Transfer Bitrate Retr [ 5] 0.00-10.00 sec 1.10 GBytes 943 Mbits/sec 0 sender [ 5] 0.00-10.04 sec 1.10 GBytes 938 Mbits/sec receiver iperf Done.