Skip to content

Mastodon - Beiträge des NodeBB-Forums automatisiert posten

Linux
9 1 639
  • Ein Anfang 🙂

    2ac64792-48eb-443f-954e-9bc868cf4b82-grafik.png

    wird noch ausführlicher, aber jetzt ist Feierabend für heute.

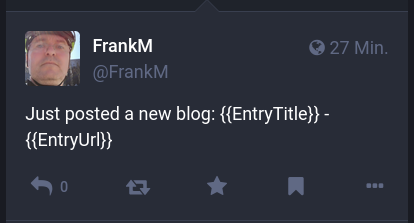
  • Das Beispiel oben habe ich mit curl gesendet.

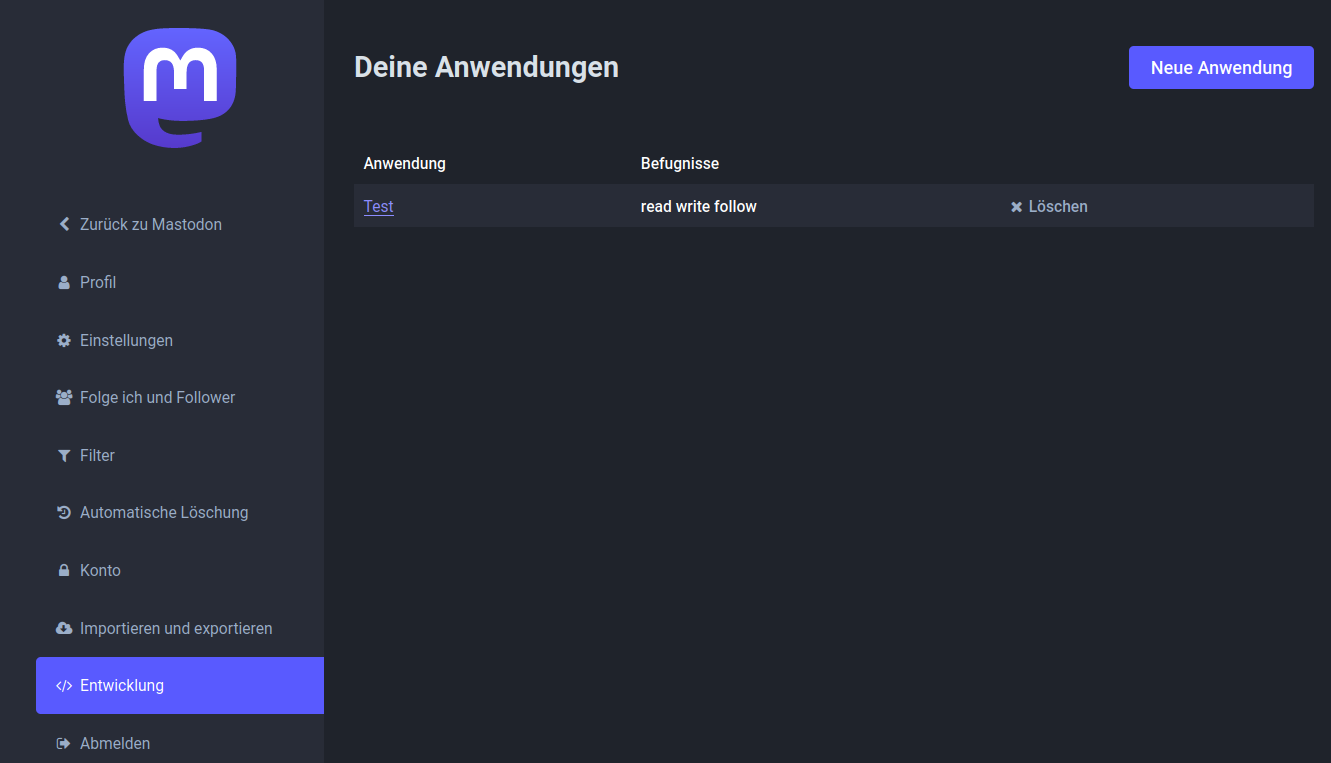
    curl -H 'Authorization: Bearer <Zugangs-Token>' https://nrw.social/api/v1/statuses -F 'status=Just posted a new blog: {{EntryTitle}} - {{EntryUrl}}'
    

    Den Token kann man sich hier erzeugen.

    5490f35d-27c7-4d85-a00a-c19785fb608a-grafik.png

    Jetzt suche ich noch nach einer praktikablen Lösung, das ganze zu automatisieren.

  • Mal OpenAI gefragt 🙂

    import requests
    import json
    
    if __name__ == '__main__':
    
        # Replace these with your actual Mastodon credentials and access token
        MASTODON_INSTANCE = 'https://nrw.social'
        ACCESS_TOKEN = 'ACCESS-TOKEN'
    
        def send_to_mastodon(topic_title, topic_content):
            try:
                mastodon_api = f"{MASTODON_INSTANCE}/api/v1/statuses"
                status = f"New Topic: {topic_title}\n\n{topic_content}\n\n#Python #NewTopic"
    
                # Use the Mastodon access token for authorization
                headers = {'Authorization': f'Bearer {ACCESS_TOKEN}'}
                data = {'status': status}
    
                # Send the status update to Mastodon
                response = requests.post(mastodon_api, headers=headers, data=data)
                response.raise_for_status()
                print('Posted to Mastodon:', response.json())
            except requests.exceptions.RequestException as e:
                print('Error posting to Mastodon:', e)
    
    
        # Example usage when creating a new topic in Python
        topic_title = 'Hello Mastodon'
        topic_content = 'This is my first post from Python to Mastodon!'
    
        send_to_mastodon(topic_title, topic_content)
    
  • Und dann mal gefragt, wie ich an die letzte Topic ID komme.

    import redis
    
    # Replace these with your actual Redis configuration
    REDIS_HOST = 'localhost'
    REDIS_PORT = 6379
    REDIS_DB = 0
    
    def get_last_topic_id():
        try:
            # Connect to the Redis database
            r = redis.StrictRedis(host=REDIS_HOST, port=REDIS_PORT, db=REDIS_DB)
    
            # Get the last Topic ID from the Redis list
            last_topic_id = r.lindex('topics:tid', -1)
            
            if last_topic_id is not None:
                last_topic_id = int(last_topic_id.decode())
                return last_topic_id
            else:
                print('No Topics found in Redis database.')
                return None
        except redis.exceptions.RedisError as e:
            print('Error connecting to Redis:', e)
            return None
    
    # Example usage
    last_topic_id = get_last_topic_id()
    if last_topic_id is not None:
        print('Last Topic ID:', last_topic_id)
    

    Ok, das werde ich dann am WE mal testen und in was Brauchbares umsetzen.

  • Ok, das OpenAI muss auch gefüttert werden, sonst kommt man da auch nicht weiter.

    Das obere Beispiel muss erst mal um eine Authentifizierung erweitert werden.

    # Replace these with your actual Redis configuration
    REDIS_HOST = 'localhost'
    REDIS_PORT = 6380
    REDIS_DB = 0
    REDIS_PASSWORD =  "<PASSWORD>"
    

    und

    # Connect to the Redis database with authentication (if required)
    r = redis.StrictRedis(host=REDIS_HOST, port=REDIS_PORT, db=REDIS_DB, password=REDIS_PASSWORD)
    

    Ok, war einfach. Danach kam folgende Fehlermeldung.

    :~/mastodon$ python3 main.py 
    Erfolg Redis<ConnectionPool<Connection<host=localhost,port=6380,db=0>>>
    Error connecting to Redis: WRONGTYPE Operation against a key holding the wrong kind of value
    

    Was das sein soll kann ich mir vorstellen, aber was nun? OK, OpenAI bitte arbeiten 🙂

    Darf man das von OpenAI einfach posten? Ach, da die auch keinen Quellenangaben haben und alles nur geklaut ist, kann ich das auch machen 🙂

    The error message "WRONGTYPE Operation against a key holding the wrong kind of value" in Redis typically occurs when you try to perform an operation on a key with a data type that is incompatible with that operation. In the context of NodeBB, this error might occur if the 'topics:tid' key is expected to be a Redis list, but it contains data of a different type.
    
    To investigate and resolve this issue, you can take the following steps:
    
        Check the data type of the 'topics:tid' key: Use the Redis CLI to inspect the data type of the key to verify if it is indeed a list. Open a terminal or command prompt and run the following command:
    
        bash
    
    redis-cli
    
    Then, in the Redis CLI, check the data type of the key:
    
    bash
    
        TYPE topics:tid
    
        The response should be "list" if the key is of the correct type. If it is not a list, this could be the cause of the error.
    
        Confirm NodeBB's usage of the key: Ensure that NodeBB is using the 'topics:tid' key as a list and not attempting to use it as a different data type. Check your NodeBB codebase or any plugins that might interact with this key to ensure that they treat it as a list.
    
        Clean up the incorrect data: If you find that the data in the 'topics:tid' key is of the wrong type, you might need to clean up the data. Be cautious when doing this to avoid data loss. If you are not sure about the correct approach, consider seeking help from NodeBB community forums or relevant documentation.
    
        Re-populate the correct data: After resolving any data type issues, you may need to re-populate the 'topics:tid' key with the correct data. NodeBB should handle this automatically when users create new topics, but if necessary, you can manually set the key to the correct value.
    
        Restart NodeBB: After making any changes, be sure to restart your NodeBB server to ensure that the changes take effect.
    
    Remember that modifying the Redis data directly can be risky, so it's essential to have backups and exercise caution while making any changes. If you are uncertain about how to proceed, seeking assistance from experienced NodeBB developers or the community can be beneficial.
    

    Ok, testen wir den Typ auf der Konsole.

    redis-cli -p 6380
    127.0.0.1:6380> AUTH default <PASSWORD>
    127.0.0.1:6380> OK
    127.0.0.1:6380> TYPE topics:tid
    zset
    127.0.0.1:6380> exit
    

    Ok, nun weiß ich das der Datensatz vom Type zset ist. Wir füttern wieder die Maschine.

    If the Redis key 'topics:tid' is of type "zset" (sorted set), the "WRONGTYPE Operation against a key holding the wrong kind of value" error could occur if you're trying to perform an operation on it that's only applicable to lists or other data types.
    
    In a sorted set, the elements are stored in such a way that they are ordered based on a score. Each element has a score associated with it, and the elements are sorted based on this score. This data structure is quite different from a list, which stores elements in a specific order without any associated scores.
    
    To resolve the issue, you need to ensure that the operations you perform on the 'topics:tid' key are appropriate for a sorted set data type.
    
    If you intended to use the sorted set for holding the topic IDs, here's how you can get the last topic ID from a sorted set in Python using the redis library:
    
    python
    
    import redis
    
    # Replace these with your actual Redis configuration and password (if any)
    REDIS_HOST = 'localhost'
    REDIS_PORT = 6379
    REDIS_DB = 0
    REDIS_PASSWORD = 'your-redis-password'  # Set to None if no password is used
    
    def get_last_topic_id():
        try:
            # Connect to the Redis database with authentication (if required)
            r = redis.StrictRedis(host=REDIS_HOST, port=REDIS_PORT, db=REDIS_DB, password=REDIS_PASSWORD)
    
            # Get the last Topic ID from the sorted set
            last_topic_id = r.zrange('topics:tid', -1, -1, withscores=True)
    
            if last_topic_id:
                last_topic_id = int(last_topic_id[0][0].decode())
                return last_topic_id
            else:
                print('No Topics found in the sorted set.')
                return None
        except redis.exceptions.RedisError as e:
            print('Error connecting to Redis:', e)
            return None
    
    # Example usage
    last_topic_id = get_last_topic_id()
    if last_topic_id is not None:
        print('Last Topic ID:', last_topic_id)
    
    In this code, we use the zrange command to retrieve the last element (topic ID) from the sorted set 'topics:tid' with the optional withscores=True parameter to also get the score associated with it (although in this case, the score might not be used).
    
    Make sure to replace 'localhost' and 6379 with the appropriate host and port where your Redis server is running, and set REDIS_DB to the appropriate database number used by NodeBB (usually 0). Also, replace 'your-redis-password' with the actual password used for authentication, or set it to None if no password is required.
    

    Das danach in mein Python Script eingefügt und ausprobiert.

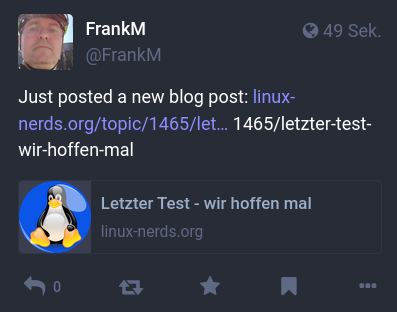
    ~/mastodon$ python3 main.py 
    Last Topic ID: 1456
    

    Kontrolle, der letzte Beitrag in meinem Forum ist folgender.

    Passt 🙂 Jetzt kann ich weitermachen.

  • FrankMF FrankM hat am auf dieses Thema verwiesen
  • FrankMF FrankM hat am auf dieses Thema verwiesen
  • Das kleine Projekt ist erfolgreich beendet.

    ba0fddff-8579-42f7-9391-cac6f05e5912-grafik.png

    So bald ich den Code bereinigt habe, werde ich den bei gitlab.com einstellen, das es sich jeder Interessierte dort kopieren kann. Es kommt auch noch eine ausführliche Anleitung dazu.

  • Das versprochene Gitlab Repository https://gitlab.com/Bullet64/nodebb_post_to_mastodon

    Viel Spaß beim Testen 🙂

  • Uupps, da hat noch ein Test auf nicht erlaubte Kategorien gefehlt. Ich habe hier z.B. einen privaten Bereich, blöd wenn man das dann nach Mastodon schiebt, es aber niemand lesen kann weil ihm die Rechte fehlen.

    Die Kategorien kann man in der config.py eintragen.

  • Ergänzt um eine automatische Übernahme der Tags aus dem Forum. Man muss den Beiträgen in Mastodon ja auch Reichweite geben 🙂

  • Podman & nftables

    Linux podman nftables linux
    1
    0 Stimmen
    1 Beiträge
    99 Aufrufe
    Niemand hat geantwortet
  • OpenCloud - Docker Compose Hetzner VM

    Angeheftet Verschoben OpenCloud opencloud linux docker
    2
    2
    0 Stimmen
    2 Beiträge
    246 Aufrufe
    FrankMF
    Ich habe mich nochmal mit verschiedenen Aspekten der produktiven Installation beschäftigt. Auch ein wenig die KI befragt und dann ein paar Änderungen vorgenommen. Was hatte mich gestört? Traefik lief als root. Um das zu ändern, habe ich das docker-compose.yml angepasst. Ich habe auch gleich mal auf die aktuelle Version angepasst. services: traefik: image: traefik:v3.4.1 #3.3.1 container_name: traefik user: "1000:1001" # 1000 = dockeruser, 1001=docker group cap_add: - NET_BIND_SERVICE # erlaubt Ports <1024 restart: always networks: - opencloud-net ports: - "80:80" - "443:443" volumes: - ./certs:/certs # bind-mount acme.json - /var/run/docker.sock:/var/run/docker.sock:ro command: - "--log.level=${TRAEFIK_LOG_LEVEL:-ERROR}" # Let's Encrypt HTTP-01 Challenge - "--certificatesResolvers.http.acme.email=${TRAEFIK_ACME_MAIL:-example@example.org}" - "--certificatesResolvers.http.acme.storage=/certs/acme.json" - "--certificatesResolvers.http.acme.httpChallenge.entryPoint=http" - "--certificatesResolvers.http.acme.caserver=${TRAEFIK_ACME_CASERVER:-https://acme-v02.api.letsencrypt.org/directory}" # Dashboard - "--api.dashboard=true" # Entrypoints - "--entryPoints.http.address=:80" - "--entryPoints.http.http.redirections.entryPoint.to=https" - "--entryPoints.http.http.redirections.entryPoint.scheme=https" - "--entryPoints.https.address=:443" - "--entryPoints.https.transport.respondingTimeouts.readTimeout=12h" - "--entryPoints.https.transport.respondingTimeouts.writeTimeout=12h" - "--entryPoints.https.transport.respondingTimeouts.idleTimeout=3m" # Docker Provider - "--providers.docker.endpoint=unix:///var/run/docker.sock" - "--providers.docker.exposedByDefault=false" # Access Log - "--accessLog=true" - "--accessLog.format=json" - "--accessLog.fields.headers.names.X-Request-Id=keep" labels: - "traefik.enable=${TRAEFIK_DASHBOARD:-false}" - "traefik.http.middlewares.traefik-auth.basicauth.users=${TRAEFIK_BASIC_AUTH_USERS:-admin:$$apr1$$4vqie50r$$YQAmQdtmz5n9rEALhxJ4l.}" - "traefik.http.routers.traefik.entrypoints=https" - "traefik.http.routers.traefik.rule=Host(`${TRAEFIK_DOMAIN:-traefik.opencloud.test}`)" - "traefik.http.routers.traefik.middlewares=traefik-auth" - "traefik.http.routers.traefik.tls.certresolver=http" - "traefik.http.routers.traefik.service=api@internal" networks: opencloud-net: volumes: {} Und hierzu - ./certs:/certs # bind-mount acme.json brauch es noch ein paar Anpassungen auf dem Host, also im Verzeichnis von wo wir deployen mit dem dockeruser! mkdir -p ./certs touch ./certs/acme.json chmod 600 ./certs/acme.json chown 1000:1000 ./certs/acme.json # UID muss mit docker-compose user übereinstimmen Das klappt jetzt hier einwandfrei. dockeruser@opencloud:~/opencloud/deployments/examples/opencloud_full$ docker exec -it traefik id uid=1000 gid=1001 groups=1001 Sieht soweit gut aus Die KI meint noch das hier Wenn du maximale Sicherheit willst, kannst du langfristig docker-socket-proxy einsetzen. Er erlaubt Traefik nur lesenden Zugriff auf die Container-API: → Projektseite: Tecnativa/docker-socket-proxy Das muss ich aber erst noch sacken lassen und mich etwas zu einlesen.
  • Standby Problem mit Mediatek MT7921e

    Linux linux mediatek mt7921e
    1
    0 Stimmen
    1 Beiträge
    266 Aufrufe
    Niemand hat geantwortet
  • Update 1.31.0 released

    Vaultwarden vaultwarden linux
    1
    1
    0 Stimmen
    1 Beiträge
    215 Aufrufe
    Niemand hat geantwortet
  • LibreOffice Security Update

    Linux debian linux
    1
    0 Stimmen
    1 Beiträge
    151 Aufrufe
    Niemand hat geantwortet
  • ZFS - Wichtige Befehle

    Linux zfs linux
    3
    0 Stimmen
    3 Beiträge
    1k Aufrufe
    FrankMF
    Heute mal drüber gestolpert, das es auch so was geben kann. root@pve2:~# zpool status pool: pool_NAS state: ONLINE status: Some supported and requested features are not enabled on the pool. The pool can still be used, but some features are unavailable. action: Enable all features using 'zpool upgrade'. Once this is done, the pool may no longer be accessible by software that does not support the features. See zpool-features(7) for details. scan: scrub repaired 0B in 00:20:50 with 0 errors on Sun Apr 13 00:44:51 2025 config: NAME STATE READ WRITE CKSUM pool_NAS ONLINE 0 0 0 mirror-0 ONLINE 0 0 0 ata-WDC_WDS100T1R0A-68A4W0_230520800733 ONLINE 0 0 0 ata-WDC_WDS100T1R0A-68A4W0_230520801376 ONLINE 0 0 0 errors: No known data errors Was machen? Als erstes mal ein Backup angestoßen. Danach root@pve2:~# zpool get all pool_NAS | grep feature pool_NAS feature@async_destroy enabled local pool_NAS feature@empty_bpobj active local pool_NAS feature@lz4_compress active local pool_NAS feature@multi_vdev_crash_dump enabled local pool_NAS feature@spacemap_histogram active local pool_NAS feature@enabled_txg active local pool_NAS feature@hole_birth active local pool_NAS feature@extensible_dataset active local pool_NAS feature@embedded_data active local pool_NAS feature@bookmarks enabled local pool_NAS feature@filesystem_limits enabled local pool_NAS feature@large_blocks enabled local pool_NAS feature@large_dnode enabled local pool_NAS feature@sha512 enabled local pool_NAS feature@skein enabled local pool_NAS feature@edonr enabled local pool_NAS feature@userobj_accounting active local pool_NAS feature@encryption enabled local pool_NAS feature@project_quota active local pool_NAS feature@device_removal enabled local pool_NAS feature@obsolete_counts enabled local pool_NAS feature@zpool_checkpoint enabled local pool_NAS feature@spacemap_v2 active local pool_NAS feature@allocation_classes enabled local pool_NAS feature@resilver_defer enabled local pool_NAS feature@bookmark_v2 enabled local pool_NAS feature@redaction_bookmarks enabled local pool_NAS feature@redacted_datasets enabled local pool_NAS feature@bookmark_written enabled local pool_NAS feature@log_spacemap active local pool_NAS feature@livelist enabled local pool_NAS feature@device_rebuild enabled local pool_NAS feature@zstd_compress enabled local pool_NAS feature@draid enabled local pool_NAS feature@zilsaxattr disabled local pool_NAS feature@head_errlog disabled local pool_NAS feature@blake3 disabled local pool_NAS feature@block_cloning disabled local pool_NAS feature@vdev_zaps_v2 disabled local Das kommt von neuen Funktionen, die zu ZFS hinzugefügt wurden und bei Erstellung des Pools nicht vorhanden waren. Dann upgraden wir mal root@pve2:~# zpool upgrade pool_NAS This system supports ZFS pool feature flags. Enabled the following features on 'pool_NAS': zilsaxattr head_errlog blake3 block_cloning vdev_zaps_v2 Kontrolle root@pve2:~# zpool status pool: pool_NAS state: ONLINE scan: scrub repaired 0B in 00:20:50 with 0 errors on Sun Apr 13 00:44:51 2025 config: NAME STATE READ WRITE CKSUM pool_NAS ONLINE 0 0 0 mirror-0 ONLINE 0 0 0 ata-WDC_WDS100T1R0A-68A4W0_230520800733 ONLINE 0 0 0 ata-WDC_WDS100T1R0A-68A4W0_230520801376 ONLINE 0 0 0 errors: No known data errors Features kontrollieren root@pve2:~# zpool get all pool_NAS | grep feature pool_NAS feature@async_destroy enabled local pool_NAS feature@empty_bpobj active local pool_NAS feature@lz4_compress active local pool_NAS feature@multi_vdev_crash_dump enabled local pool_NAS feature@spacemap_histogram active local pool_NAS feature@enabled_txg active local pool_NAS feature@hole_birth active local pool_NAS feature@extensible_dataset active local pool_NAS feature@embedded_data active local pool_NAS feature@bookmarks enabled local pool_NAS feature@filesystem_limits enabled local pool_NAS feature@large_blocks enabled local pool_NAS feature@large_dnode enabled local pool_NAS feature@sha512 enabled local pool_NAS feature@skein enabled local pool_NAS feature@edonr enabled local pool_NAS feature@userobj_accounting active local pool_NAS feature@encryption enabled local pool_NAS feature@project_quota active local pool_NAS feature@device_removal enabled local pool_NAS feature@obsolete_counts enabled local pool_NAS feature@zpool_checkpoint enabled local pool_NAS feature@spacemap_v2 active local pool_NAS feature@allocation_classes enabled local pool_NAS feature@resilver_defer enabled local pool_NAS feature@bookmark_v2 enabled local pool_NAS feature@redaction_bookmarks enabled local pool_NAS feature@redacted_datasets enabled local pool_NAS feature@bookmark_written enabled local pool_NAS feature@log_spacemap active local pool_NAS feature@livelist enabled local pool_NAS feature@device_rebuild enabled local pool_NAS feature@zstd_compress enabled local pool_NAS feature@draid enabled local pool_NAS feature@zilsaxattr enabled local pool_NAS feature@head_errlog active local pool_NAS feature@blake3 enabled local pool_NAS feature@block_cloning enabled local pool_NAS feature@vdev_zaps_v2 enabled local So, alle neuen Features aktiviert. Jetzt kann der Pool weiterhin seine Arbeit machen.
  • Debian 11 Bullseye released!

    Linux debian linux
    4
    0 Stimmen
    4 Beiträge
    377 Aufrufe
    FrankMF
    Mein Systemadmin auf der Arbeit meinte heute, angesprochen auf das Problem, läuft der Network-Manager? Ok, gute Frage...... Schauen wir mal. Ich bin mir leider nicht 100% sicher, ob er vor meinem Eingreifen lief, ich denke aber schon. Warum ich unsicher bin? root@debian:~# systemctl enable systemd-networkd.service Created symlink /etc/systemd/system/dbus-org.freedesktop.network1.service → /lib/systemd/system/systemd-networkd.service. Created symlink /etc/systemd/system/multi-user.target.wants/systemd-networkd.service → /lib/systemd/system/systemd-networkd.service. Created symlink /etc/systemd/system/sockets.target.wants/systemd-networkd.socket → /lib/systemd/system/systemd-networkd.socket. Created symlink /etc/systemd/system/network-online.target.wants/systemd-networkd-wait-online.service → /lib/systemd/system/systemd-networkd-wait-online.service. Ok, danach root@debian:~# systemctl start systemd-networkd.service root@debian:~# systemctl status systemd-networkd.service ● systemd-networkd.service - Network Service Loaded: loaded (/lib/systemd/system/systemd-networkd.service; enabled; ven> Active: active (running) since Tue 2021-08-17 17:36:38 CEST; 6s ago TriggeredBy: ● systemd-networkd.socket Docs: man:systemd-networkd.service(8) Main PID: 1288 (systemd-network) Status: "Processing requests..." Tasks: 1 (limit: 19087) Memory: 3.9M CPU: 39ms CGroup: /system.slice/systemd-networkd.service └─1288 /lib/systemd/systemd-networkd Aug 17 17:36:38 debian systemd[1]: Starting Network Service... Aug 17 17:36:38 debian systemd-networkd[1288]: enp25s0: Gained IPv6LL Aug 17 17:36:38 debian systemd-networkd[1288]: Enumeration completed Aug 17 17:36:38 debian systemd[1]: Started Network Service. Danach ging immer noch nix. root@debian:/etc/network# ^C root@debian:/etc/network# nmcli device show GENERAL.DEVICE: wlx7cdd907cbec2 GENERAL.TYPE: wifi GENERAL.HWADDR: BA:59:C0:76:C7:F5 GENERAL.MTU: 1500 GENERAL.STATE: 20 (nicht verfügbar) GENERAL.CONNECTION: -- GENERAL.CON-PATH: -- GENERAL.DEVICE: enp25s0 GENERAL.TYPE: ethernet GENERAL.HWADDR: 30:9C:23:60:C6:8E GENERAL.MTU: 1500 GENERAL.STATE: 10 (nicht verwaltet) GENERAL.CONNECTION: -- GENERAL.CON-PATH: -- WIRED-PROPERTIES.CARRIER: an IP4.ADDRESS[1]: 192.168.3.169/24 IP4.GATEWAY: 192.168.3.1 IP4.ROUTE[1]: dst = 192.168.3.0/24, nh = 0.0.0.0, mt = 0 IP4.ROUTE[2]: dst = 0.0.0.0/0, nh = 192.168.3.1, mt = 0 IP6.ADDRESS[1]: 2a02:908:1260:13bc:329c:23ff:xxxx:xxxx/64 IP6.ADDRESS[2]: fd8a:6ff:2880:0:329c:23ff:fe60:c68e/64 IP6.ADDRESS[3]: fe80::329c:23ff:fe60:c68e/64 IP6.GATEWAY: fe80::e4d3:f0ff:fe8f:2354 IP6.ROUTE[1]: dst = fe80::/64, nh = ::, mt = 256 IP6.ROUTE[2]: dst = ::/0, nh = fe80::e4d3:f0ff:fe8f:2354, mt = 1024 IP6.ROUTE[3]: dst = 2a02:908:xxxx:xxxx::/64, nh = ::, mt = 256 IP6.ROUTE[4]: dst = fd8a:6ff:2880::/64, nh = ::, mt = 256 Jetzt hatte ich das erste Mal einen Ansatz, wonach ich suchen musste. GENERAL.STATE: 10 (nicht verwaltet) Etwas Suche im Netz und dann das nano /etc/NetworkManager/NetworkManager.conf Inhalt der Datei [main] plugins=ifupdown,keyfile [ifupdown] managed=false Das false in true geändert. Danach ein systemctl restart NetworkManager und ich konnte den Network-Manager auf dem Desktop benutzen!?!?!? [image: 1629216580219-bildschirmfoto-vom-2021-08-17-18-07-25.png] Irgendwas ist da durcheinander im Bullseye
  • Ubuntu Cinnamon Remix 21.04

    Linux ubuntu cinnamon linux
    2
    1
    0 Stimmen
    2 Beiträge
    365 Aufrufe
    FrankMF
    Nach einem kurzen Test denke ich, das für das Projekt noch eine Menge Arbeit wartet. Verschlüsselte Installation Geht nicht, nach Reboot klappt die Passwortabfrage nicht Unverschlüsselte Installation Ok, nachdem ich dann die Zeichensatzprobleme im Griff hatte, warum bekommt man das eigentlich nicht in den Griff?, hatte ich nach der zweiten Installation eine funktionierende Installation. Kurz Fazit Dringend den Installer überarbeiten. Die Ubuntu Installation funktioniert auf dem Rechner problemlos. Der Desktop gefällt mir auf den ersten Blick ganz gut. Kein Wunder, man fühlt sich ja sofort zu Hause Aktuell in meinen Augen produktiv nicht einsetzbar! Und HiDPi habe ich noch gar nicht getestet...