Skip to content

Restic UI - mein zweites Python3 Projekt

Python3
  • Ich habe mal ein kleines UI für Restic erstellt. Das ist das Resultat, wenn man sich ein wenig Python3 und PyQt5 versucht beizubringen 🙂

    Der Code wird vermutlich keinen professionellen Ansprüchen genügen, mir hat er aber sehr viel Wissen neu vermittelt.

    Sollte so zu 98% fertig sein und neue Ideen zur Verbesserung sind auch schon im Kopf.
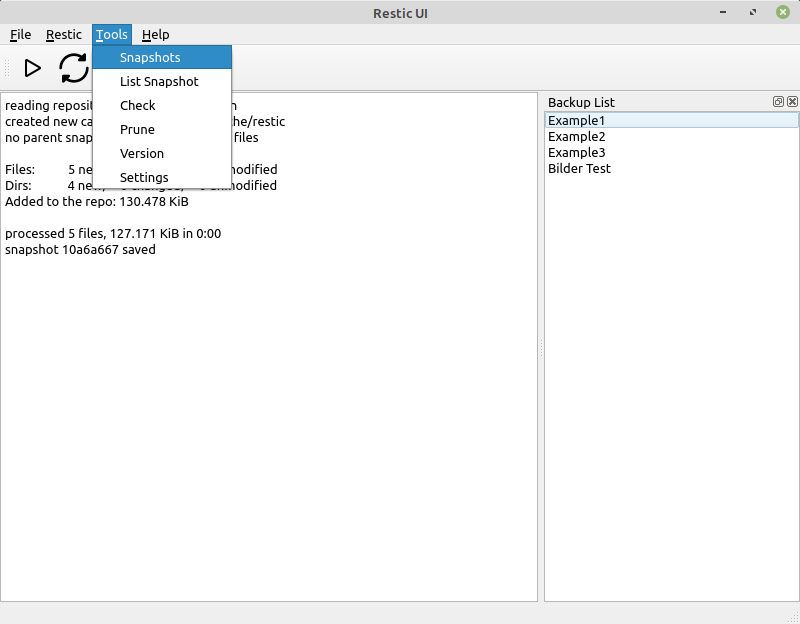
    Funktionen

    • init
    • backup
    • mount
    • restore
    • check
    • prune
    • snapshots

    sind drin und eine Funtion, mehrere Backups zu verwalten.

  • Noch ein kurzes Video zum Tool.

  • Ja, ich bin immer noch dran mich in Python3 und PyQT5 einzuarbeiten bzw. zu erlernen 😉

    Nachdem ich am Anfang alles mit einem JSON-File gemacht habe, habe ich die letzten Tage alles umgebaut. Ich nutze nun eine Klasse um mit den Daten zu hantieren, das JSON-File dient noch zur dauerhaften Speicherung der Daten.

    Es waren wieder interessante Stunden, in denen ich hoffentlich viel gelernt habe. Da ich aber bei solchen Dingen immer wieder feststelle, das man es besser machen kann 🙂 
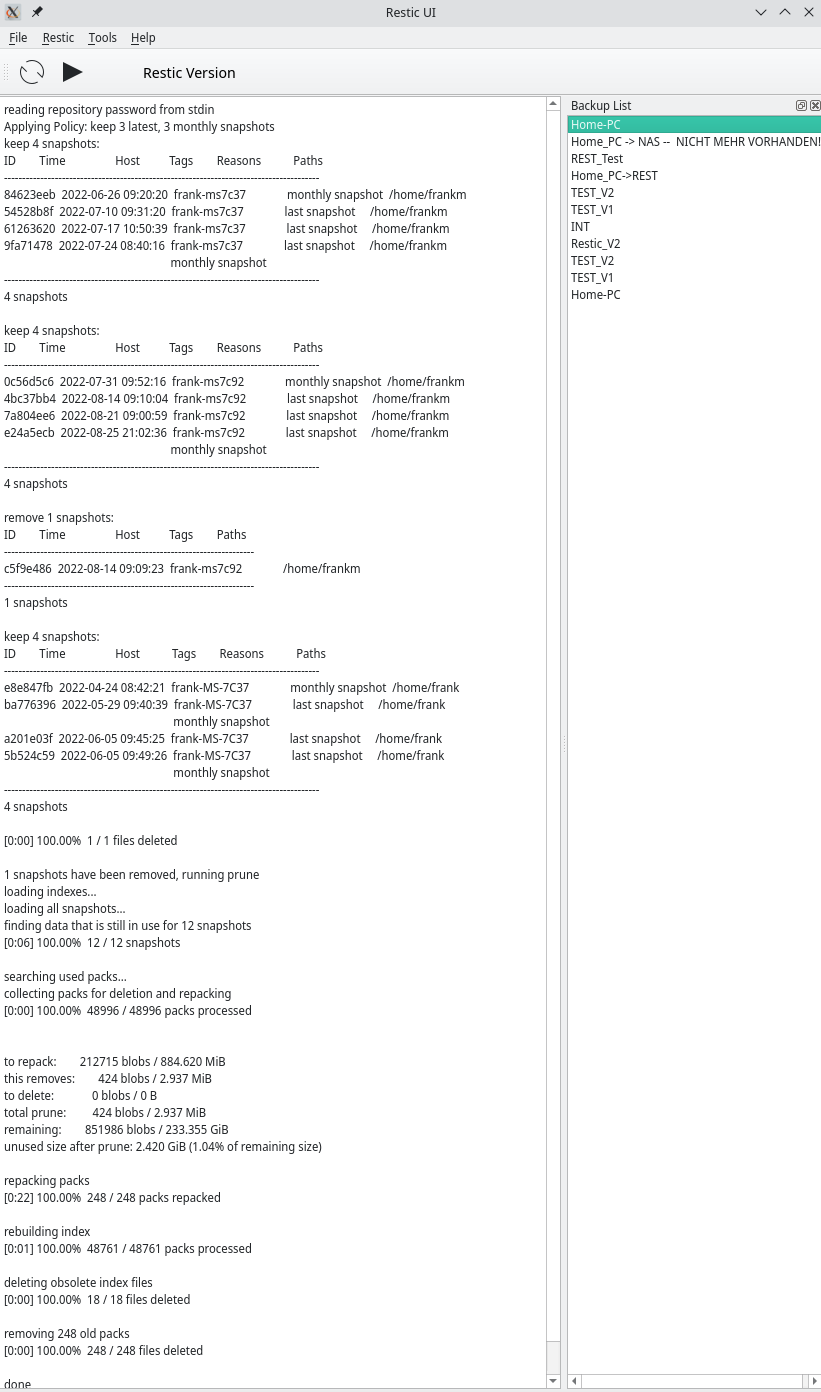
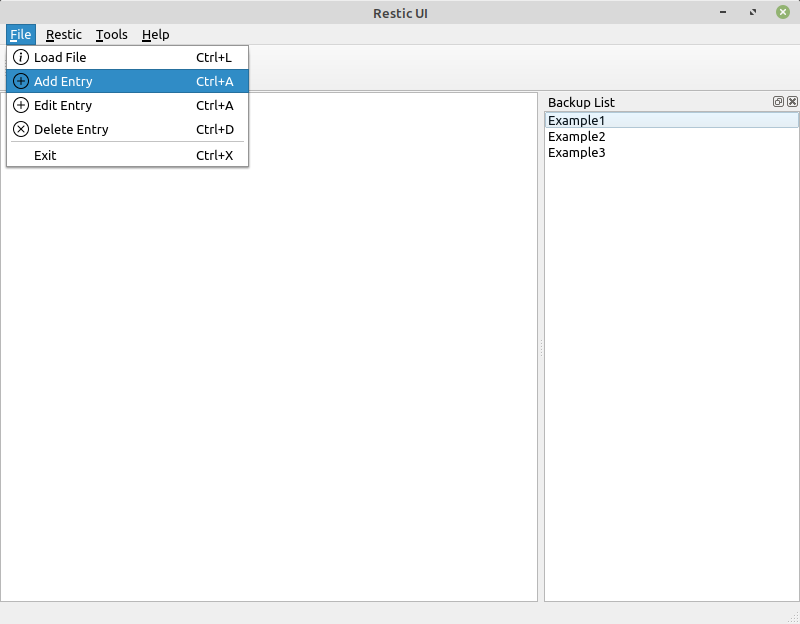
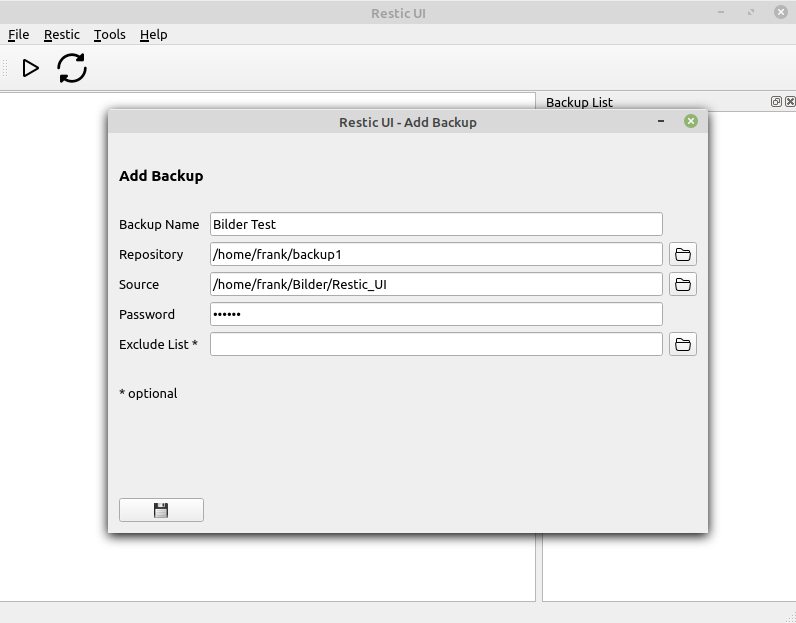
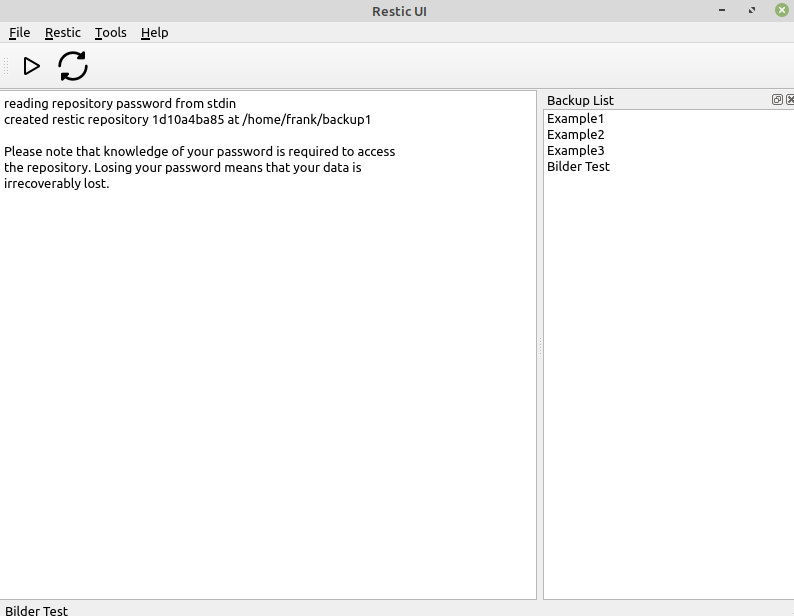
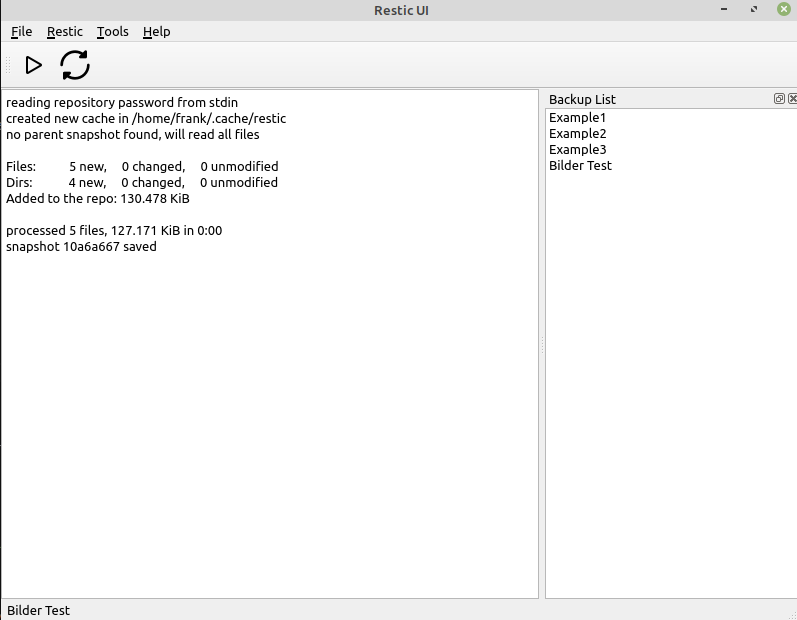
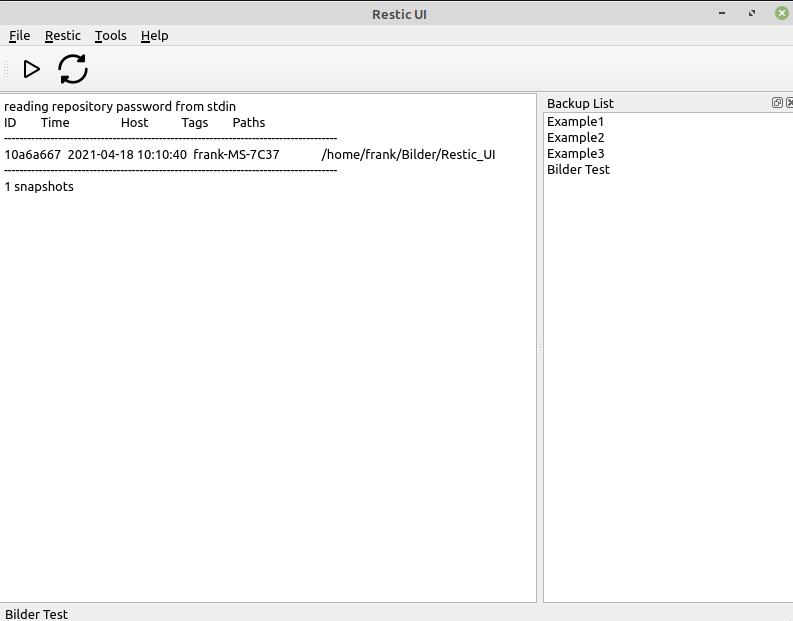
werde ich wohl bald mal anfangen es von vorne anzugehen.

    Hier ein paar Eindrücke.

    Start.png

    add.png

    add2.png

    init2.png

    backup.png

    snapshot.png

    snapshot2.png

    Das soll mal reichen 😉

  • Hallo,
    das interessiert mich brennend!
    Kann man das Ganze denn mal selbst probieren?
    VG

  • @berthold Hallo Berthold. Ich bin eigentlich immer noch nicht mit meinem Code zufrieden. Ist man das jemals? Da ich auch noch ein kleines Problem habe, würde ich da ungerne jemanden reinschauen lassen. Der Code ist stellenweise in deutsch kommentiert, stellenweise in englisch. Kennt man ja, man will es irgendwann mal ordentlich machen und dann kommt das nächste Problem auf einen zu.

    Hast Du Python3 Vorkenntnisse? Wenn Du "brennend" dran interessiert bist, könnte ich Dir evt. Zugang zu meinem Gitlab-Projekt geben.

    Wenn Du interessiert bist und ich dich nicht los werde :), dann schreib mir eine PN.

  • 0 Stimmen
    1 Beiträge
    71 Aufrufe
    Niemand hat geantwortet
  • 0 Stimmen
    5 Beiträge
    141 Aufrufe
    FrankMF

    Hab ChatGPT nochmal nach der Installation auf einem Production Server befragt.

    ChatGPT

    Certainly! Here's a short example of the steps you can follow to deploy a Flask application on a production server using Nginx and Gunicorn:

    Prepare your server:

    Set up a server (e.g., using a cloud provider like AWS, DigitalOcean, or a dedicated server) and ensure it has a clean, up-to-date installation of a Linux distribution (e.g., Ubuntu or CentOS).

    Install required software:

    Install necessary software packages on your server. You'll need Python, pip (Python package manager), Nginx, and Gunicorn. You can use your distribution's package manager (e.g., apt for Ubuntu or yum for CentOS) to install these dependencies.

    Deploy your Flask application:

    Copy your Flask application code and any required dependencies to your server.

    Set up a virtual environment (optional but recommended):

    Create a virtual environment for your Flask application to isolate its dependencies. You can use venv or virtualenv for this purpose.

    Install Flask and any required Python packages within your virtual environment:

    pip install flask

    Test your Flask application:

    Ensure your Flask application runs correctly within your server's virtual environment.

    Configure Gunicorn:

    Create a Gunicorn configuration file (e.g., gunicorn_config.py) to specify the settings for running your Flask application. Here's a simple example: workers = 4 # Number of Gunicorn worker processes bind = '0.0.0.0:8000' # The address and port Gunicorn should listen on

    Start Gunicorn:

    Start Gunicorn with your Flask application: gunicorn -c gunicorn_config.py your_app:app

    Configure Nginx:

    Create an Nginx server block (often located in /etc/nginx/sites-available) to define how Nginx should handle incoming requests. Here's a simplified example: server { listen 80; server_name your_domain.com www.your_domain.com; location / { proxy_pass http://127.0.0.1:8000; # Pass requests to Gunicorn proxy_set_header Host $host; proxy_set_header X-Real-IP $remote_addr; } }

    Enable the Nginx server block and restart Nginx:

    sudo ln -s /etc/nginx/sites-available/your_config /etc/nginx/sites-enabled/ sudo nginx -t # Test Nginx configuration sudo systemctl restart nginx

    Configure your DNS:

    Point your domain name to your server's IP address.

    Secure your server (optional but recommended):

    Set up SSL/TLS certificates for your domain to enable HTTPS. You can use Let's Encrypt for free SSL certificates.

    Monitor your application:

    Set up monitoring tools and logs to keep track of your application's performance and troubleshoot any issues.

    These are the basic steps to deploy a Flask application on a production server with Nginx and Gunicorn. Please note that this is a simplified example, and there are many additional considerations, such as database configuration, security, and optimization, depending on your specific application and requirements. It's also important to keep your server and software up to date and follow security best practices to ensure the stability and security of your production environment.

    Das werde ich doch mal ausprobieren 😎

  • Restic UI - PyWebIO

    Python3
    3
    0 Stimmen
    3 Beiträge
    251 Aufrufe
    FrankMF

  • Restic v0.13.0 released

    Restic
    1
    0 Stimmen
    1 Beiträge
    98 Aufrufe
    Niemand hat geantwortet
  • Python3 - PyQt5 Layout

    Python3
    1
    0 Stimmen
    1 Beiträge
    147 Aufrufe
    Niemand hat geantwortet
  • Python3 - String-Operatoren

    Python3
    1
    0 Stimmen
    1 Beiträge
    134 Aufrufe
    Niemand hat geantwortet
  • Python und GUI

    Verschoben Python3
    1
    0 Stimmen
    1 Beiträge
    155 Aufrufe
    Niemand hat geantwortet
  • Restic - forget --keep-last 3 --prune

    Restic
    2
    0 Stimmen
    2 Beiträge
    578 Aufrufe
    FrankMF

    Ich habe mich damit noch ein wenig beschäftigt, die letzten drei zu behalten, ist nicht so optimal. Da es viele Optionen bei dem Befehl gibt, hier ein Ausschnitt

    Flags: -l, --keep-last n keep the last n snapshots -H, --keep-hourly n keep the last n hourly snapshots -d, --keep-daily n keep the last n daily snapshots -w, --keep-weekly n keep the last n weekly snapshots -m, --keep-monthly n keep the last n monthly snapshots -y, --keep-yearly n keep the last n yearly snapshots

    habe ich das ein wenig so angepasst, das ich denke es passt für mich.

    restic --password-file /root/passwd -r /media/NAS_neu/Restic/Home/ forget --keep-last 3 --keep-monthly 3 --prune

    Damit behalte ich auch die jeweils eines pro Monat. Und die letzten drei. Das sieht dann so aus.

    root@debian:~# ./backup2.sh repository 2f3f6147 opened successfully, password is correct Files: 38 new, 100 changed, 13268 unmodified Dirs: 0 new, 1 changed, 0 unmodified Added to the repo: 10.166 GiB processed 13406 files, 50.324 GiB in 3:24 snapshot 849f614c saved repository 2f3f6147 opened successfully, password is correct Applying Policy: keep the last 3 snapshots, 3 monthly snapshots snapshots for (host [debian], paths [/home/frank]): keep 5 snapshots: ID Time Host Tags Reasons Paths ------------------------------------------------------------------------------------ a7251cfd 2019-11-28 17:00:01 debian monthly snapshot /home/frank 283d4027 2019-12-31 17:00:01 debian monthly snapshot /home/frank ae2b96ec 2020-01-01 21:47:46 debian last snapshot /home/frank 079e00a6 2020-01-02 17:00:01 debian last snapshot /home/frank 849f614c 2020-01-03 21:08:45 debian last snapshot /home/frank monthly snapshot ------------------------------------------------------------------------------------ 5 snapshots remove 26 snapshots: ID Time Host Tags Paths ------------------------------------------------------------------ 896f16c2 2019-11-07 22:23:40 debian /home/frank b21bcf6d 2019-11-11 17:00:01 debian /home/frank f89248fb 2019-11-12 17:00:01 debian /home/frank 123ab546 2019-11-13 17:00:01 debian /home/frank b82d87d0 2019-11-18 17:00:01 debian /home/frank 040b0ab7 2019-11-19 17:00:01 debian /home/frank 7221d8ef 2019-11-20 17:00:01 debian /home/frank 84132a25 2019-11-21 17:00:01 debian /home/frank b558a52c 2019-11-25 17:00:01 debian /home/frank e5cc0c3e 2019-12-02 17:00:01 debian /home/frank 22423fa5 2019-12-03 17:00:01 debian /home/frank 39df1ab9 2019-12-04 17:00:01 debian /home/frank 98843457 2019-12-05 17:00:01 debian /home/frank b0cdd4b6 2019-12-09 17:00:01 debian /home/frank 828414f9 2019-12-10 17:00:01 debian /home/frank e34a27c3 2019-12-11 17:00:01 debian /home/frank 6e488c3b 2019-12-12 17:00:01 debian /home/frank 17898403 2019-12-16 17:00:01 debian /home/frank 1973305a 2019-12-17 17:00:01 debian /home/frank 9553bedd 2019-12-18 17:00:01 debian /home/frank fedf749d 2019-12-19 17:00:01 debian /home/frank 8e7cb876 2019-12-23 17:00:01 debian /home/frank 0bd0d102 2019-12-25 17:00:01 debian /home/frank 13d348b0 2019-12-26 17:00:01 debian /home/frank c7d960aa 2019-12-30 17:00:01 debian /home/frank f6ea9118 2020-01-01 17:00:01 debian /home/frank ------------------------------------------------------------------ 26 snapshots 26 snapshots have been removed, running prune counting files in repo building new index for repo [0:35] 100.00% 7806 / 7806 packs repository contains 7806 packs (46537 blobs) with 41.110 GiB processed 46537 blobs: 0 duplicate blobs, 0 B duplicate load all snapshots find data that is still in use for 5 snapshots [0:01] 100.00% 5 / 5 snapshots found 32654 of 46537 data blobs still in use, removing 13883 blobs will remove 0 invalid files will delete 715 packs and rewrite 752 packs, this frees 5.027 GiB [2:28] 100.00% 752 / 752 packs rewritten counting files in repo [0:01] 100.00% 6571 / 6571 packs finding old index files saved new indexes as [d137b425 f7caee99 a6e9711a] remove 35 old index files [1:13] 100.00% 1467 / 1467 packs deleted done using temporary cache in /tmp/restic-check-cache-916655151 repository 2f3f6147 opened successfully, password is correct created new cache in /tmp/restic-check-cache-916655151 create exclusive lock for repository load indexes check all packs check snapshots, trees and blobs read all data [7:47] 100.00% 6571 / 6571 items duration: 7:47 no errors were found root@debian:~#

    Am Ende seht ihr noch, wie Restic alle Files testet. Mein Script sieht jetzt so aus.

    #!/bin/bash # Script um mit Restic Daten automatisiert zu sichern! # Dient zum Sichern der Homepartition auf dem ROCKPro64 NAS! # Was soll gesichert werden? backup_pfad=/home/frank # Programm Start restic --password-file /root/passwd -r /media/NAS_neu/Restic/Home/ backup $backup_pfad --exclude-file=excludes.txt restic --password-file /root/passwd -r /media/NAS_neu/Restic/Home/ forget --keep-last 3 --keep-monthly 3 --prune # Testen restic --password-file /root/passwd -r /media/NAS_neu/Restic/Home/ check --read-data

    Das dann schön mit einem Cronjob laufen lassen und die Datensicherung ist erledigt 😉