Skip to content

Python3 - JSON

Python3
  • Heute endlich mal wieder ein wenig mit Python beschäftigt. Wenn man ein Tool bauen will, muss man fast immer irgendwelche Daten dauerhaft speichern. Das wollte ich mal ausprobieren. Fangen wir an...

    Was ist JSON?

    Die JavaScript Object Notation (JSON [ˈdʒeɪsən]) ist ein kompaktes Datenformat in einer einfach lesbaren Textform und dient dem Zweck des Datenaustausches zwischen Anwendungen. JSON ist von der Programmiersprache unabhängig. Parser und Generatoren existieren in allen verbreiteten Sprachen.

    Wie sieht das aus?

    68a6c3c1-9b4f-4d38-bad1-4018d3fb5fbd-grafik.png

    JSON benutzen

    Um JSON zu benutzen, brauchen wir folgenden import

    import json
    

    JSON erzeugen

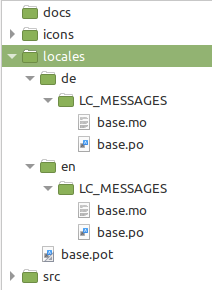
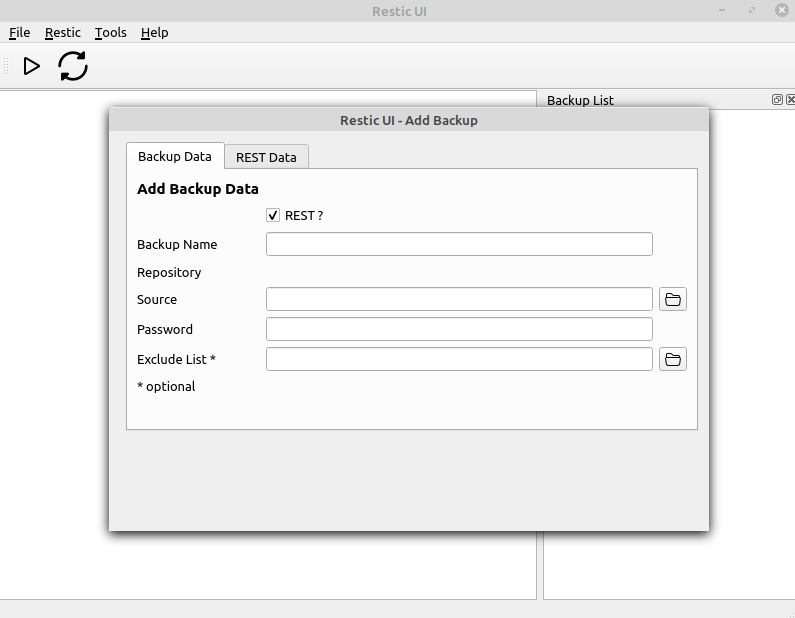
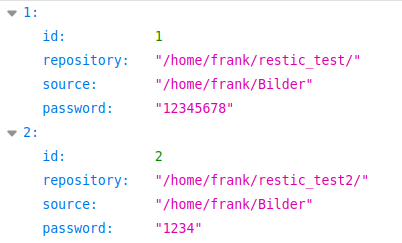
    Die Datei aus dem Bild erzeugen.

    backups = {}
            backups['1'] = {'id': 1, 'repository': "/home/frank/restic_test/", 'source': "/home/frank/Bilder", 'password': "12345678"}
            backups['2'] = {'id': 2, 'repository': "/home/frank/restic_test2/", 'source': "/home/frank/Bilder", 'password': "1234"}
    

    JSON als Datei speichern

    with open('mydata.json', 'w') as f:
        json.dump(backups, f)
    

    JSON laden

    with open('mydata.json') as f:
                backups = json.load(f)
    

    JSON Daten ausgeben

    Alles

    for i in backups.values():
                print(i)
    

    Einzelne Daten

    print(backups['1']['repository'])
    print(backups['2']['repository'])
    

    Zählen der Einträge

    print(len(backups)) 
    

    Löschen eines Eintrages

    backups.pop('1')
    

    Damit habe ich dann alles zusammen um meine Daten als JSON auf der Platte abzulegen und damit zu arbeiten.

  • Noch was vergessen 🙂 Wenn wir was ändern wollen, sind die Schritte wie folgt.

    • wir laden das File
    • wir bearbeiten das File
    • wir speichern das File

    laden

    with open('mydata.json') as f:
                backups = json.load(f)
    

    bearbeiten

    backups['2']['repository'] = "/home/frank/restic_test3/"
    

    speichern

    with open('mydata.json', 'w') as f:
                json.dump(backups, f) 
    

    Kontrolle

    z.B. so

    print(backups['2']['repository'])
    
  • ede1a88a-5183-4f85-a602-27650362d532-grafik.png

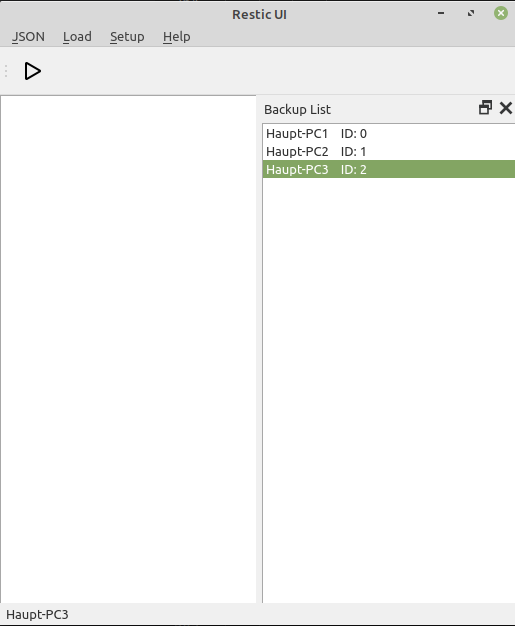
    Die Backups sollen Namen haben, also habe ich das erweitert. Jetzt sollen diese als Liste rechts angezeigt werden. Das mache ich wie folgt.

    for key in backups:
                        print(backups[key]['name'], key)
                        liste = backups[key]['name'] + "    ID: " + key
                        self.listWidget.addItem(liste)
    

    Mittels des Keys kann ich auf den Namen zugreifen und die Liste damit füllen. Aktuell habe ich noch den Key hinten angefügt, weil ich noch keine Idee habe, wie ich die Backups anders verarbeiten soll. Aber, Stück für Stück. Der Backup-Name wird nach Auswahl in der Statusbar angezeigt. So weit klappt das so wie ich mir das vorstelle. Für heute ist Feierabend 😇

  • Python3 - PyQt5 QIcon

    Python3 pyqt5 python3
    2
    2
    0 Stimmen
    2 Beiträge
    182 Aufrufe
    FrankMF
    Die Suchpfade findet man hiermit print(QIcon.themeSearchPaths()) Ausgabe ['/home/frank/.icons', '/usr/share/cinnamon/icons', '/var/lib/flatpak/exports/share/icons', '/usr/share/icons', ':/icons']
  • Django - Webframework

    Python3 django python3
    1
    2
    0 Stimmen
    1 Beiträge
    145 Aufrufe
    Niemand hat geantwortet
  • Restic UI - User documentation

    Restic UI restic-ui python3 pyqt5
    1
    7
    0 Stimmen
    1 Beiträge
    278 Aufrufe
    Niemand hat geantwortet
  • Python3 - PyQt5 Layout

    Python3 pyqt5 python3
    1
    2
    0 Stimmen
    1 Beiträge
    204 Aufrufe
    Niemand hat geantwortet
  • Python3 - virtuelle Entwicklungsumgebung

    Angeheftet Python3 python3
    3
    0 Stimmen
    3 Beiträge
    425 Aufrufe
    FrankMF
    Nach Systemwechsel erneut Probleme. Hier noch mal aufgelistet. Aufpassen, das kein venv Ordner vorhanden ist! Neu anlegen! python3 -m venv venv Dann meckert mein Linux Mint Cinnamon The virtual environment was not created successfully because ensurepip is not available. On Debian/Ubuntu systems, you need to install the python3-venv package using the following command. apt install python3.8-venv You may need to use sudo with that command. After installing the python3-venv package, recreate your virtual environment. Failing command: ['/home/frank/Restic_UI_Produktiv/restic-ui-public/venv/bin/python3', '-Im', 'ensurepip', '--upgrade', '--default-pip'] Ok, das ist einfach apt install python3.8-venv python3 -m venv venv Danach aktivieren source venv/bin/activate Installation von PyQt5 (venv) frank@frank-MS-7C37:~/Restic_UI_Produktiv/restic-ui-public$ pip3 install PyQt5 Collecting PyQt5 Downloading PyQt5-5.15.4-cp36.cp37.cp38.cp39-abi3-manylinux2014_x86_64.whl (8.3 MB) |████████████████████████████████| 8.3 MB 1.7 MB/s Collecting PyQt5-Qt5>=5.15 Downloading PyQt5_Qt5-5.15.2-py3-none-manylinux2014_x86_64.whl (59.9 MB) |████████████████████████████████| 59.9 MB 18.3 MB/s Collecting PyQt5-sip<13,>=12.8 Downloading PyQt5_sip-12.9.0-cp38-cp38-manylinux1_x86_64.whl (332 kB) |████████████████████████████████| 332 kB 46.1 MB/s Installing collected packages: PyQt5-Qt5, PyQt5-sip, PyQt5 Successfully installed PyQt5-5.15.4 PyQt5-Qt5-5.15.2 PyQt5-sip-12.9.0 Danach meckert er über ein fehlendes Modul requests (venv) frank@frank-MS-7C37:~/Restic_UI_Produktiv/restic-ui-public$ python3 restic_ui.py Traceback (most recent call last): File "restic_ui.py", line 41, in <module> from functions import ( File "/home/frank/Restic_UI_Produktiv/restic-ui-public/functions.py", line 19, in <module> import requests as req ModuleNotFoundError: No module named 'requests' Installation requests (venv) frank@frank-MS-7C37:~/Restic_UI_Produktiv/restic-ui-public$ pip3 install requests Collecting requests Downloading requests-2.25.1-py2.py3-none-any.whl (61 kB) |████████████████████████████████| 61 kB 802 kB/s Collecting chardet<5,>=3.0.2 Downloading chardet-4.0.0-py2.py3-none-any.whl (178 kB) |████████████████████████████████| 178 kB 2.7 MB/s Collecting certifi>=2017.4.17 Downloading certifi-2021.5.30-py2.py3-none-any.whl (145 kB) |████████████████████████████████| 145 kB 14.0 MB/s Collecting idna<3,>=2.5 Downloading idna-2.10-py2.py3-none-any.whl (58 kB) |████████████████████████████████| 58 kB 9.4 MB/s Collecting urllib3<1.27,>=1.21.1 Downloading urllib3-1.26.6-py2.py3-none-any.whl (138 kB) |████████████████████████████████| 138 kB 11.5 MB/s Installing collected packages: chardet, certifi, idna, urllib3, requests Successfully installed certifi-2021.5.30 chardet-4.0.0 idna-2.10 requests-2.25.1 urllib3-1.26.6 Und schwupps, geht mein Tool wieder [image: 1625848253488-4968ce42-7c66-4c8a-a2ad-424b9a529d87-grafik.png]
  • Python3 - Globale Variablen

    Python3 python3
    1
    0 Stimmen
    1 Beiträge
    162 Aufrufe
    Niemand hat geantwortet
  • Python3 - RegEx für ein LineEdit

    Python3 pyqt5 python3
    2
    1
    0 Stimmen
    2 Beiträge
    222 Aufrufe
    FrankMF
    Gut, Menschen die mich kennen, wissen das IPv6 nicht so mein Spezialgebiet ist. Es hilft aber nichts, auch damit muss man sich beschäftigen Es war etwas schwierig was Passendes zu finden, aber ich denke das hier ist ganz gut. Ob es alle Möglichkeiten bei IPv6 beinhaltet, weiß ich nicht zu 100%. Hier eine Seite, wo ich was Passendes gefunden habe. https://ihateregex.io/expr/ipv6/ Code # regex für IPv6 reg_ex = QRegExp('^(([0-9a-fA-F]{1,4}:){7,7}[0-9a-fA-F]{1,4}|([0-9a-fA-F]{1,4}:){1,7}:|([0-9a-fA-F]{1,4}:){1,6}:[0-9a-fA-F]{1,4}|([0-9a-fA-F]{1,4}:){1,5}(:[0-9a-fA-F]{1,4}){1,2}|([0-9a-fA-F]{1,4}:){1,4}(:[0-9a-fA-F]{1,4}){1,3}|([0-9a-fA-F]{1,4}:){1,3}(:[0-9a-fA-F]{1,4}){1,4}|([0-9a-fA-F]{1,4}:){1,2}(:[0-9a-fA-F]{1,4}){1,5}|[0-9a-fA-F]{1,4}:((:[0-9a-fA-F]{1,4}){1,6})|:((:[0-9a-fA-F]{1,4}){1,7}|:)|fe80:(:[0-9a-fA-F]{0,4}){0,4}%[0-9a-zA-Z]{1,}|::(ffff(:0{1,4}){0,1}:){0,1}((25[0-5]|(2[0-4]|1{0,1}[0-9]){0,1}[0-9])\.){3,3}(25[0-5]|(2[0-4]|1{0,1}[0-9]){0,1}[0-9])|([0-9a-fA-F]{1,4}:){1,4}:((25[0-5]|(2[0-4]|1{0,1}[0-9]){0,1}[0-9])\.){3,3}(25[0-5]|(2[0-4]|1{0,1}[0-9]){0,1}[0-9]))$') input_validator = QRegExpValidator(reg_ex, self.lineedit2_ipv6) self.lineedit2_ipv6.setValidator(input_validator) Ein paar Test von mir ergaben, das es so aussieht als wenn es funktioniert
  • Wireguard UI - mein erstes Python3 Projekt

    Python3 pyqt5 python3
    2
    3
    0 Stimmen
    2 Beiträge
    294 Aufrufe
    FrankMF
    Dinge entwickeln sich. Es sieht alles schon wieder was anders aus Hauptfenster [image: 1600889374694-270b5c68-3d64-44ca-9a01-e3f24ba4a26c-grafik.png] Setup Fenster zum Erstellen der wg0.conf [image: 1600889412743-27c3cb28-50f5-4e00-b03d-de47c07372a0-grafik.png] Und alles funktioniert so weit