Skip to content

Python3 - Pipenv für die virtuelle Entwicklungsumgebung

Python3
  • Python hat ein wirklich sehr groß entwickeltes Ökosystem, mit ganz vielen Tools, die man erst mal finden muss und dann im zweiten Step auch nutzen können muss.

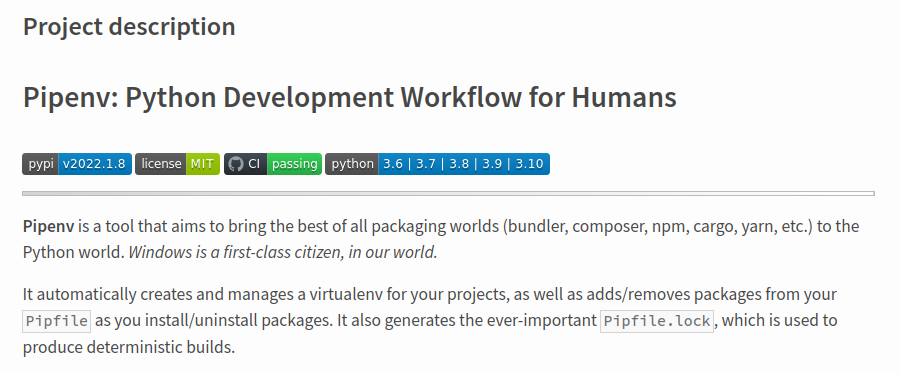
    Hier geht es heute um pipenv

    01b9dc8f-34ae-4a32-b18a-5e06df39e960-grafik.png

    Installation

    sudo apt install pipenv
    

    Virtuelle Umgebung anlegen

    Wir wechseln ins Projektverzeichnis

    cd /home/$USER/projekt1
    

    Die Entwicklungsumgebung anlegen

    pipenv --python 3.8
    

    Die Entwicklungsumgebung starten

    frank@frank-MS-7C37:~/restic_ui$ pipenv shell
    Spawning environment shell (/bin/bash). Use 'exit' to leave.
    frank@frank-MS-7C37:~/restic_ui$ . /home/frank/.local/share/virtualenvs/restic_ui-RwXjz-0W/bin/activate
    (restic_ui-RwXjz-0W) frank@frank-MS-7C37:~/restic_ui$ pipenv
    Usage: pipenv [OPTIONS] COMMAND [ARGS]...
    
    Options:
      --where          Output project home information.
      --venv           Output virtualenv information.
      --py             Output Python interpreter information.
      --envs           Output Environment Variable options.
      --rm             Remove the virtualenv.
      --bare           Minimal output.
      --completion     Output completion (to be eval'd).
      --man            Display manpage.
      --three / --two  Use Python 3/2 when creating virtualenv.
      --python TEXT    Specify which version of Python virtualenv should use.
      --site-packages  Enable site-packages for the virtualenv.
      --version        Show the version and exit.
      -h, --help       Show this message and exit.
    
    
    Usage Examples:
       Create a new project using Python 3.6, specifically:
       $ pipenv --python 3.6
    
       Install all dependencies for a project (including dev):
       $ pipenv install --dev
    
       Create a lockfile containing pre-releases:
       $ pipenv lock --pre
    
       Show a graph of your installed dependencies:
       $ pipenv graph
    
       Check your installed dependencies for security vulnerabilities:
       $ pipenv check
    
       Install a local setup.py into your virtual environment/Pipfile:
       $ pipenv install -e .
    
       Use a lower-level pip command:
       $ pipenv run pip freeze
    
    Commands:
      check      Checks for security vulnerabilities and against PEP 508 markers
                 provided in Pipfile.
      clean      Uninstalls all packages not specified in Pipfile.lock.
      graph      Displays currently–installed dependency graph information.
      install    Installs provided packages and adds them to Pipfile, or (if none
                 is given), installs all packages.
      lock       Generates Pipfile.lock.
      open       View a given module in your editor.
      run        Spawns a command installed into the virtualenv.
      shell      Spawns a shell within the virtualenv.
      sync       Installs all packages specified in Pipfile.lock.
      uninstall  Un-installs a provided package and removes it from Pipfile.
      update     Runs lock, then sync.
    
  • Ich ko... immer, wenn ich mein VSCodium neu installieren muss. Das größte Problem dabei ist immer, das ich fast immer vergesse den Python Interpreter zu setzen.

    "CTRL+SHIFT+P" and choose the correct python interpreter.

    46f85075-4dbc-414c-94c2-abc5bb6009b6-grafik.png

    Danach startet das Python Programm auch wieder aus der richtigen Entwicklungsumgebung 🙂

  • Python - Frameworks

    Python3
    2
    0 Stimmen
    2 Beiträge
    76 Aufrufe
    FrankMF

    Und mal hier parken

  • Python - Dict -> JSON und umgekehrt

    Python3
    1
    0 Stimmen
    1 Beiträge
    191 Aufrufe
    Niemand hat geantwortet
  • Python - mehrsprachiges GUI

    Python3
    1
    0 Stimmen
    1 Beiträge
    119 Aufrufe
    Niemand hat geantwortet
  • Restic UI - QThread

    Restic UI
    1
    0 Stimmen
    1 Beiträge
    95 Aufrufe
    Niemand hat geantwortet
  • Python3 - PyQt5 QIcon

    Python3
    2
    0 Stimmen
    2 Beiträge
    100 Aufrufe
    FrankMF

    Die Suchpfade findet man hiermit

    print(QIcon.themeSearchPaths())

    Ausgabe

    ['/home/frank/.icons', '/usr/share/cinnamon/icons', '/var/lib/flatpak/exports/share/icons', '/usr/share/icons', ':/icons']
  • Python3 - QT_QPA_PLATFORM

    Python3
    2
    0 Stimmen
    2 Beiträge
    284 Aufrufe
    FrankMF

    Nachdem ich ja mittlerweile schon lange weder auf Cinnamon bin, hatte ich nach einem Update von VSCodium wieder ein anderes Design. Ok, schauen wir rein.

    (venv) frank@frank-MS-7C37:~/restic-ui-public$ env | grep "QT" QT_ACCESSIBILITY=1 QT_QPA_PLATFORMTHEME=qt5ct

    Wenn ich das auf

    QT_QPA_PLATFORMTHEME=gnome3

    ändere, sieht es wie auf meinem Linux Mint Cinnamon Desktop aus.

  • Python3 - virtuelle Entwicklungsumgebung

    Angeheftet Python3
    3
    0 Stimmen
    3 Beiträge
    301 Aufrufe
    FrankMF

    Nach Systemwechsel erneut Probleme. Hier noch mal aufgelistet.

    Aufpassen, das kein venv Ordner vorhanden ist! Neu anlegen!

    python3 -m venv venv

    Dann meckert mein Linux Mint Cinnamon

    The virtual environment was not created successfully because ensurepip is not available. On Debian/Ubuntu systems, you need to install the python3-venv package using the following command. apt install python3.8-venv You may need to use sudo with that command. After installing the python3-venv package, recreate your virtual environment. Failing command: ['/home/frank/Restic_UI_Produktiv/restic-ui-public/venv/bin/python3', '-Im', 'ensurepip', '--upgrade', '--default-pip']

    Ok, das ist einfach 😉

    apt install python3.8-venv python3 -m venv venv

    Danach aktivieren

    source venv/bin/activate Installation von PyQt5 (venv) frank@frank-MS-7C37:~/Restic_UI_Produktiv/restic-ui-public$ pip3 install PyQt5 Collecting PyQt5 Downloading PyQt5-5.15.4-cp36.cp37.cp38.cp39-abi3-manylinux2014_x86_64.whl (8.3 MB) |████████████████████████████████| 8.3 MB 1.7 MB/s Collecting PyQt5-Qt5>=5.15 Downloading PyQt5_Qt5-5.15.2-py3-none-manylinux2014_x86_64.whl (59.9 MB) |████████████████████████████████| 59.9 MB 18.3 MB/s Collecting PyQt5-sip<13,>=12.8 Downloading PyQt5_sip-12.9.0-cp38-cp38-manylinux1_x86_64.whl (332 kB) |████████████████████████████████| 332 kB 46.1 MB/s Installing collected packages: PyQt5-Qt5, PyQt5-sip, PyQt5 Successfully installed PyQt5-5.15.4 PyQt5-Qt5-5.15.2 PyQt5-sip-12.9.0

    Danach meckert er über ein fehlendes Modul requests

    (venv) frank@frank-MS-7C37:~/Restic_UI_Produktiv/restic-ui-public$ python3 restic_ui.py Traceback (most recent call last): File "restic_ui.py", line 41, in <module> from functions import ( File "/home/frank/Restic_UI_Produktiv/restic-ui-public/functions.py", line 19, in <module> import requests as req ModuleNotFoundError: No module named 'requests' Installation requests (venv) frank@frank-MS-7C37:~/Restic_UI_Produktiv/restic-ui-public$ pip3 install requests Collecting requests Downloading requests-2.25.1-py2.py3-none-any.whl (61 kB) |████████████████████████████████| 61 kB 802 kB/s Collecting chardet<5,>=3.0.2 Downloading chardet-4.0.0-py2.py3-none-any.whl (178 kB) |████████████████████████████████| 178 kB 2.7 MB/s Collecting certifi>=2017.4.17 Downloading certifi-2021.5.30-py2.py3-none-any.whl (145 kB) |████████████████████████████████| 145 kB 14.0 MB/s Collecting idna<3,>=2.5 Downloading idna-2.10-py2.py3-none-any.whl (58 kB) |████████████████████████████████| 58 kB 9.4 MB/s Collecting urllib3<1.27,>=1.21.1 Downloading urllib3-1.26.6-py2.py3-none-any.whl (138 kB) |████████████████████████████████| 138 kB 11.5 MB/s Installing collected packages: chardet, certifi, idna, urllib3, requests Successfully installed certifi-2021.5.30 chardet-4.0.0 idna-2.10 requests-2.25.1 urllib3-1.26.6

    Und schwupps, geht mein Tool wieder 🙂

    4968ce42-7c66-4c8a-a2ad-424b9a529d87-grafik.png

  • Python3 - Eingabeformular

    Python3
    3
    0 Stimmen
    3 Beiträge
    191 Aufrufe
    FrankMF

    Meine endgültige Lösung, zu mindestens im Moment 😉 , ist ein zweites Window. Das gefällt mir am Besten, komme ich zu mindestens im Moment einfach besser mit klar. Aber, eines der größten Probleme war für mich, wie aktualisiere ich die Liste im Hauptfenster!? Da habe ich doch etliche Stunden dran rum gefummelt....

    Hier nur mal das Layout

    ##################### # Layout ##################### self.formGroupBox = QGroupBox("Form layout") layout = QFormLayout() layout.addRow(self.label_1) layout.addRow(QLabel("Backup Name:"), self.input1) layout.addRow(QLabel("Repository:"), self.button3) layout.addRow(QLabel("Source:"), self.button4) layout.addRow(QLabel("Password:"), self.input4) layout.addRow(self.label_6) layout.addRow(self.button2) self.formGroupBox.setLayout(layout) self.setLayout(layout)

    Das mit dem SecondWindow ist aber was aufwändiger. Da mach ich dann mal einen eigenen Beitrag zu. Aktuell sieht das so aus.

    6c68c956-9127-438f-bc54-4dcef8e18f00-image.png