Restic & Rclone & Nextcloud
-
Ich hatte mich schon mal mit rclone beschäftigt -> https://forum.frank-mankel.org/topic/27/restic-ein-backupkonzept-automatisieren?_=1584115522317
Was ist rclone?
Rclone - rsync for cloud storage
Rclone
Rclone syncs your files to cloud storage: Google Drive, S3, Swift, Dropbox, Google Cloud Storage, Azure, Box and many more.

(rclone.org)
Nun mal rclone auf meinem Haupt-PC, Debian Buster, ausprobieren.
Installation
root@debian:~# apt install rclone
Paketlisten werden gelesen... Fertig
Abhängigkeitsbaum wird aufgebaut.
Statusinformationen werden eingelesen.... Fertig
Die folgenden NEUEN Pakete werden installiert:
  rclone
0 aktualisiert, 1 neu installiert, 0 zu entfernen und 0 nicht aktualisiert.
Es müssen 6.248 kB an Archiven heruntergeladen werden.
Nach dieser Operation werden 26,6 MB Plattenplatz zusätzlich benutzt.
Holen:1 https://deb.debian.org/debian buster/main amd64 rclone amd64 1.45-3 [6.248 kB]
Es wurden 6.203 kB in 8 s geholt (777 kB/s).
Vormals nicht ausgewähltes Paket rclone wird gewählt.
(Lese Datenbank ... 238249 Dateien und Verzeichnisse sind derzeit installiert.)
Vorbereitung zum Entpacken von .../rclone_1.45-3_amd64.deb ...
Entpacken von rclone (1.45-3) ...
rclone (1.45-3) wird eingerichtet ...
Konfiguration
root@debian:~# rclone config
2020/03/14 09:20:19 NOTICE: Config file "/root/.config/rclone/rclone.conf" not found - using defaults
No remotes found - make a new one
n) New remote
s) Set configuration password
q) Quit config
n/s/q> n
name> nextcloud
Type of storage to configure.
Enter a string value. Press Enter for the default ("").
Choose a number from below, or type in your own value
 1 / A stackable unification remote, which can appear to merge the contents of several remotes
   \ "union"
 2 / Alias for a existing remote
   \ "alias"
 3 / Amazon Drive
   \ "amazon cloud drive"
 4 / Amazon S3 Compliant Storage Providers (AWS, Ceph, Dreamhost, IBM COS, Minio)
   \ "s3"
 5 / Backblaze B2
   \ "b2"
 6 / Box
   \ "box"
 7 / Cache a remote
   \ "cache"
 8 / Dropbox
   \ "dropbox"
 9 / Encrypt/Decrypt a remote
   \ "crypt"
10 / FTP Connection
   \ "ftp"
11 / Google Cloud Storage (this is not Google Drive)
   \ "google cloud storage"
12 / Google Drive
   \ "drive"
13 / Hubic
   \ "hubic"
14 / JottaCloud
   \ "jottacloud"
15 / Local Disk
   \ "local"
16 / Microsoft Azure Blob Storage
   \ "azureblob"
17 / Microsoft OneDrive
   \ "onedrive"
18 / OpenDrive
   \ "opendrive"
19 / Openstack Swift (Rackspace Cloud Files, Memset Memstore, OVH)
   \ "swift"
20 / Pcloud
   \ "pcloud"
21 / SSH/SFTP Connection
   \ "sftp"
22 / Webdav
   \ "webdav"
23 / Yandex Disk
   \ "yandex"
24 / http Connection
   \ "http"
Storage> 22
** See help for webdav backend at: https://rclone.org/webdav/ **

URL of http host to connect to
Enter a string value. Press Enter for the default ("").
Choose a number from below, or type in your own value
 1 / Connect to example.com
   \ "https://example.com"
url> https://nextcloud.example.de/remote.php/dav/files/User/
Name of the Webdav site/service/software you are using
Enter a string value. Press Enter for the default ("").
Choose a number from below, or type in your own value
 1 / Nextcloud
   \ "nextcloud"
 2 / Owncloud
   \ "owncloud"
 3 / Sharepoint
   \ "sharepoint"
 4 / Other site/service or software
   \ "other"
vendor> 1
User name
Enter a string value. Press Enter for the default ("").
user> Frank
Password.
y) Yes type in my own password
g) Generate random password
n) No leave this optional password blank
y/g/n> y
Enter the password:
password:
Confirm the password:
password:
Bearer token instead of user/pass (eg a Macaroon)
Enter a string value. Press Enter for the default ("").
bearer_token>
Remote config
--------------------
[nextcloud]
url = https://nextcloud.example.de/remote.php/dav/files/Frank/
vendor = nextcloud
user = Frank
pass = *** ENCRYPTED ***
--------------------
y) Yes this is OK
e) Edit this remote
d) Delete this remote
y/e/d> y
Current remotes:

Name                 Type
====                 ====
nextcloud            webdav

e) Edit existing remote
n) New remote
d) Delete remote
r) Rename remote
c) Copy remote
s) Set configuration password
q) Quit config
e/n/d/r/c/s/q> q
Das sollte für Euch als Nextcloud User keine besondere Herausforderung sein. Unter https://nextcloud.example.de/settings/user/security legt ihr, wie gewohnt, das Gerät fest was auf Eure Nextcloud Instanz zugreifen darf.
Test
rclone ls nextcloud:Ein erster Test gab mir den kompletten Inhalt der Nextcloud Installation aus. Hmm, nicht das was ich wollte. rclone soll nur auf ein bestimmtes Verzeichnis zugreifen dürfen. Also schnell einen Ordner in der Nextcloud angelegt.
Kurz ändern.
root@debian:~# rclone config
Current remotes:

Name                 Type
====                 ====
nextcloud            webdav

e) Edit existing remote
n) New remote
d) Delete remote
r) Rename remote
c) Copy remote
s) Set configuration password
q) Quit config
e/n/d/r/c/s/q> e
Choose a number from below, or type in an existing value
 1 > nextcloud
remote> 1
--------------------
[nextcloud]
type = webdav
url = https://nextcloud.example.de/remote.php/dav/files/Frank/
vendor = nextcloud
user = Frank
pass = *** ENCRYPTED ***
--------------------
Edit remote
** See help for webdav backend at: https://rclone.org/webdav/ **

Value "url" = "https://nextcloud.example.de/remote.php/dav/files/Frank/"
Edit? (y/n)>
y) Yes
n) No
y/n> y
URL of http host to connect to
Enter a string value. Press Enter for the default ("").
Choose a number from below, or type in your own value
 1 / Connect to example.com
   \ "https://example.com"
url> https://nextcloud.example.de/remote.php/dav/files/Frank/rclone/
Value "vendor" = "nextcloud"
Edit? (y/n)>
y) Yes
n) No
y/n> n
Value "user" = "Frank"
Edit? (y/n)>
y) Yes
n) No
y/n> n
Value "pass" = "xxxxxxxxxxxxxxxxxxxxxxxxxxxxxxxxxxxxxxxxxxxxxxxxxxxxxxxx"
Edit? (y/n)>
y) Yes
n) No
y/n> n
Value "bearer_token" = ""
Edit? (y/n)>
y) Yes
n) No
y/n> n
--------------------
[nextcloud]
type = webdav
url = https://nextcloud.example.de/remote.php/dav/files/Frank/rclone/
vendor = nextcloud
user = Frank
pass = *** ENCRYPTED ***
--------------------
y) Yes this is OK
e) Edit this remote
d) Delete this remote
y/e/d> y
Remote config
Current remotes:

Name                 Type
====                 ====
nextcloud            webdav

e) Edit existing remote
n) New remote
d) Delete remote
r) Rename remote
c) Copy remote
s) Set configuration password
q) Quit config
e/n/d/r/c/s/q> q
Erneuter Test
root@debian:~# rclone ls nextcloud:Jetzt zeigt er ein leeres Verzeichnis an. Kurz ein Dokument erstellt.
root@debian:~# rclone ls nextcloud:
         4 Testing.md
Passt. Die rclone Konfiguration ist abgeschlossen. Jetzt kann ich mit rclone auf meine Nextcloud Installation zugreifen. Und wofür das Ganze? Mit Restic, in Verbindung mit rclone, möchte ich eine Datensicherung einrichten die Daten verschlüsselt in meiner Nextcloud Instanz ablegt.
-
Gut, nun zum Restic Teil.
In Debian Buster ist aktuell diese Version enthalten.
restic/stable,now 0.9.4+ds-2+b1 amd64  [installiert]
  backup program with multiple revisions, encryption and more
Installation
apt install resticVersion checken mit
root@debian:~# restic version
restic 0.9.4 compiled with go1.11.6 on linux/amd64
INIT
Um jetzt eine Datensicherung zu initialisieren, muss man folgendes eingeben.
root@debian:~# restic -r rclone:nextcloud:HOME init
enter password for new repository:
enter password again:
created restic repository 4bxxxxxx16 at rclone:nextcloud:HOME

Please note that knowledge of your password is required to access
the repository. Losing your password means that your data is
irrecoverably lost.
In diesem Beispiel erzeuge ich eine Datensicherung in der Nextcloud Instanz im Verzeichnis HOME.
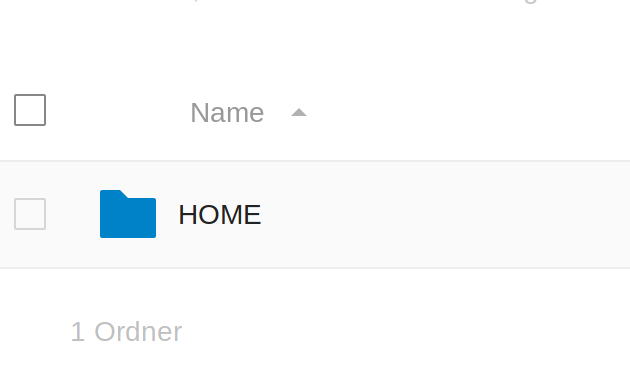
Man wird nach dem Passwort gefragt, alles so wie wir es kennen. Mehr zu Restic gibt es hier. Man könnte jetzt natürlich auch mehrere Datensicherungen dort ablegen, dazu müsste das HOME gegen was anderes ausgetauscht werden.
Backup Plan
Ich möchte die wichtigsten Daten aus meinem Homeverzeichnis sichern. Dazu müssen wir uns Gedanken machen, was wichtig ist.
Ich habe da folgende Sachen mal ausgesucht
- Scripte_NAS
- .cinnamon
- .config
- .filezilla
- .gnupg
- .joplin
- .mozilla
- .ssh
- .thunderbird
- .vscode
Nun erstellen wir eine INCLUDE Datei.
nano includes.txtDie Dateien von oben rein und speichern.
BACKUP
Das sieht dann so aus.
restic --password-file /root/passwd -r rclone:nextcloud:HOME backup --files-from /root/includes.txtIn /root/passwd liegt das Passwort, wir wollen das Ganze ja bitte schön automatisieren.
Der Rest sollte klar sein, ansonsten verweise ich auf die tolle Anleitung.
Nun werden alle Dateien verschlüsselt in der Nextcloud Instanz abgelegt. So mit kann auch kein neugieriger Systemadministrator da was mit anfangen

-
Hier mal eine Ausgabe vom ersten Durchgang
root@frank-MS-7C37:~# restic --password-file /root/passwd -r rclone:Nextcloud:HOME_UBUNTU backup --files-from /root/includes.txt
repository 99xxxxa0 opened successfully, password is correct
created new cache in /root/.cache/restic
rclone: 2020/05/08 17:47:57 ERROR : locks: error listing: directory not found
rclone: 2020/05/08 17:47:58 ERROR : index: error listing: directory not found
rclone: 2020/05/08 17:47:58 ERROR : snapshots: error listing: directory not found

Files:        3503 new,     0 changed,     0 unmodified
Dirs:            2 new,     0 changed,     0 unmodified
Added to the repo: 16.872 GiB

processed 3503 files, 21.134 GiB in 1:02:56
snapshot fdxxxxec saved
Der erste Durchgang hat also etwa eine Stunde benötigt. Durch die Deduplikation der Daten, ist der Vorgang beim zweiten Durchgang viel schneller weil nur neue oder geänderte Daten gesichert werden. Und außerdem sind alle Daten AES-256 verschlüsselt. Also perfekt zur Ablage in irgendeiner Cloud

root@frank-MS-7C37:~# restic --password-file /root/passwd -r rclone:Nextcloud:HOME_UBUNTU backup --files-from /root/includes.txt
repository 99xxxxa0 opened successfully, password is correct

Files:          57 new,    41 changed,  3449 unmodified
Dirs:            0 new,     2 changed,     0 unmodified
Added to the repo: 22.941 MiB

processed 3547 files, 21.137 GiB in 0:13
snapshot c6xxxxe4 saved
Wie ihr seht, hat der zweite Durchgang nur ein paar neue und geänderte Daten gesichert. Der Rest ist ja schon vorhanden. Und das kann man dann auch problemlos täglich, wöchentlich oder was auch immer mal eben schnell durchführen.
Eines meiner absoluten Lieblingstool

-
-
-
-
-
Quartz64 - dts File bearbeiten
Angeheftet Verschoben Quartz64 -
-
-

