Skip to content

Kernel 4.4.x

Angeheftet Images

  • ROCKPro64 - Debian Bullseye Teil 1

    ROCKPro64
    17
    0 Stimmen
    17 Beiträge
    2k Aufrufe
    FrankMF

    Durch diesen Beitrag ist mir mal wieder eingefallen, das wir das erneut testen könnten 😉

    Also die aktuellen Daten von Debian gezogen. Das Image gebaut, könnt ihr alles hier im ersten Beitrag nachlesen. Da die eingebaute Netzwerkschnittstelle nicht erkannt wurde, habe ich mal wieder den USB-to-LAN Adapter eingesetzt.

    Bus 005 Device 002: ID 0b95:1790 ASIX Electronics Corp. AX88179 Gigabit Ethernet

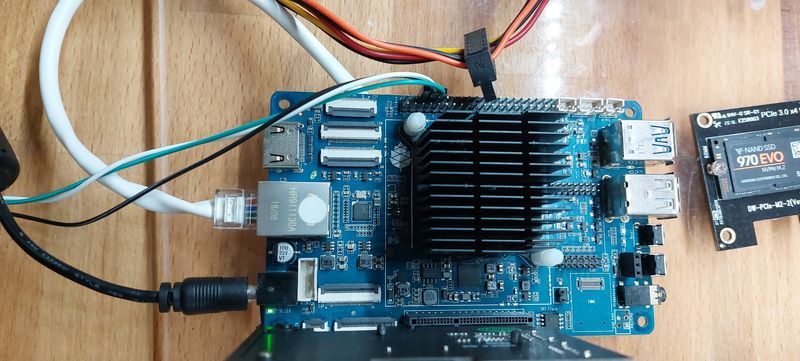
    Die Installation wollte ich auf einem NVMe Riegel installieren.

    Die Debian Installation durchgezogen und nach erfolgreicher Installation neugestartet. Und siehe da, ohne das man alles möglich ändern musste, bootete die NVMe SSD 🤓

    Eingesetzter uboot -> 2020.01-ayufan-2013......

    Die nicht erkannte LAN-Schnittstelle müsste an nicht freien Treibern liegen, hatte ich da irgendwo kurz gelesen. Beim Schreiben dieses Satzes kam die Nacht und ich konnte noch mal drüber schlafen. Heute Morgen, beim ersten Kaffee, dann noch mal logischer an die Sache ran gegangen.

    Wir schauen uns mal die wichtigsten Dinge an.

    root@debian:~# ip a 1: lo: <LOOPBACK,UP,LOWER_UP> mtu 65536 qdisc noqueue state UNKNOWN group default qlen 1000 link/loopback 00:00:00:00:00:00 brd 00:00:00:00:00:00 inet 127.0.0.1/8 scope host lo valid_lft forever preferred_lft forever inet6 ::1/128 scope host valid_lft forever preferred_lft forever 2: eth0: <BROADCAST,MULTICAST> mtu 1500 qdisc noop state DOWN group default qlen 1000 link/ether 62:03:b0:d6:dc:b3 brd ff:ff:ff:ff:ff:ff 3: enx000acd26e2c8: <BROADCAST,MULTICAST,UP,LOWER_UP> mtu 1500 qdisc pfifo_fast state UP group default qlen 1000 link/ether 00:0a:cd:26:e2:c8 brd ff:ff:ff:ff:ff:ff inet 192.168.3.208/24 brd 192.168.3.255 scope global dynamic enx000acd26e2c8 valid_lft 42567sec preferred_lft 42567sec inet6 fd8a:6ff:2880:0:20a:cdff:fe26:e2c8/64 scope global dynamic mngtmpaddr valid_lft forever preferred_lft forever inet6 2a02:908:1260:13bc:20a:xxxx:xxxx:xxxx/64 scope global dynamic mngtmpaddr valid_lft 5426sec preferred_lft 1826sec inet6 fe80::20a:cdff:fe26:e2c8/64 scope link valid_lft forever preferred_lft forever

    Ok, er zeigt mir die Schnittstelle eth0 ja an, dann kann es an fehlenden Treibern ja nicht liegen. Lässt dann auf eine fehlerhafte Konfiguration schließen. Nächster Halt wäre dann /etc/network/interfaces

    Das trägt Debian ein

    # This file describes the network interfaces available on your system # and how to activate them. For more information, see interfaces(5). source /etc/network/interfaces.d/* # The loopback network interface auto lo iface lo inet loopback # The primary network interface allow-hotplug enx000acd26e2c8 iface enx000acd26e2c8 inet dhcp # This is an autoconfigured IPv6 interface iface enx000acd26e2c8 inet6 auto

    Gut, bei der Installation hat Debian ja nur die zusätzliche Netzwerkschnittstelle erkannt, folgerichtig ist die auch als primäre Schnittstelle eingetragen. Dann ändern wir das mal...

    # This file describes the network interfaces available on your system # and how to activate them. For more information, see interfaces(5). source /etc/network/interfaces.d/* # The loopback network interface auto lo iface lo inet loopback # The primary network interface #allow-hotplug enx000acd26e2c8 allow-hotplug eth0 #iface enx000acd26e2c8 inet dhcp iface eth0 inet dhcp # This is an autoconfigured IPv6 interface #iface enx000acd26e2c8 inet6 auto iface eth0 inet6 auto

    Danach einmal alles neu starten bitte 😉

    systemctl status networking

    Da fehlte mir aber jetzt die IPv4 Adresse, so das ich einmal komplett neugestartet habe. Der Ordnung halber, so hätte man die IPv4 Adresse bekommen.

    dhclient eth0

    Nachdem Neustart kam dann das

    root@debian:/etc/network# ip a 1: lo: <LOOPBACK,UP,LOWER_UP> mtu 65536 qdisc noqueue state UNKNOWN group default qlen 1000 link/loopback 00:00:00:00:00:00 brd 00:00:00:00:00:00 inet 127.0.0.1/8 scope host lo valid_lft forever preferred_lft forever inet6 ::1/128 scope host valid_lft forever preferred_lft forever 2: eth0: <BROADCAST,MULTICAST,UP,LOWER_UP> mtu 1500 qdisc mq state UP group default qlen 1000 link/ether 62:03:b0:d6:dc:b3 brd ff:ff:ff:ff:ff:ff inet 192.168.3.172/24 brd 192.168.3.255 scope global dynamic eth0 valid_lft 42452sec preferred_lft 42452sec inet6 fd8a:6ff:2880:0:6003:b0ff:fed6:dcb3/64 scope global dynamic mngtmpaddr valid_lft forever preferred_lft forever inet6 2a02:908:1260:13bc:6003:xxxx:xxxx:xxxx/64 scope global dynamic mngtmpaddr valid_lft 5667sec preferred_lft 2067sec inet6 fe80::6003:b0ff:fed6:dcb3/64 scope link valid_lft forever preferred_lft forever 3: enx000acd26e2c8: <BROADCAST,MULTICAST> mtu 1500 qdisc noop state DOWN group default qlen 1000 link/ether 00:0a:cd:26:e2:c8 brd ff:ff:ff:ff:ff:ff

    Fertig, eth0 läuft. Nun kann man den zusätzlichen Adapter entfernen oder halt konfigurieren, wenn man ihn braucht.

    Warum der Debian Installer die eth0 nicht erkennt verstehe ich nicht, aber vielleicht wird das irgendwann auch noch gefixt. Jetzt habe ich erst mal einen Workaround um eine Installation auf den ROCKPro64 zu bekommen.

  • ROCKPro64 - Netflix?

    ROCKPro64
    2
    0 Stimmen
    2 Beiträge
    409 Aufrufe
    FrankMF

    Anleitung von Kamil

    # Netflix Starting with 0.8.0rc13 it is possible to use Netflix on all **Ubuntu/armf** desktop images using regular Chromium browser. Due to Google policies images do not ship Widevine CDM required by Netflix to decrypt videos. Currently, Widevine CDM is only available for **armhf** and **Ubuntu**. You have to install Widevine CDM with: ```bash install_widevine_drm.sh ``` This will take between 5 to 15 mins depending on the performance of SD-card, and your Internet connection.
  • Zwischenfazit April 2019

    Angeheftet ROCKPro64
    1
    1 Stimmen
    1 Beiträge
    555 Aufrufe
    Niemand hat geantwortet
  • ROCKPro64 - RP64.GPIO

    Angeheftet Verschoben Hardware
    6
    0 Stimmen
    6 Beiträge
    6k Aufrufe
    FrankMF

    Hallo zusammen,

    da ich weiß das dieser Artikel recht beliebt ist, wollen wir den heute mal aktualisieren. Vieles aus den vorherigen Beiträgen passt noch. Es gibt aber kleine Anpassungen.

    Hardware ROCKPro64v21. 2GB RAM Software Kamils Release 0.10.9 Linux rockpro64 5.6.0-1132-ayufan-g81043e6e109a #ayufan SMP Tue Apr 7 10:07:35 UTC 2020 aarch64 GNU/Linux Installation apt install python

    Danach laden wir das Projekt

    git clone https://github.com/Leapo/Rock64-R64.GPIO

    PIN Nummern anpassen

    cd Rock64-R64.GPIO/R64 nano _GPIO.py

    Datei ergänzen

    # Define GPIO arrays #ROCK_valid_channels = [27, 32, 33, 34, 35, 36, 37, 38, 64, 65, 67, 68, 69, 76, 79, 80, 81, 82, 83, 84, 85, 86, 87, 88, 89, 96, 97, 98, 100, 101, 102, 103, 104] #BOARD_to_ROCK = [0, 0, 0, 89, 0, 88, 0, 0, 64, 0, 65, 0, 67, 0, 0, 100, 101, 0, 102, 97, 0, 98, 103, 96, 104, 0, 76, 68, 69, 0, 0, 0, 38, 32, 0, 33, 37, 34, 36, 0, 35, 0, 0, 81, 82, 87, 83, 0, 0, 80, 79, 85, 84, 27, 86, 0, 0, 0, 0, 0, 0, 89, 88] #BCM_to_ROCK = [68, 69, 89, 88, 81, 87, 83, 76, 104, 98, 97, 96, 38, 32, 64, 65, 37, 80, 67, 33, 36, 35, 100, 101, 102, 103, 34, 82] ROCK_valid_channels = [52,53,152,54,50,33,48,39,41,43,155,156,125,122,121,148,147,120,36,149,153,42,45,44,124,126,123,127] BOARD_to_ROCK = [0,0,0,52,0,53,0,152,148,0,147,54,120,50,0,33,36,0,149,48,0,39,153,41,42,0,45,43,44,155,0,156,124,125,0,122,126,121,123,0,127] BCM_to_ROCK = [43,44,52,53,152,155,156,45,42,39,48,41,124,125,148,147,124,54,120,122,123,127,33,36,149,153,121,50]

    Abspeichern.

    Datei test.py anlegen

    nano test.py

    Inhalt

    #!/usr/bin/env python # Frank Mankel, 2018, LGPLv3 License # Rock 64 GPIO Library for Python # Thanks Allison! Thanks smartdave! import R64.GPIO as GPIO from time import sleep print("Output Test R64.GPIO Module...") # Set Variables var_gpio_out = 156 var_gpio_in = 155 # GPIO Setup GPIO.setwarnings(True) GPIO.setmode(GPIO.ROCK) GPIO.setup(var_gpio_out, GPIO.OUT, initial=GPIO.HIGH) # Set up GPIO as an output, with an initial state of HIGH GPIO.setup(var_gpio_in, GPIO.IN, pull_up_down=GPIO.PUD_UP) # Set up GPIO as an input, pullup enabled # Test Output print("") print("Testing GPIO Input/Output:") while True: var_gpio_state_in = GPIO.input(var_gpio_in) var_gpio_state = GPIO.input(var_gpio_out) # Return State of GPIO if var_gpio_state == 0 and var_gpio_state_in == 1: GPIO.output(var_gpio_out,GPIO.HIGH) # Set GPIO to HIGH print("Input State: " + str(var_gpio_state_in)) # Print results print("Output State IF : " + str(var_gpio_state)) # Print results else: GPIO.output(var_gpio_out,GPIO.LOW) # Set GPIO to LOW print("Input State: " + str(var_gpio_state_in)) # Print results print("Output State ELSE: " + str(var_gpio_state)) # Print results sleep(0.5) exit() Beispiel

    Bild Text

    Wenn der Taster im Bild betätigt wird, soll die LED blinken.

    Wir benutzen folgende Ein- Augänge des ROCKPro64.

    # Set Variables var_gpio_out = 156 var_gpio_in = 155

    Das heißt:

    an Pin 1 (3,3V) kommt eine Strippe des Tasters an Pin 29 (Input) kommt eine Strippe des Tasters an Pin 31 (Output) kommt der Plus-Pol der LED an Pin 39 (GND) kommt der Minus-Pol der LED

    Somit wird auf den Eingang (Pin 29) bei Betätigung des Tasters 3,3 Volt angelegt. Damit wird dann der Eingang als High (1) erkannt. Die LED wird über den Ausgang (Pin 31) gesteuert.

    Starten kann man das Script mit

    python test.py

  • Release Empfehlung für Einsteiger

    Verschoben Archiv
    2
    0 Stimmen
    2 Beiträge
    1k Aufrufe
    FrankMF

    Sieht so aus, als wenn wir ein neues Traumpaar haben. 🙂

    0.7.7

    und

    rock64@rockpro64:/mnt$ uname -a Linux rockpro64 4.18.0-rc3-1046-ayufan-ge76778b6aa4b #1 SMP PREEMPT Thu Jul 19 14:10:17 UTC 2018 aarch64 aarch64 aarch64 GNU/Linux
  • ROCKPro64 - Der Bootvorgang

    Verschoben Hardware
    3
    0 Stimmen
    3 Beiträge
    2k Aufrufe
    FrankMF

    Um einen neuen Kernel booten zu können, brauche ich diese 4 Dateien unter /boot

    config-4.19.0-rc4-1065-ayufan-g72e04c7b3e06 initrd.img-4.19.0-rc4-1065-ayufan-g72e04c7b3e06 System.map-4.19.0-rc4-1065-ayufan-g72e04c7b3e06 vmlinuz-4.19.0-rc4-1065-ayufan-g72e04c7b3e06

    Und den Ordner /boot/dtbs/4.19.0-rc4-1065-ayufan-g72e04c7b3e06 mit folgendem Inhalt

    rock64@rockpro64v2_0:/boot/dtbs/4.19.0-rc4-1065-ayufan-g72e04c7b3e06$ ls -la total 104 drwxr-xr-x 26 root root 4096 Sep 30 09:54 . drwxr-xr-x 6 root root 4096 Sep 30 09:55 .. drwxr-xr-x 2 root root 4096 Sep 30 09:54 al drwxr-xr-x 2 root root 4096 Sep 30 09:54 allwinner drwxr-xr-x 2 root root 4096 Sep 30 09:54 altera drwxr-xr-x 2 root root 4096 Sep 30 09:54 amd drwxr-xr-x 2 root root 4096 Sep 30 09:54 amlogic drwxr-xr-x 2 root root 4096 Sep 30 09:54 apm drwxr-xr-x 2 root root 4096 Sep 30 09:54 arm drwxr-xr-x 4 root root 4096 Sep 30 09:54 broadcom drwxr-xr-x 2 root root 4096 Sep 30 09:54 cavium drwxr-xr-x 2 root root 4096 Sep 30 09:54 exynos drwxr-xr-x 2 root root 4096 Sep 30 09:54 freescale drwxr-xr-x 2 root root 4096 Sep 30 09:54 hisilicon drwxr-xr-x 2 root root 4096 Sep 30 09:54 lg drwxr-xr-x 2 root root 4096 Sep 30 09:54 marvell drwxr-xr-x 2 root root 4096 Sep 30 09:54 mediatek drwxr-xr-x 2 root root 4096 Sep 30 09:54 nvidia drwxr-xr-x 2 root root 4096 Sep 30 09:54 qcom drwxr-xr-x 2 root root 4096 Sep 30 09:54 renesas drwxr-xr-x 2 root root 4096 Sep 30 09:54 rockchip drwxr-xr-x 2 root root 4096 Sep 30 09:54 socionext drwxr-xr-x 2 root root 4096 Sep 30 09:54 sprd drwxr-xr-x 2 root root 4096 Sep 30 09:54 synaptics drwxr-xr-x 2 root root 4096 Sep 30 09:54 xilinx drwxr-xr-x 2 root root 4096 Sep 30 09:54 zte

    Unter /boot/extlinux liegt dann die Datei extlinux.conf

    Die sieht bei mir dann so aus

    timeout 10 menu title select kernel label kernel-4.19.0-rc4-1065-ayufan-g72e04c7b3e06 kernel /boot/vmlinuz-4.19.0-rc4-1065-ayufan-g72e04c7b3e06 initrd /boot/initrd.img-4.19.0-rc4-1065-ayufan-g72e04c7b3e06 devicetreedir /boot/dtbs/4.19.0-rc4-1065-ayufan-g72e04c7b3e06 append rw panic=10 init=/sbin/init coherent_pool=1M ethaddr=${ethaddr} eth1addr=${eth1addr} serial=${serial#} cgroup_enable=cpuset cgroup_memory=1 cgroup_enable=memory swapaccount=1 root=LABEL=TEST rootwait rootfstype=ext4 label kernel-4.19.0-rc4-1065-ayufan-g72e04c7b3e06-memtest kernel /boot/vmlinuz-4.19.0-rc4-1065-ayufan-g72e04c7b3e06 initrd /boot/initrd.img-4.19.0-rc4-1065-ayufan-g72e04c7b3e06 devicetreedir /boot/dtbs/4.19.0-rc4-1065-ayufan-g72e04c7b3e06 append rw panic=10 init=/sbin/init coherent_pool=1M ethaddr=${ethaddr} eth1addr=${eth1addr} serial=${serial#} cgroup_enable=cpuset cgroup_memory=1 cgroup_enable=memory swapaccount=1 root=LABEL=TEST rootwait rootfstype=ext4 memtest

    Darunter kommen dann evt. die alten Kernel die installiert waren, das habe ich hier im Beispiel weg gelassen.

  • stretch-minimal-rockpro64

    Verschoben Linux
    3
    0 Stimmen
    3 Beiträge
    1k Aufrufe
    FrankMF

    Mal ein Test was der Speicher so kann.

    rock64@rockpro64:~/tinymembench$ ./tinymembench tinymembench v0.4.9 (simple benchmark for memory throughput and latency) ========================================================================== == Memory bandwidth tests == == == == Note 1: 1MB = 1000000 bytes == == Note 2: Results for 'copy' tests show how many bytes can be == == copied per second (adding together read and writen == == bytes would have provided twice higher numbers) == == Note 3: 2-pass copy means that we are using a small temporary buffer == == to first fetch data into it, and only then write it to the == == destination (source -> L1 cache, L1 cache -> destination) == == Note 4: If sample standard deviation exceeds 0.1%, it is shown in == == brackets == ========================================================================== C copy backwards : 2812.7 MB/s C copy backwards (32 byte blocks) : 2811.9 MB/s C copy backwards (64 byte blocks) : 2632.8 MB/s C copy : 2667.2 MB/s C copy prefetched (32 bytes step) : 2633.5 MB/s C copy prefetched (64 bytes step) : 2640.8 MB/s C 2-pass copy : 2509.8 MB/s C 2-pass copy prefetched (32 bytes step) : 2431.6 MB/s C 2-pass copy prefetched (64 bytes step) : 2424.1 MB/s C fill : 4887.7 MB/s (0.5%) C fill (shuffle within 16 byte blocks) : 4883.0 MB/s C fill (shuffle within 32 byte blocks) : 4889.3 MB/s C fill (shuffle within 64 byte blocks) : 4889.2 MB/s --- standard memcpy : 2807.3 MB/s standard memset : 4890.4 MB/s (0.3%) --- NEON LDP/STP copy : 2803.7 MB/s NEON LDP/STP copy pldl2strm (32 bytes step) : 2802.1 MB/s NEON LDP/STP copy pldl2strm (64 bytes step) : 2800.7 MB/s NEON LDP/STP copy pldl1keep (32 bytes step) : 2745.5 MB/s NEON LDP/STP copy pldl1keep (64 bytes step) : 2745.8 MB/s NEON LD1/ST1 copy : 2801.9 MB/s NEON STP fill : 4888.9 MB/s (0.3%) NEON STNP fill : 4850.1 MB/s ARM LDP/STP copy : 2803.8 MB/s ARM STP fill : 4893.0 MB/s (0.5%) ARM STNP fill : 4851.7 MB/s ========================================================================== == Framebuffer read tests. == == == == Many ARM devices use a part of the system memory as the framebuffer, == == typically mapped as uncached but with write-combining enabled. == == Writes to such framebuffers are quite fast, but reads are much == == slower and very sensitive to the alignment and the selection of == == CPU instructions which are used for accessing memory. == == == == Many x86 systems allocate the framebuffer in the GPU memory, == == accessible for the CPU via a relatively slow PCI-E bus. Moreover, == == PCI-E is asymmetric and handles reads a lot worse than writes. == == == == If uncached framebuffer reads are reasonably fast (at least 100 MB/s == == or preferably >300 MB/s), then using the shadow framebuffer layer == == is not necessary in Xorg DDX drivers, resulting in a nice overall == == performance improvement. For example, the xf86-video-fbturbo DDX == == uses this trick. == ========================================================================== NEON LDP/STP copy (from framebuffer) : 602.5 MB/s NEON LDP/STP 2-pass copy (from framebuffer) : 551.6 MB/s NEON LD1/ST1 copy (from framebuffer) : 667.1 MB/s NEON LD1/ST1 2-pass copy (from framebuffer) : 605.6 MB/s ARM LDP/STP copy (from framebuffer) : 445.3 MB/s ARM LDP/STP 2-pass copy (from framebuffer) : 428.8 MB/s ========================================================================== == Memory latency test == == == == Average time is measured for random memory accesses in the buffers == == of different sizes. The larger is the buffer, the more significant == == are relative contributions of TLB, L1/L2 cache misses and SDRAM == == accesses. For extremely large buffer sizes we are expecting to see == == page table walk with several requests to SDRAM for almost every == == memory access (though 64MiB is not nearly large enough to experience == == this effect to its fullest). == == == == Note 1: All the numbers are representing extra time, which needs to == == be added to L1 cache latency. The cycle timings for L1 cache == == latency can be usually found in the processor documentation. == == Note 2: Dual random read means that we are simultaneously performing == == two independent memory accesses at a time. In the case if == == the memory subsystem can't handle multiple outstanding == == requests, dual random read has the same timings as two == == single reads performed one after another. == ========================================================================== block size : single random read / dual random read 1024 : 0.0 ns / 0.0 ns 2048 : 0.0 ns / 0.0 ns 4096 : 0.0 ns / 0.0 ns 8192 : 0.0 ns / 0.0 ns 16384 : 0.0 ns / 0.0 ns 32768 : 0.0 ns / 0.0 ns 65536 : 4.5 ns / 7.2 ns 131072 : 6.8 ns / 9.7 ns 262144 : 9.8 ns / 12.8 ns 524288 : 11.4 ns / 14.7 ns 1048576 : 16.0 ns / 22.6 ns 2097152 : 114.0 ns / 175.3 ns 4194304 : 161.7 ns / 219.9 ns 8388608 : 190.7 ns / 241.5 ns 16777216 : 205.3 ns / 250.5 ns 33554432 : 212.9 ns / 255.5 ns 67108864 : 222.3 ns / 271.1 ns
  • Wiki zum ROCKPro64 veröffentlicht!

    Verschoben ROCKPro64
    1
    0 Stimmen
    1 Beiträge
    1k Aufrufe
    Niemand hat geantwortet