Skip to content

Kernel 4.4.x

Angeheftet Images
45 1 4.8k
  • ROCKPro64 - Release 0.10.6 Was geht?

    Angeheftet ROCKPro64 rockpro64
    1
    0 Stimmen
    1 Beiträge
    457 Aufrufe
    Niemand hat geantwortet
  • ROCKPro64 - USB-C -> LAN

    ROCKPro64 rockpro64
    1
    0 Stimmen
    1 Beiträge
    340 Aufrufe
    Niemand hat geantwortet
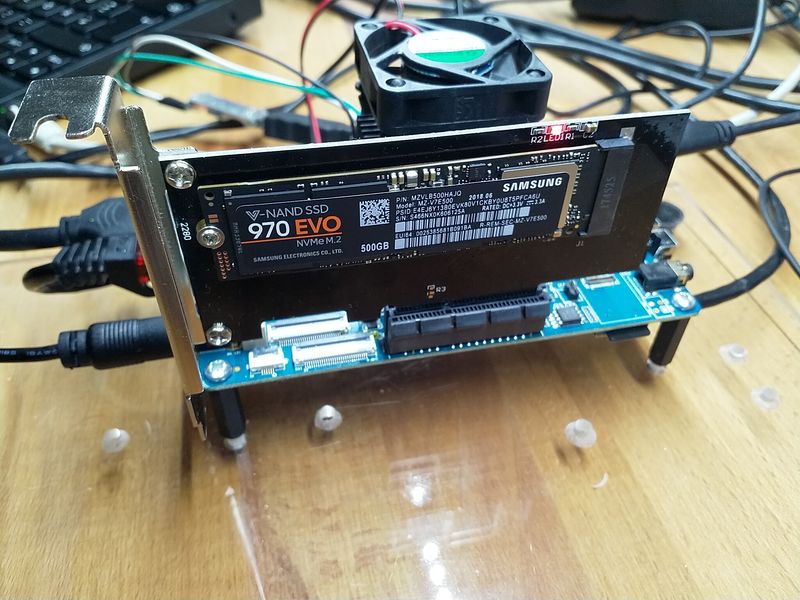
  • ROCKPro64 - Samsung 970 NVMe M.2 500GB

    Hardware hardware rockpro64
    1
    1
    0 Stimmen
    1 Beiträge
    1k Aufrufe
    Niemand hat geantwortet
  • [HOWTO] Verschlüsseltes NAS aufsetzen

    Verschoben ROCKPro64 howto linux rockpro64
    12
    0 Stimmen
    12 Beiträge
    3k Aufrufe
    FrankMF
    Da btrfs bei mir ja nicht so der Bringer war, Fehler im Image vom Kamil?, Fehler in btrfs? Ich weiß es nicht, also weg damit! Da ich das NAS noch richtig produktiv genutzt hatte, waren die Daten schnell gesichert. Danach das NAS neugestartet, nun sind die beiden Platten nicht mehr gemountet und wir können damit arbeiten. ACHTUNG! Ich bitte wie immer darum, das Gehirn ab hier einzuschalten! Sonst droht Datenverlust! Aus Sicherheitsgründen gebe ich hier die Laufwerke so an = sdX1 Das X bitte entsprechend austauschen! Die beiden Platten mit sudo fdisk /dev/sdX neu einrichten. Alte Partition weg, neu einrichten usw. Im Detail gehe ich hier jetzt nicht drauf ein. Ich gehe davon aus, das das bekannt ist. Der Plan raid_pool0 = sdX1 = /dev/mapper/raid_pool0 raid_pool1 = sdX1 = /dev/mapper/raid_pool1 Verschlüsseln sudo cryptsetup --key-size 512 --hash sha256 --iter-time 5000 --use-random luksFormat /dev/sdX1 sudo cryptsetup --key-size 512 --hash sha256 --iter-time 5000 --use-random luksFormat /dev/sdX1 Platten entschlüsseln sudo cryptsetup open /dev/sdX1 raid_pool0 sudo cryptsetup open /dev/sdX1 raid_pool1 RAID1 anlegen sudo mdadm --create /dev/md0 --auto md --level=1 --raid-devices=2 /dev/mapper/raid_pool0 /dev/mapper/raid_pool1 sudo mkfs.ext4 /dev/md0 Script zum Entschlüsseln und Mounten crypt.sh #!/bin/bash ###############################################################################$ # Autor: Frank Mankel # Verschlüsseltes Raid1 einbinden! # # Hardware: # ROCKPro64v2.1 # PCIe SATA Karte # 2St. 2,5 Zoll HDD Platten a 2TB # # Software: # bionic-minimal 0.7.9 # Kontakt: frank.mankel@gmail.com # ###############################################################################$ #Passwort abfragen echo "Passwort eingeben!" read -s password echo "Bitte warten......" #Passwörter abfragen echo -n $password | cryptsetup open /dev/sdX1 raid_pool0 -d - echo -n $password | cryptsetup open /dev/sdX1 raid_pool1 -d - #Raid1 mounten mount /dev/md0 /mnt/raid echo "Laufwerke erfolgreich gemountet!" Bis jetzt sieht das Raid ok aus, ich werde das die nächsten Tage mal ein wenig im Auge behalten. [ 82.430293] device-mapper: uevent: version 1.0.3 [ 82.430430] device-mapper: ioctl: 4.39.0-ioctl (2018-04-03) initialised: dm-devel@redhat.com [ 108.196397] md/raid1:md0: not clean -- starting background reconstruction [ 108.196401] md/raid1:md0: active with 2 out of 2 mirrors [ 108.240395] md0: detected capacity change from 0 to 2000260497408 [ 110.076860] md: resync of RAID array md0 [ 110.385099] EXT4-fs (md0): recovery complete [ 110.431715] EXT4-fs (md0): mounted filesystem with ordered data mode. Opts: (null) [57744.301662] md: md0: resync done.
  • RockPro64 - Firewall mit zwei LAN Schnittstellen!

    Verschoben ROCKPro64 howto rockpro64
    1
    0 Stimmen
    1 Beiträge
    841 Aufrufe
    Niemand hat geantwortet
  • 960 EVO M.2 vs. 970 PRO M.2

    ROCKPro64 rockpro64
    2
    0 Stimmen
    2 Beiträge
    2k Aufrufe
    FrankMF
    Die 970 steckt jetzt in meinem Haupt-PC. Dort werkelt ein aktuelles Linux Mint Cinnamon 19. Zum Vergleich. 100M frank@frank-MS-7A34:~$ sudo iozone -e -I -a -s 100M -r 4k -r 16k -r 512k -r 1024k -r 16384k -i 0 -i 1 -i 2 [sudo] Passwort für frank: Iozone: Performance Test of File I/O Version $Revision: 3.429 $ Compiled for 64 bit mode. Build: linux-AMD64 Contributors:William Norcott, Don Capps, Isom Crawford, Kirby Collins Al Slater, Scott Rhine, Mike Wisner, Ken Goss Steve Landherr, Brad Smith, Mark Kelly, Dr. Alain CYR, Randy Dunlap, Mark Montague, Dan Million, Gavin Brebner, Jean-Marc Zucconi, Jeff Blomberg, Benny Halevy, Dave Boone, Erik Habbinga, Kris Strecker, Walter Wong, Joshua Root, Fabrice Bacchella, Zhenghua Xue, Qin Li, Darren Sawyer, Vangel Bojaxhi, Ben England, Vikentsi Lapa. Run began: Sun Aug 19 16:52:19 2018 Include fsync in write timing O_DIRECT feature enabled Auto Mode File size set to 102400 kB Record Size 4 kB Record Size 16 kB Record Size 512 kB Record Size 1024 kB Record Size 16384 kB Command line used: iozone -e -I -a -s 100M -r 4k -r 16k -r 512k -r 1024k -r 16384k -i 0 -i 1 -i 2 Output is in kBytes/sec Time Resolution = 0.000001 seconds. Processor cache size set to 1024 kBytes. Processor cache line size set to 32 bytes. File stride size set to 17 * record size. random random bkwd record stride kB reclen write rewrite read reread read write read rewrite read fwrite frewrite fread freread 102400 4 92640 121912 131074 139525 45719 116653 102400 16 254286 285267 285539 320370 108049 314486 102400 512 537947 581765 606103 598137 537701 588214 102400 1024 566892 547921 567369 597286 518014 558686 102400 16384 1407884 1642148 1941120 2115608 2006947 1668118 iozone test complete. 1000M frank@frank-MS-7A34:~$ sudo iozone -e -I -a -s 1000M -r 4k -r 16k -r 512k -r 1024k -r 16384k -i 0 -i 1 -i 2 Iozone: Performance Test of File I/O Version $Revision: 3.429 $ Compiled for 64 bit mode. Build: linux-AMD64 Contributors:William Norcott, Don Capps, Isom Crawford, Kirby Collins Al Slater, Scott Rhine, Mike Wisner, Ken Goss Steve Landherr, Brad Smith, Mark Kelly, Dr. Alain CYR, Randy Dunlap, Mark Montague, Dan Million, Gavin Brebner, Jean-Marc Zucconi, Jeff Blomberg, Benny Halevy, Dave Boone, Erik Habbinga, Kris Strecker, Walter Wong, Joshua Root, Fabrice Bacchella, Zhenghua Xue, Qin Li, Darren Sawyer, Vangel Bojaxhi, Ben England, Vikentsi Lapa. Run began: Sun Aug 19 15:28:38 2018 Include fsync in write timing O_DIRECT feature enabled Auto Mode File size set to 1024000 kB Record Size 4 kB Record Size 16 kB Record Size 512 kB Record Size 1024 kB Record Size 16384 kB Command line used: iozone -e -I -a -s 1000M -r 4k -r 16k -r 512k -r 1024k -r 16384k -i 0 -i 1 -i 2 Output is in kBytes/sec Time Resolution = 0.000001 seconds. Processor cache size set to 1024 kBytes. Processor cache line size set to 32 bytes. File stride size set to 17 * record size. random random bkwd record stride kB reclen write rewrite read reread read write read rewrite read fwrite frewrite fread freread 1024000 4 95635 121379 108328 108265 45369 123356 1024000 16 239238 314359 245937 241877 105865 297193 1024000 512 596812 620661 442100 382367 351948 613525 1024000 1024 608903 611898 434687 417192 412018 646465 1024000 16384 1898738 2004622 2143647 2188062 2099674 1983240 iozone test complete. Da scheint auf dem ROCKPro64 noch ein wenig Luft nach oben.
  • ROCKPro64 - kein WLan-Modul möglich?

    ROCKPro64 rockpro64
    4
    2
    0 Stimmen
    4 Beiträge
    2k Aufrufe
    FrankMF
    Heute, 5 Monate später, kann ich bestätigen das WLan möglich ist Getestet auf einem ROCKPro64 v2.1 mit 2GB RAM. Eine Vorabversion von Recalbox machte es das erste Mal für mich möglich das WLan zu benutzen. Bericht Und PCIe ist abgeschaltet im dts File. pcie-phy { compatible = "rockchip,rk3399-pcie-phy"; #phy-cells = <0x0>; rockchip,grf = <0x15>; clocks = <0x8 0x8a>; clock-names = "refclk"; resets = <0x8 0x87>; reset-names = "phy"; status = "disabled"; phandle = <0x8b>; }; pcie@f8000000 { compatible = "rockchip,rk3399-pcie"; #address-cells = <0x3>; #size-cells = <0x2>; aspm-no-l0s; clocks = <0x8 0xc5 0x8 0xc4 0x8 0x147 0x8 0xa0>; clock-names = "aclk", "aclk-perf", "hclk", "pm"; bus-range = <0x0 0x1f>; max-link-speed = <0x2>; linux,pci-domain = <0x0>; msi-map = <0x0 0x89 0x0 0x1000>; interrupts = <0x0 0x31 0x4 0x0 0x0 0x32 0x4 0x0 0x0 0x33 0x4 0x0>; interrupt-names = "sys", "legacy", "client"; #interrupt-cells = <0x1>; interrupt-map-mask = <0x0 0x0 0x0 0x7>; interrupt-map = <0x0 0x0 0x0 0x1 0x8a 0x0 0x0 0x0 0x0 0x2 0x8a 0x1 0x0 0x0 0x0 0x3 0x8a 0x2 0x0 0x0 0x0 0x4 0x8a 0x3>; phys = <0x8b>; phy-names = "pcie-phy"; ranges = <0x83000000 0x0 0xfa000000 0x0 0xfa000000 0x0 0x1e00000 0x81000000 0x0 0xfbe00000 0x0 0xfbe00000 0x0 0x100000>; reg = <0x0 0xf8000000 0x0 0x2000000 0x0 0xfd000000 0x0 0x1000000>; reg-names = "axi-base", "apb-base"; resets = <0x8 0x82 0x8 0x83 0x8 0x84 0x8 0x85 0x8 0x86 0x8 0x81 0x8 0x80>; reset-names = "core", "mgmt", "mgmt-sticky", "pipe", "pm", "pclk", "aclk"; status = "disabled"; Also bleibt weiterhin ungeklärt, ob auch beides zusammen möglich ist. Also gleichzeitig das WLan-Modul und eine PCIe Karte.
  • ROCKPro64 - Der Bootvorgang

    Verschoben Hardware hardware rockpro64
    3
    0 Stimmen
    3 Beiträge
    2k Aufrufe
    FrankMF
    Um einen neuen Kernel booten zu können, brauche ich diese 4 Dateien unter /boot config-4.19.0-rc4-1065-ayufan-g72e04c7b3e06 initrd.img-4.19.0-rc4-1065-ayufan-g72e04c7b3e06 System.map-4.19.0-rc4-1065-ayufan-g72e04c7b3e06 vmlinuz-4.19.0-rc4-1065-ayufan-g72e04c7b3e06 Und den Ordner /boot/dtbs/4.19.0-rc4-1065-ayufan-g72e04c7b3e06 mit folgendem Inhalt rock64@rockpro64v2_0:/boot/dtbs/4.19.0-rc4-1065-ayufan-g72e04c7b3e06$ ls -la total 104 drwxr-xr-x 26 root root 4096 Sep 30 09:54 . drwxr-xr-x 6 root root 4096 Sep 30 09:55 .. drwxr-xr-x 2 root root 4096 Sep 30 09:54 al drwxr-xr-x 2 root root 4096 Sep 30 09:54 allwinner drwxr-xr-x 2 root root 4096 Sep 30 09:54 altera drwxr-xr-x 2 root root 4096 Sep 30 09:54 amd drwxr-xr-x 2 root root 4096 Sep 30 09:54 amlogic drwxr-xr-x 2 root root 4096 Sep 30 09:54 apm drwxr-xr-x 2 root root 4096 Sep 30 09:54 arm drwxr-xr-x 4 root root 4096 Sep 30 09:54 broadcom drwxr-xr-x 2 root root 4096 Sep 30 09:54 cavium drwxr-xr-x 2 root root 4096 Sep 30 09:54 exynos drwxr-xr-x 2 root root 4096 Sep 30 09:54 freescale drwxr-xr-x 2 root root 4096 Sep 30 09:54 hisilicon drwxr-xr-x 2 root root 4096 Sep 30 09:54 lg drwxr-xr-x 2 root root 4096 Sep 30 09:54 marvell drwxr-xr-x 2 root root 4096 Sep 30 09:54 mediatek drwxr-xr-x 2 root root 4096 Sep 30 09:54 nvidia drwxr-xr-x 2 root root 4096 Sep 30 09:54 qcom drwxr-xr-x 2 root root 4096 Sep 30 09:54 renesas drwxr-xr-x 2 root root 4096 Sep 30 09:54 rockchip drwxr-xr-x 2 root root 4096 Sep 30 09:54 socionext drwxr-xr-x 2 root root 4096 Sep 30 09:54 sprd drwxr-xr-x 2 root root 4096 Sep 30 09:54 synaptics drwxr-xr-x 2 root root 4096 Sep 30 09:54 xilinx drwxr-xr-x 2 root root 4096 Sep 30 09:54 zte Unter /boot/extlinux liegt dann die Datei extlinux.conf Die sieht bei mir dann so aus timeout 10 menu title select kernel label kernel-4.19.0-rc4-1065-ayufan-g72e04c7b3e06 kernel /boot/vmlinuz-4.19.0-rc4-1065-ayufan-g72e04c7b3e06 initrd /boot/initrd.img-4.19.0-rc4-1065-ayufan-g72e04c7b3e06 devicetreedir /boot/dtbs/4.19.0-rc4-1065-ayufan-g72e04c7b3e06 append rw panic=10 init=/sbin/init coherent_pool=1M ethaddr=${ethaddr} eth1addr=${eth1addr} serial=${serial#} cgroup_enable=cpuset cgroup_memory=1 cgroup_enable=memory swapaccount=1 root=LABEL=TEST rootwait rootfstype=ext4 label kernel-4.19.0-rc4-1065-ayufan-g72e04c7b3e06-memtest kernel /boot/vmlinuz-4.19.0-rc4-1065-ayufan-g72e04c7b3e06 initrd /boot/initrd.img-4.19.0-rc4-1065-ayufan-g72e04c7b3e06 devicetreedir /boot/dtbs/4.19.0-rc4-1065-ayufan-g72e04c7b3e06 append rw panic=10 init=/sbin/init coherent_pool=1M ethaddr=${ethaddr} eth1addr=${eth1addr} serial=${serial#} cgroup_enable=cpuset cgroup_memory=1 cgroup_enable=memory swapaccount=1 root=LABEL=TEST rootwait rootfstype=ext4 memtest Darunter kommen dann evt. die alten Kernel die installiert waren, das habe ich hier im Beispiel weg gelassen.