Skip to content

Mastodon - Beiträge des NodeBB-Forums automatisiert posten

Linux
9 1 661
  • Ein Anfang 🙂

    2ac64792-48eb-443f-954e-9bc868cf4b82-grafik.png

    wird noch ausführlicher, aber jetzt ist Feierabend für heute.

  • Das Beispiel oben habe ich mit curl gesendet.

    curl -H 'Authorization: Bearer <Zugangs-Token>' https://nrw.social/api/v1/statuses -F 'status=Just posted a new blog: {{EntryTitle}} - {{EntryUrl}}'
    

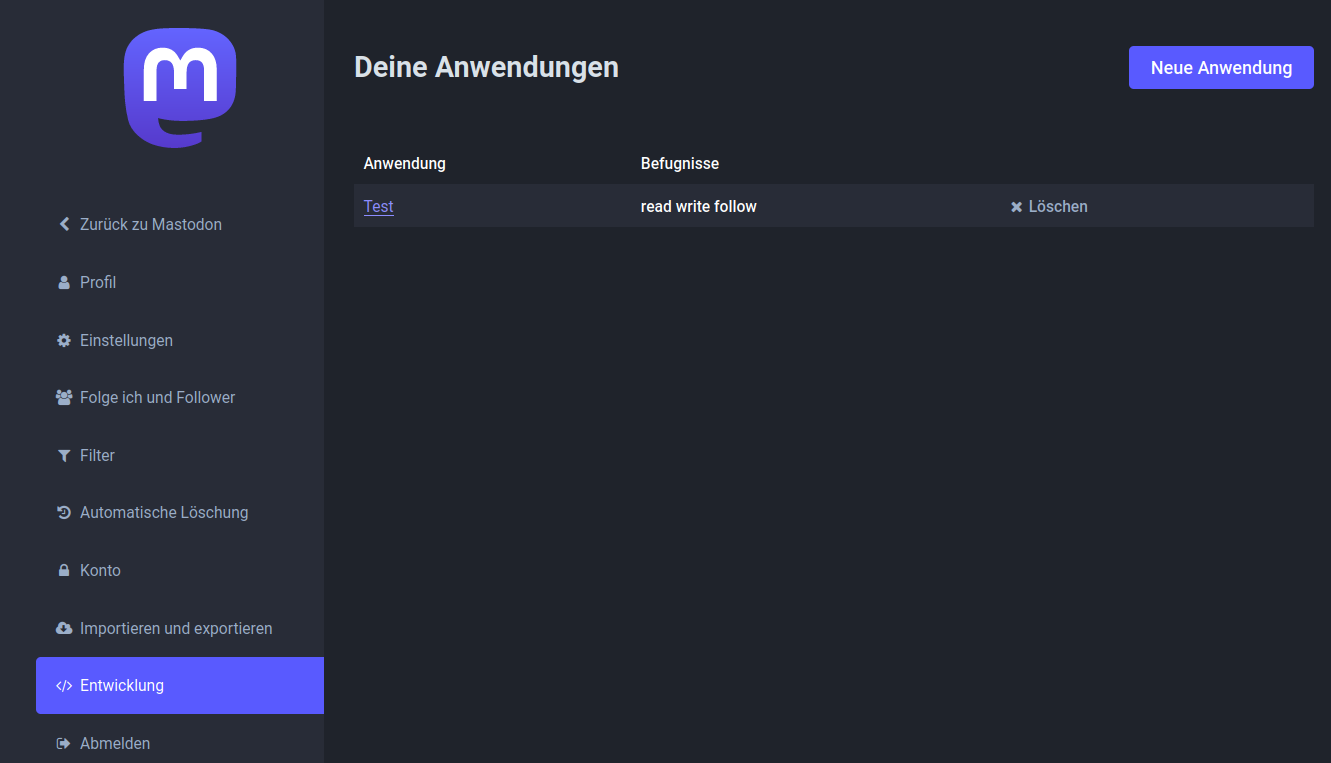
    Den Token kann man sich hier erzeugen.

    5490f35d-27c7-4d85-a00a-c19785fb608a-grafik.png

    Jetzt suche ich noch nach einer praktikablen Lösung, das ganze zu automatisieren.

  • Mal OpenAI gefragt 🙂

    import requests
    import json
    
    if __name__ == '__main__':
    
        # Replace these with your actual Mastodon credentials and access token
        MASTODON_INSTANCE = 'https://nrw.social'
        ACCESS_TOKEN = 'ACCESS-TOKEN'
    
        def send_to_mastodon(topic_title, topic_content):
            try:
                mastodon_api = f"{MASTODON_INSTANCE}/api/v1/statuses"
                status = f"New Topic: {topic_title}\n\n{topic_content}\n\n#Python #NewTopic"
    
                # Use the Mastodon access token for authorization
                headers = {'Authorization': f'Bearer {ACCESS_TOKEN}'}
                data = {'status': status}
    
                # Send the status update to Mastodon
                response = requests.post(mastodon_api, headers=headers, data=data)
                response.raise_for_status()
                print('Posted to Mastodon:', response.json())
            except requests.exceptions.RequestException as e:
                print('Error posting to Mastodon:', e)
    
    
        # Example usage when creating a new topic in Python
        topic_title = 'Hello Mastodon'
        topic_content = 'This is my first post from Python to Mastodon!'
    
        send_to_mastodon(topic_title, topic_content)
    
  • Und dann mal gefragt, wie ich an die letzte Topic ID komme.

    import redis
    
    # Replace these with your actual Redis configuration
    REDIS_HOST = 'localhost'
    REDIS_PORT = 6379
    REDIS_DB = 0
    
    def get_last_topic_id():
        try:
            # Connect to the Redis database
            r = redis.StrictRedis(host=REDIS_HOST, port=REDIS_PORT, db=REDIS_DB)
    
            # Get the last Topic ID from the Redis list
            last_topic_id = r.lindex('topics:tid', -1)
            
            if last_topic_id is not None:
                last_topic_id = int(last_topic_id.decode())
                return last_topic_id
            else:
                print('No Topics found in Redis database.')
                return None
        except redis.exceptions.RedisError as e:
            print('Error connecting to Redis:', e)
            return None
    
    # Example usage
    last_topic_id = get_last_topic_id()
    if last_topic_id is not None:
        print('Last Topic ID:', last_topic_id)
    

    Ok, das werde ich dann am WE mal testen und in was Brauchbares umsetzen.

  • Ok, das OpenAI muss auch gefüttert werden, sonst kommt man da auch nicht weiter.

    Das obere Beispiel muss erst mal um eine Authentifizierung erweitert werden.

    # Replace these with your actual Redis configuration
    REDIS_HOST = 'localhost'
    REDIS_PORT = 6380
    REDIS_DB = 0
    REDIS_PASSWORD =  "<PASSWORD>"
    

    und

    # Connect to the Redis database with authentication (if required)
    r = redis.StrictRedis(host=REDIS_HOST, port=REDIS_PORT, db=REDIS_DB, password=REDIS_PASSWORD)
    

    Ok, war einfach. Danach kam folgende Fehlermeldung.

    :~/mastodon$ python3 main.py 
    Erfolg Redis<ConnectionPool<Connection<host=localhost,port=6380,db=0>>>
    Error connecting to Redis: WRONGTYPE Operation against a key holding the wrong kind of value
    

    Was das sein soll kann ich mir vorstellen, aber was nun? OK, OpenAI bitte arbeiten 🙂

    Darf man das von OpenAI einfach posten? Ach, da die auch keinen Quellenangaben haben und alles nur geklaut ist, kann ich das auch machen 🙂

    The error message "WRONGTYPE Operation against a key holding the wrong kind of value" in Redis typically occurs when you try to perform an operation on a key with a data type that is incompatible with that operation. In the context of NodeBB, this error might occur if the 'topics:tid' key is expected to be a Redis list, but it contains data of a different type.
    
    To investigate and resolve this issue, you can take the following steps:
    
        Check the data type of the 'topics:tid' key: Use the Redis CLI to inspect the data type of the key to verify if it is indeed a list. Open a terminal or command prompt and run the following command:
    
        bash
    
    redis-cli
    
    Then, in the Redis CLI, check the data type of the key:
    
    bash
    
        TYPE topics:tid
    
        The response should be "list" if the key is of the correct type. If it is not a list, this could be the cause of the error.
    
        Confirm NodeBB's usage of the key: Ensure that NodeBB is using the 'topics:tid' key as a list and not attempting to use it as a different data type. Check your NodeBB codebase or any plugins that might interact with this key to ensure that they treat it as a list.
    
        Clean up the incorrect data: If you find that the data in the 'topics:tid' key is of the wrong type, you might need to clean up the data. Be cautious when doing this to avoid data loss. If you are not sure about the correct approach, consider seeking help from NodeBB community forums or relevant documentation.
    
        Re-populate the correct data: After resolving any data type issues, you may need to re-populate the 'topics:tid' key with the correct data. NodeBB should handle this automatically when users create new topics, but if necessary, you can manually set the key to the correct value.
    
        Restart NodeBB: After making any changes, be sure to restart your NodeBB server to ensure that the changes take effect.
    
    Remember that modifying the Redis data directly can be risky, so it's essential to have backups and exercise caution while making any changes. If you are uncertain about how to proceed, seeking assistance from experienced NodeBB developers or the community can be beneficial.
    

    Ok, testen wir den Typ auf der Konsole.

    redis-cli -p 6380
    127.0.0.1:6380> AUTH default <PASSWORD>
    127.0.0.1:6380> OK
    127.0.0.1:6380> TYPE topics:tid
    zset
    127.0.0.1:6380> exit
    

    Ok, nun weiß ich das der Datensatz vom Type zset ist. Wir füttern wieder die Maschine.

    If the Redis key 'topics:tid' is of type "zset" (sorted set), the "WRONGTYPE Operation against a key holding the wrong kind of value" error could occur if you're trying to perform an operation on it that's only applicable to lists or other data types.
    
    In a sorted set, the elements are stored in such a way that they are ordered based on a score. Each element has a score associated with it, and the elements are sorted based on this score. This data structure is quite different from a list, which stores elements in a specific order without any associated scores.
    
    To resolve the issue, you need to ensure that the operations you perform on the 'topics:tid' key are appropriate for a sorted set data type.
    
    If you intended to use the sorted set for holding the topic IDs, here's how you can get the last topic ID from a sorted set in Python using the redis library:
    
    python
    
    import redis
    
    # Replace these with your actual Redis configuration and password (if any)
    REDIS_HOST = 'localhost'
    REDIS_PORT = 6379
    REDIS_DB = 0
    REDIS_PASSWORD = 'your-redis-password'  # Set to None if no password is used
    
    def get_last_topic_id():
        try:
            # Connect to the Redis database with authentication (if required)
            r = redis.StrictRedis(host=REDIS_HOST, port=REDIS_PORT, db=REDIS_DB, password=REDIS_PASSWORD)
    
            # Get the last Topic ID from the sorted set
            last_topic_id = r.zrange('topics:tid', -1, -1, withscores=True)
    
            if last_topic_id:
                last_topic_id = int(last_topic_id[0][0].decode())
                return last_topic_id
            else:
                print('No Topics found in the sorted set.')
                return None
        except redis.exceptions.RedisError as e:
            print('Error connecting to Redis:', e)
            return None
    
    # Example usage
    last_topic_id = get_last_topic_id()
    if last_topic_id is not None:
        print('Last Topic ID:', last_topic_id)
    
    In this code, we use the zrange command to retrieve the last element (topic ID) from the sorted set 'topics:tid' with the optional withscores=True parameter to also get the score associated with it (although in this case, the score might not be used).
    
    Make sure to replace 'localhost' and 6379 with the appropriate host and port where your Redis server is running, and set REDIS_DB to the appropriate database number used by NodeBB (usually 0). Also, replace 'your-redis-password' with the actual password used for authentication, or set it to None if no password is required.
    

    Das danach in mein Python Script eingefügt und ausprobiert.

    ~/mastodon$ python3 main.py 
    Last Topic ID: 1456
    

    Kontrolle, der letzte Beitrag in meinem Forum ist folgender.

    Passt 🙂 Jetzt kann ich weitermachen.

  • FrankMF FrankM hat am auf dieses Thema verwiesen
  • FrankMF FrankM hat am auf dieses Thema verwiesen
  • Das kleine Projekt ist erfolgreich beendet.
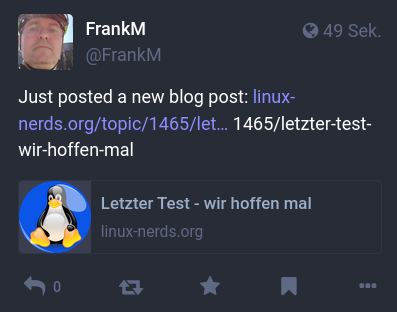
    ba0fddff-8579-42f7-9391-cac6f05e5912-grafik.png

    So bald ich den Code bereinigt habe, werde ich den bei gitlab.com einstellen, das es sich jeder Interessierte dort kopieren kann. Es kommt auch noch eine ausführliche Anleitung dazu.

  • Das versprochene Gitlab Repository https://gitlab.com/Bullet64/nodebb_post_to_mastodon

    Viel Spaß beim Testen 🙂

  • Uupps, da hat noch ein Test auf nicht erlaubte Kategorien gefehlt. Ich habe hier z.B. einen privaten Bereich, blöd wenn man das dann nach Mastodon schiebt, es aber niemand lesen kann weil ihm die Rechte fehlen.

    Die Kategorien kann man in der config.py eintragen.

  • Ergänzt um eine automatische Übernahme der Tags aus dem Forum. Man muss den Beiträgen in Mastodon ja auch Reichweite geben 🙂

  • Forgejo - Down on Debian 13

    Forgejo forgejo catatonit linux podman quadlet
    1
    0 Stimmen
    1 Beiträge
    67 Aufrufe
    Niemand hat geantwortet
  • Update 1.34.1

    Vaultwarden vaultwarden linux
    1
    0 Stimmen
    1 Beiträge
    95 Aufrufe
    Niemand hat geantwortet
  • OpenCloud - Docker Compose local

    Verschoben OpenCloud opencloud linux
    3
    1
    0 Stimmen
    3 Beiträge
    667 Aufrufe
    FrankMF
    Noch was Wichtiges. Die Docker Installation nutzt folgende config. In meinem Beispiel findet man sie unter /home/frank/opencloud/deployments/examples/opencloud_full Darin liegt ein .env ## Basic Settings ## # Define the docker compose log driver used. # Defaults to local LOG_DRIVER= # If you're on an internet facing server, comment out following line. # It skips certificate validation for various parts of OpenCloud and is # needed when self signed certificates are used. INSECURE=true ## Traefik Settings ## # Note: Traefik is always enabled and can't be disabled. # Serve Traefik dashboard. # Defaults to "false". TRAEFIK_DASHBOARD= # Domain of Traefik, where you can find the dashboard. # Defaults to "traefik.opencloud.test" TRAEFIK_DOMAIN= # Basic authentication for the traefik dashboard. # Defaults to user "admin" and password "admin" (written as: "admin:$2y$05$KDHu3xq92SPaO3G8Ybkc7edd51pPLJcG1nWk3lmlrIdANQ/B6r5pq"). # To create user:password pair, it's possible to use this command: # echo $(htpasswd -nB user) | sed -e s/\\$/\\$\\$/g TRAEFIK_BASIC_AUTH_USERS= # Email address for obtaining LetsEncrypt certificates. # Needs only be changed if this is a public facing server. TRAEFIK_ACME_MAIL= # Set to the following for testing to check the certificate process: # "https://acme-staging-v02.api.letsencrypt.org/directory" # With staging configured, there will be an SSL error in the browser. # When certificates are displayed and are emitted by # "Fake LE Intermediate X1", # the process went well and the envvar can be reset to empty to get valid certificates. TRAEFIK_ACME_CASERVER= [....gekürzt....] Man kann dort etwas ändern und mittels docker compose up -d alles aktualisieren. Radicale OpenCloud nutzt im Moment folgendes https://radicale.org/v3.html als Backend Server für Kalender & Kontakte. Jemand hat mir dann erklärt, wie das so funktioniert. Danach hatte es dann klick gemacht. https://fosstodon.org/@h4kamp/114562514701351170 In der config findet man zum Beispiel die Konfiguration für radicale (Kalender- und Kontakte-App) Das ist nur eine rudimentäre Ablage, wird gesteuert über Clienten, z.B. die Thunderbird Kalender Funktion. ### Radicale Setting ### # Radicale is a small open-source CalDAV (calendars, to-do lists) and CardDAV (contacts) server. # When enabled OpenCloud is configured as a reverse proxy for Radicale, providing all authenticated # OpenCloud users access to a Personal Calendar and Addressbook RADICALE=:radicale.yml # Docker image to use for the Radicale Container #RADICALE_DOCKER_IMAGE=opencloudeu/radicale # Docker tag to pull for the Radicale Container #RADICALE_DOCKER_TAG=latest # Define the storage location for the Radicale data. Set the path to a local path. # Ensure that the configuration and data directories are owned by the user and group with ID 1000:1000. # This matches the default user inside the container and avoids permission issues when accessing files. # Leaving it default stores data in docker internal volumes. #RADICALE_DATA_DIR=/your/local/radicale/data In einer Standard Installation ist das auskommentiert. RADICALE=:radicale.yml Danach ein docker compose up -d und Eure Kalendereinträge (extern auf einem Clienten verwaltet) werden in der OpenCloud gesichert.
  • Update 1.30.3 released

    Vaultwarden vaultwarden linux
    1
    0 Stimmen
    1 Beiträge
    159 Aufrufe
    Niemand hat geantwortet
  • Nextcloud - Collabora Installation Debian Bookworm 12

    Nextcloud nextcloud collabora linux
    2
    3
    0 Stimmen
    2 Beiträge
    2k Aufrufe
    FrankMF
    Ok, ich war leider nicht in der Lage den CODE-Server hinter einem Proxy zu installieren. Das CODE-Team scheint Docker zu lieben und das andere nur am Rande zu machen. Ohne Liebe Da ich extrem lange Ladezeiten hatte und die Software insgesamt nicht den Eindruck machte, das man das gerne produktiv auf einem Server nutzen möchte, habe ich den Server eben wieder gelöscht. Jetzt fehlt mir leider, die deepl.com Anbindung, aber das kann man ja auch über die Webseite nutzen. Ich nutze jetzt wieder den eingebauten CODE-Server, der eigentlich ein App-Image ist. [image: 1694677466020-28c41010-5ce1-4f7c-89d5-1c9b253011d0-grafik.png] Der klare Vorteil, es läuft incl. Dokumenten Freigabe Nicht vergessen, unter Allow list for WOPI requests kommen die Server Adressen des Nextcloud-Webservers rein! [image: 1694677621827-c1a06c2c-86b5-4750-a062-7ba9d8dd8253-grafik.png]
  • NodeBB - Update auf v1.18.6

    NodeBB nodebb nodejs linux
    1
    1
    0 Stimmen
    1 Beiträge
    175 Aufrufe
    Niemand hat geantwortet
  • 10G

    Linux 10g linux
    2
    0 Stimmen
    2 Beiträge
    227 Aufrufe
    FrankMF
    Bedingt durch ein paar Probleme mit der Forensoftware, habe ich einen kleinen Datenverlust erlitten. Dazu gehören auch hier einige Beiträge. Dann versuche ich das mal zu rekonstruieren. Oben hatten wir das SFP+ Modul ja getestet. Als nächsten Schritt habe ich die ASUS XG-C100F 10G SFP+ Netzwerkkarte in meinen Hauptrechner verbaut. [image: 1635752117002-20211028_162455_ergebnis.jpg] Die Verbindung zum Zyxel Switch erfolgt mit einem DAC-Kabel. Im Video zum Zyxel Switch wurde schön erklärt, das die DAC Verbindung stromsparender als RJ45 Adapter sind. Somit fiel die Wahl auf die DAC Verbindungen. Hier nochmal das Video. https://www.youtube.com/watch?v=59I-RlliRms So sieht so ein DAC Verbindungskabel aus. Die SFP+ Adapter sind direkt daran montiert. [image: 1635752308951-20211028_170118_ergebnis.jpg] ethtool root@frank-MS-7C37:/home/frank# ethtool enp35s0 Settings for enp35s0: Supported ports: [ FIBRE ] Supported link modes: 100baseT/Full 1000baseT/Full 10000baseT/Full 2500baseT/Full 5000baseT/Full Supported pause frame use: Symmetric Receive-only Supports auto-negotiation: Yes Supported FEC modes: Not reported Advertised link modes: 100baseT/Full 1000baseT/Full 10000baseT/Full 2500baseT/Full 5000baseT/Full Advertised pause frame use: Symmetric Advertised auto-negotiation: Yes Advertised FEC modes: Not reported Speed: 10000Mb/s Duplex: Full Port: FIBRE PHYAD: 0 Transceiver: internal Auto-negotiation: on Supports Wake-on: pg Wake-on: g Current message level: 0x00000005 (5) drv link Link detected: yes iperf3 ----------------------------------------------------------- Server listening on 5201 ----------------------------------------------------------- Accepted connection from 192.168.3.207, port 44570 [ 5] local 192.168.3.213 port 5201 connected to 192.168.3.207 port 44572 [ ID] Interval Transfer Bitrate Retr Cwnd [ 5] 0.00-1.00 sec 1.10 GBytes 9.43 Gbits/sec 46 1.59 MBytes [ 5] 1.00-2.00 sec 1.10 GBytes 9.42 Gbits/sec 0 1.60 MBytes [ 5] 2.00-3.00 sec 1.10 GBytes 9.42 Gbits/sec 3 1.60 MBytes [ 5] 3.00-4.00 sec 1.10 GBytes 9.42 Gbits/sec 0 1.60 MBytes [ 5] 4.00-5.00 sec 1.10 GBytes 9.42 Gbits/sec 0 1.61 MBytes [ 5] 5.00-6.00 sec 1.10 GBytes 9.42 Gbits/sec 0 1.63 MBytes [ 5] 6.00-7.00 sec 1.10 GBytes 9.42 Gbits/sec 0 1.63 MBytes [ 5] 7.00-8.00 sec 1.09 GBytes 9.41 Gbits/sec 0 1.68 MBytes [ 5] 8.00-9.00 sec 1.10 GBytes 9.42 Gbits/sec 0 1.68 MBytes [ 5] 9.00-10.00 sec 1.10 GBytes 9.42 Gbits/sec 0 1.68 MBytes [ 5] 10.00-10.02 sec 22.5 MBytes 9.45 Gbits/sec 0 1.68 MBytes - - - - - - - - - - - - - - - - - - - - - - - - - [ ID] Interval Transfer Bitrate Retr [ 5] 0.00-10.02 sec 11.0 GBytes 9.42 Gbits/sec 49 sender
  • Restic & Rclone & Nextcloud

    Linux nextcloud rclone linux restic
    3
    0 Stimmen
    3 Beiträge
    859 Aufrufe
    FrankMF
    Hier mal eine Ausgabe vom ersten Durchgang root@frank-MS-7C37:~# restic --password-file /root/passwd -r rclone:Nextcloud:HOME_UBUNTU backup --files-from /root/includes.txt repository 99xxxxa0 opened successfully, password is correct created new cache in /root/.cache/restic rclone: 2020/05/08 17:47:57 ERROR : locks: error listing: directory not found rclone: 2020/05/08 17:47:58 ERROR : index: error listing: directory not found rclone: 2020/05/08 17:47:58 ERROR : snapshots: error listing: directory not found Files: 3503 new, 0 changed, 0 unmodified Dirs: 2 new, 0 changed, 0 unmodified Added to the repo: 16.872 GiB processed 3503 files, 21.134 GiB in 1:02:56 snapshot fdxxxxec saved Der erste Durchgang hat also etwa eine Stunde benötigt. Durch die Deduplikation der Daten, ist der Vorgang beim zweiten Durchgang viel schneller weil nur neue oder geänderte Daten gesichert werden. Und außerdem sind alle Daten AES-256 verschlüsselt. Also perfekt zur Ablage in irgendeiner Cloud root@frank-MS-7C37:~# restic --password-file /root/passwd -r rclone:Nextcloud:HOME_UBUNTU backup --files-from /root/includes.txt repository 99xxxxa0 opened successfully, password is correct Files: 57 new, 41 changed, 3449 unmodified Dirs: 0 new, 2 changed, 0 unmodified Added to the repo: 22.941 MiB processed 3547 files, 21.137 GiB in 0:13 snapshot c6xxxxe4 saved Wie ihr seht, hat der zweite Durchgang nur ein paar neue und geänderte Daten gesichert. Der Rest ist ja schon vorhanden. Und das kann man dann auch problemlos täglich, wöchentlich oder was auch immer mal eben schnell durchführen. Eines meiner absoluten Lieblingstool