Skip to content

Restic UI - User documentation

Restic UI
1 1 307
  • File menu

    Load file

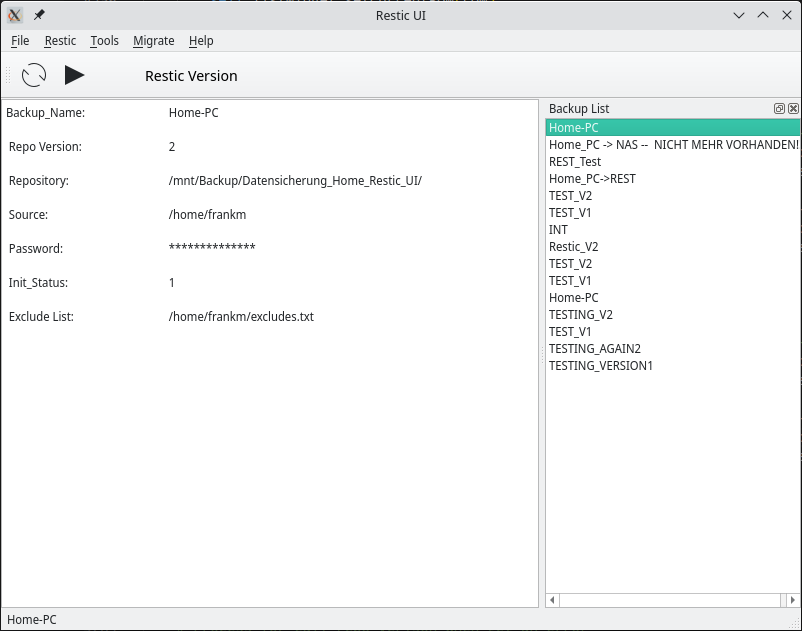
    For each backup we store the following data in a JSON file.

    Backup Data

    • name
    • repository
    • source
    • password (*)
    • init
    • exclude (*)

    REST Data

    • REST Domain
    • REST Port
    • REST User
    • REST Password
    • REST Folder

    (*) optional

    Data Explanation
    BACKUP DATA
    name The name of the backup, this name must be unique
    repository The path of the backup
    source The path of the data to be saved
    password The Restic password used to encrypt the data
    init Status whether the backup has already been initialized. 1 = done 0 = not done
    exclude Path to exclude.txt
    REST DATA
    REST Domain Domain from REST-server example.com
    REST Port Port from REST-server
    REST User username from HTTP-user
    REST Password password from HTTP-user
    REST Folder Folder on REST-server for storing backup

    Open Repo (since 1.5.1)

    Every now and then I have a repo lying around here somewhere that I want to take a look at. Comes very often from testing. I want to take a look before I delete it.

    • For opening the repo the password is needed.
    • The data of the repo is attached to the backup_list.json.

    Now you can look inside, list snapshots and so on.

    What you can't do is a new backup. For that the source would have to be set first.

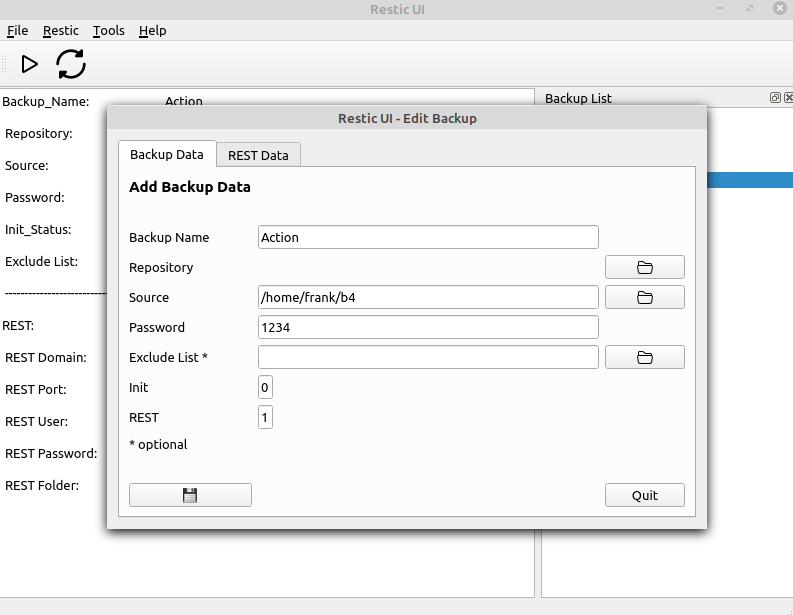
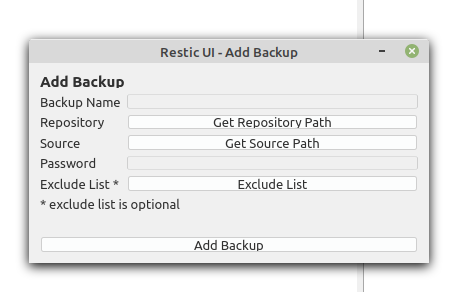
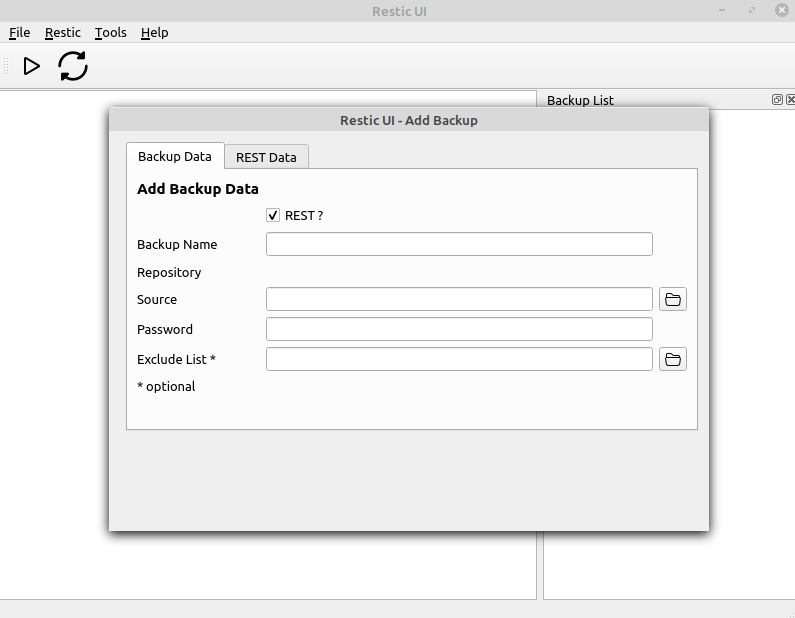
    Add backup

    Here we can create and save a backup

    cf27bad9-0435-4051-ba40-2ef14ee63603-image.png

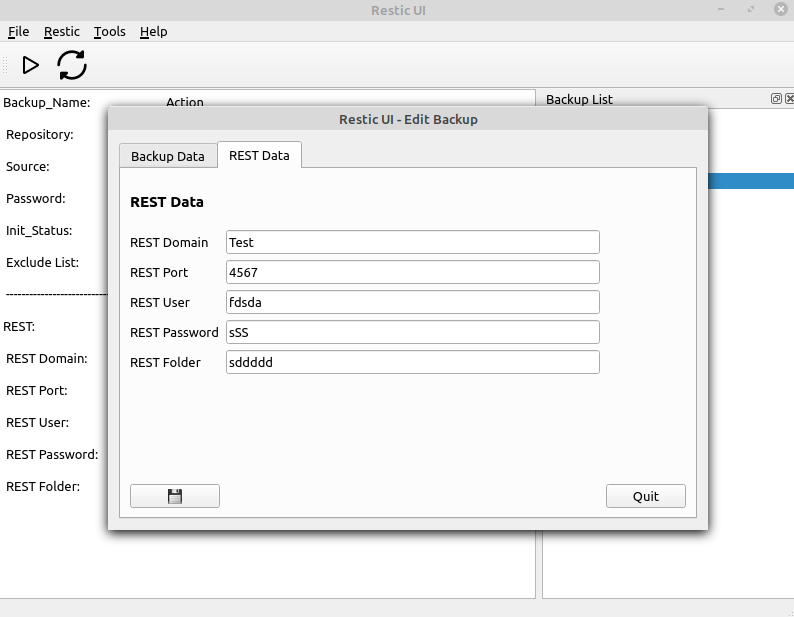
    Edit backup

    Here we can edit and save a backup

    cdde6f32-af6b-4e30-a39c-30f6b9af5d3c-image.png

    1b103470-2aba-4bc7-b03d-c71d53f161db-image.png

    Delete backup

    With this menu we can delete a backup AND it's data!

    Restic menu

    Init

    We will use this restic command

    restic -r /home/frank/restic_test/ init
    

    Backup

    We will use this restic command

    restic -r /home/frank/restic_test/ backup /home/frank/Bilder --exclude-file=excludes.txt
    

    Mount

    We will use this restic command

    restic -r /home/frank/restic_test/ mount /tmp/restic
    

    UMount

    We will use this command

    umount mount_path
    

    Restore

    We will use this restic command

    restic -r /srv/restic-repo restore <ID> --target /tmp/restore-work
    

    You will be ask for a snapshot <ID>. Use Tools/Snapshots and copy and paste the <ID>

    Tools menu

    Snapshots

    We will use this restic command

    restic -r /home/frank/restic_test/ snapshots
    

    Example output

    reading repository password from stdin
    ID        Time                 Host           Tags        Paths
    ----------------------------------------------------------------------------
    af5080e4  2021-08-04 21:22:10  frank-MS-7C37              /home/frank/Bilder
    ----------------------------------------------------------------------------
    1 snapshots
    

    List Snapshot

    We will use this restic command

    restic -r /home/frank/restic_test/ ls <ID>
    

    Example output

    reading repository password from stdin
    snapshot af5080e4 of [/home/frank/Bilder] filtered by [] at 2021-08-04 21:22:10.320165238 +0200 CEST):
    /home
    /home/frank
    /home/frank/Bilder
    /home/frank/Bilder/20210603_161.zip
    /home/frank/Bilder/20210603_161548.jpg
    /home/frank/Bilder/20210603_161601.jpg
    /home/frank/Bilder/20210721_140856.jpg
    /home/frank/Bilder/20210722_101305.jpg
    /home/frank/Bilder/Bildschirmfoto vom 2021-06-15 17-39-09.png
    /home/frank/Bilder/Bildschirmfoto vom 2021-06-24 18-48-52.png
    /home/frank/Bilder/Bildschirmfoto vom 2021-06-24 18-49-55.png
    /home/frank/Bilder/Cinebar
    ............
    

    Check

    We will use this restic command

    restic -r /home/frank/restic_test/ check
    

    Unlock

    We will use this restic command

     restic -r /home/frank/restic_test/ unlock
    

    Stats

    We will use this restic command

    restic -r /home/frank/restic_test/ stats
    

    Prune

    We will use this restic command

    restic -r /home/frank/restic_test/ forget --keep-last 3 --keep-monthly 3 --prune
    

    Version

    We will use this command

    restic version
    

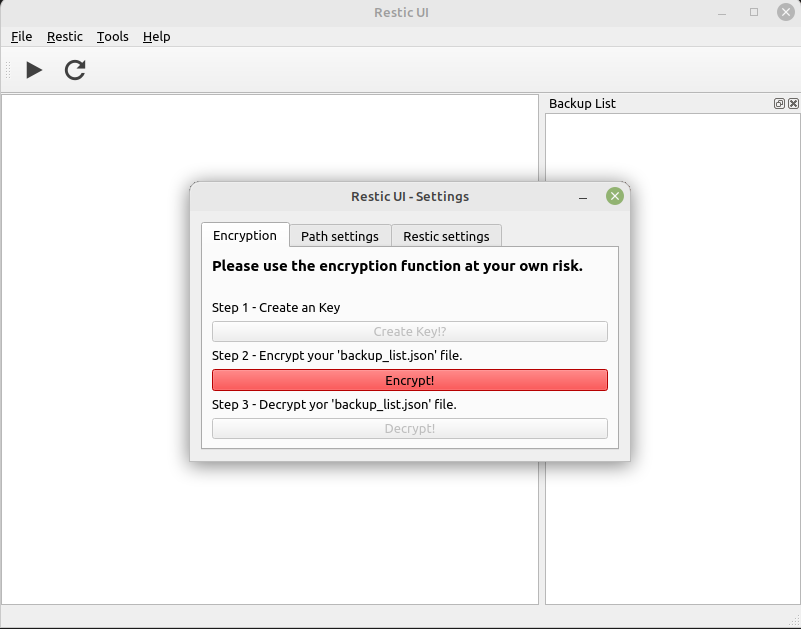
    Settings

    Here you can store

    Tab Encryption

    crypt.png

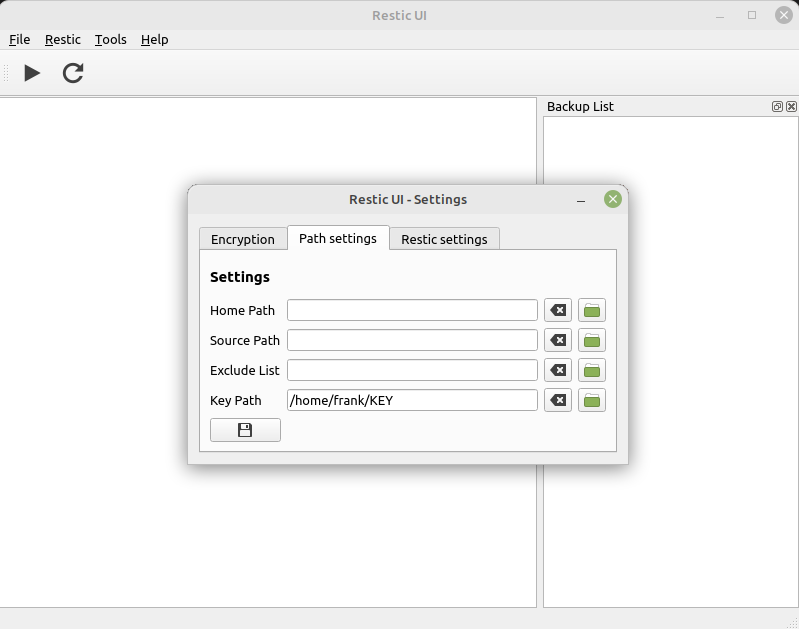
    Tab Paths

    • home path
    • source path
    • exclude list
    • Key Path

    path.png

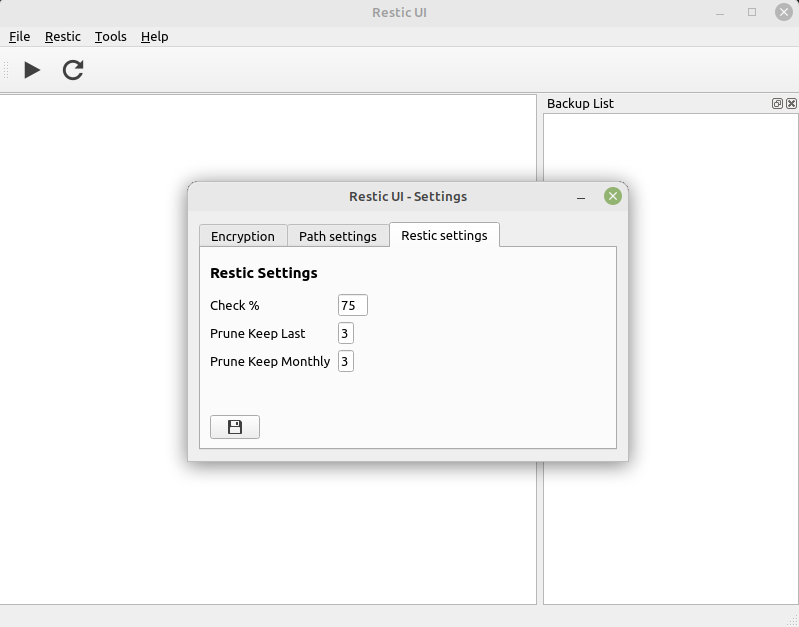
    Tab Restic Settings

    Here we can set some restic parameters

    • check --read-data subset 75%

    Then restic will only load 75% from data to check

    • prune keep last (0 - 9)
    • prune keep monthly (0 - 12)

    --keep-last n never delete the n last (most recent) snapshots
    --keep-monthly n for the last n months which have one or more snapshots, only keep the last one for that month.
    Quelle: https://restic.readthedocs.io/en/latest/060_forget.html

    restic.png

    Migrate menu

    Since restic version 0.14.0 compression has been added.

    The repo format has changed.

    There is the restic migrate command to migrate old repos V1 to V2.

    For this there is a new menu 'Migrate' with two commands

    migrate check and migrate update

    Migrate Check

    Migrate check will show available migrations for the repo.

    Migrate Update

    Attention. I am using

    export RESTIC_PASSWORD="I9n7G7G0ZpDWA3GOcJbIuwQCGvGUBkU5"
    

    because migrate update expects a password entry twice.

    Migrate Update will change repo version from V1 to V2. No data will be compressed, only with a new backup the data will be saved compressed.

    For more infos read -> https://linux-nerds.org/topic/1257/restic-ui-migrate

    Help menu

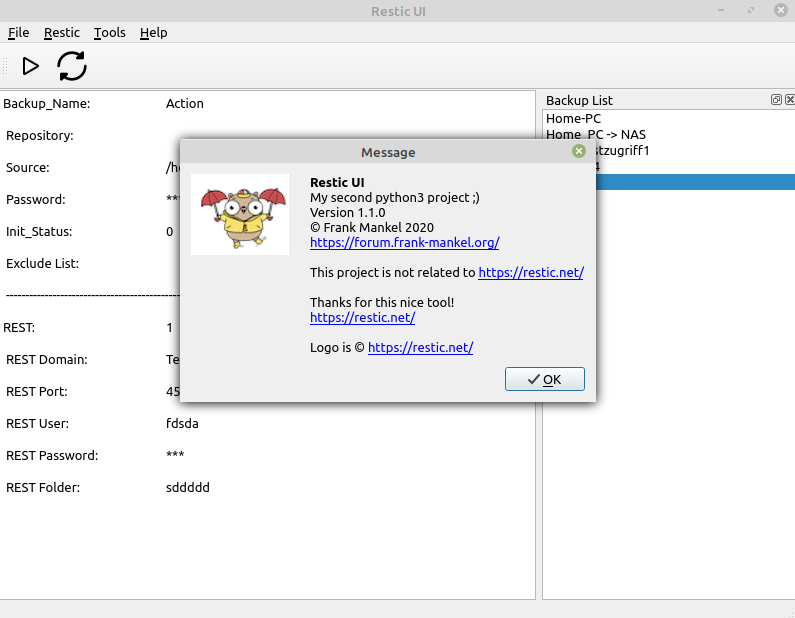
    About Restic UI

    2e1aff87-1541-473f-affa-ccbbcccf5028-image.png

    Restic documentation

    Restic documentation you can read here

    Translated with www.DeepL.com/Translator (free version)

1/1

27. Aug. 2021, 14:17


  • 0 Stimmen
    7 Beiträge
    375 Aufrufe
    https://gitlab.com/Bullet64/restic_ui_pywebio/-/commit/45c83cd8c38f466e427046b0f123c23def1bd7ca
  • Restic UI - Repo Version

    Restic UI restic-ui 4. Sept. 2022, 08:38
    1
    0 Stimmen
    1 Beiträge
    182 Aufrufe
    Niemand hat geantwortet
  • PyQt6 - QRegularExpressionValidator

    Python3 pyqt6 python3 23. Jan. 2022, 13:58
    0 Stimmen
    1 Beiträge
    678 Aufrufe
    Niemand hat geantwortet
  • Python3 - subprocess.run

    Python3 python3 24. Apr. 2021, 09:58
    0 Stimmen
    2 Beiträge
    301 Aufrufe
    Ich möchte das Thema noch mal ausgraben. Bin beim Recherchieren über diese Links gestolpert, die mein Interesse geweckt haben. https://security.openstack.org/guidelines/dg_avoid-shell-true.html https://bandit.readthedocs.io/en/latest/plugins/b603_subprocess_without_shell_equals_true.html Da ich aktuell nur eine Desktop Anwendung entwickle, ist das Thema Sicherheit nicht ganz so wichtig, weil wer hackt sich schon selber!? Aber, da man ja nie weiß, wie so ein Tool evt. mal benutzt wird, sollte man von Anfang an auf ein paar Dinge achten. Ok, schauen wir uns das mal genauer an. Link 1 - shell=True Ich kopiere mal das Beispiel aus dem Link. def count_lines(website): return subprocess.check_output('curl %s | wc -l' % website, shell=True) Ok, das Problem ist shell=True Ein Beispiel aus meinem Projekt result = subprocess.run(['restic', '-r', backup_data[row].repository, 'stats'], input=pass_word.pw[0], capture_output=True, text=True) Gesetzt wird der in meinem Beispiel nicht. Besuchen wir mal die Webseite vom subprocess.run https://docs.python.org/3/library/subprocess.html?highlight=subprocess run#subprocess.run Wenn ich das jetzt richtig verstehe, subprocess.run(args, *, stdin=None, input=None, stdout=None, stderr=None, capture_output=False, shell=False, cwd=None, timeout=None, check=False, encoding=None, errors=None, text=None, env=None, universal_newlines=None, **other_popen_kwargs) dann ist standardmäßig shell=False gesetzt. Damit ist das in meinem Projekt kein Problem. Link 2 - B603: subprocess_without_shell_equals_true Ein Tool auf gitlab.com wirft Security Warnings aus, dabei war diese. Schauen wir mal, was uns das sagen möchte. Python possesses many mechanisms to invoke an external executable. However, doing so may present a security issue if appropriate care is not taken to sanitize any user provided or variable input. Ok, es geht also um die Prüfung von Eingaben bzw. Variablen. Der Merksatz "Keine Benutzereingabe wird ungeprüft übernommen!" ist doch mit das Wichtigste, wenn man irgendwas programmiert. Nochmal mein Beispiel von oben. result = subprocess.run(['restic', '-r', backup_data[row].repository, 'stats'], input=pass_word.pw[0], capture_output=True, text=True) Ich übergebe dem Prozess einige Eingaben / Variablen. backup_data[row].repository pass_word.pw[0] Lesen wir wieder ein wenig in der Dokumentation von subprocess.run args is required for all calls and should be a string, or a sequence of program arguments. Providing a sequence of arguments is generally preferred, as it allows the module to take care of any required escaping and quoting of arguments (e.g. to permit spaces in file names). If passing a single string, either shell must be True (see below) or else the string must simply name the program to be executed without specifying any arguments. Das Wichtigste in Kürze Providing a sequence of arguments is generally preferred Der Aufruf von subprocess.run erwartet als erste Übergabe args subprocess.run(args, *, .... Mein Beispiel result = subprocess.run(['restic', '-r', backup_data[row].repository, 'stats'], .... Das zwischen den eckigen Klammern ist args. Laut der Anleitung ist es empfohlen, das als ein Argument zu übergeben, also so. Somit ist dafür gesorgt, das das Modul die Argumente selbst ein wenig "überwacht". as it allows the module to take care of any required escaping and quoting of arguments (e.g. to permit spaces in file names). Somit hätten man schon mal was für sie "Sicherheit" getan. args = ['restic', '-r', backup_data[row].repository, 'stats'] result = subprocess.run(args, .... Man sollte trotzdem auf diese beiden Variablen * backup_data[row].repository * pass_word.pw[0] ein Auge behalten. Ich denke, das habe ich in meinem Projekt eingehalten, indem ich Pfadangabe mit den Systemwerkzeugen auswählbar mache, keine Texteingaben! Passwörter und andere Bezeichnung werden mit regex auf korrekte Eingaben geprüft usw. Fazit Wieder viel gelernt und ich denke, es passt so weit alles. Bei der ganzen Spielerei, dann noch entdeckt, das ich im Code dieses Argument drin hatte. check=False Das ist aber Standard, somit kann das weg. Habe das im kompletten Projekt dann entfernt und mir fällt gerade auf, da der Code immer gleich ist, muss das jetzt eigentlich alles in eine Funktion Mal auf die ToDo-Liste drauf schreiben.
  • Python3 - PyQt5 Layout

    Python3 pyqt5 python3 5. Apr. 2021, 09:15
    2
    0 Stimmen
    1 Beiträge
    214 Aufrufe
    Niemand hat geantwortet
  • Python3 - String-Operatoren

    Python3 python3 10. Jan. 2021, 10:43
    0 Stimmen
    1 Beiträge
    181 Aufrufe
    Niemand hat geantwortet
  • Python3 - Eingabeformular

    Python3 python3 7. Nov. 2020, 11:25
    1
    0 Stimmen
    3 Beiträge
    287 Aufrufe
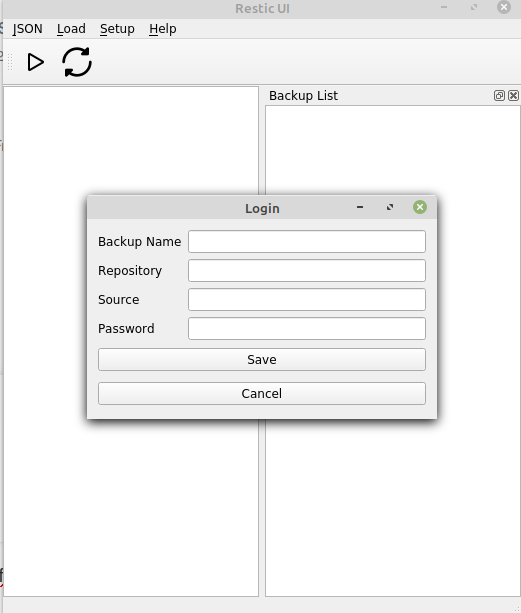
    Meine endgültige Lösung, zu mindestens im Moment , ist ein zweites Window. Das gefällt mir am Besten, komme ich zu mindestens im Moment einfach besser mit klar. Aber, eines der größten Probleme war für mich, wie aktualisiere ich die Liste im Hauptfenster!? Da habe ich doch etliche Stunden dran rum gefummelt.... Hier nur mal das Layout ##################### # Layout ##################### self.formGroupBox = QGroupBox("Form layout") layout = QFormLayout() layout.addRow(self.label_1) layout.addRow(QLabel("Backup Name:"), self.input1) layout.addRow(QLabel("Repository:"), self.button3) layout.addRow(QLabel("Source:"), self.button4) layout.addRow(QLabel("Password:"), self.input4) layout.addRow(self.label_6) layout.addRow(self.button2) self.formGroupBox.setLayout(layout) self.setLayout(layout) Das mit dem SecondWindow ist aber was aufwändiger. Da mach ich dann mal einen eigenen Beitrag zu. Aktuell sieht das so aus. [image: 1604819923887-6c68c956-9127-438f-bc54-4dcef8e18f00-image.png]
  • Python3 - Globale Variablen

    Python3 python3 3. Okt. 2020, 06:50
    0 Stimmen
    1 Beiträge
    172 Aufrufe
    Niemand hat geantwortet