Skip to content

Qt 5 Designer

Python3
1 1 137
  • ich habe die Tage mal den Qt 5 Designer ausprobiert.

    3d38ec8c-d60c-41a9-a290-a1edc561f037-grafik.png

    Installation

    apt://qttools5-dev-tools
    

    Und da ich hier das erste Mal auf apt:// gestoßen bin, habe ich mal nachgesehen, was das ist.

    apturl ist eine kleine Ergänzung für Firefox, Epiphany und apt-get, das die Installation von Paketen über die Adresszeile des Browsers bzw. durch einen simplen Linksklick linke Maustaste erlaubt. Mit einem kleinen manuellen Eingriff kann man apturl auch mit anderen Browsern nutzen.

    Wenn man auf so einen Link klickt, kommt folgendes Fenster im FF

    87d39baf-88ee-415c-97ca-c1b5f62c117e-image.png

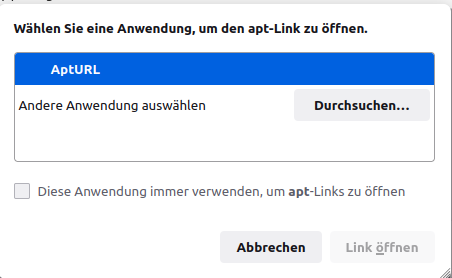
    Damit kann man dann den Designer installieren.

    Test Programm

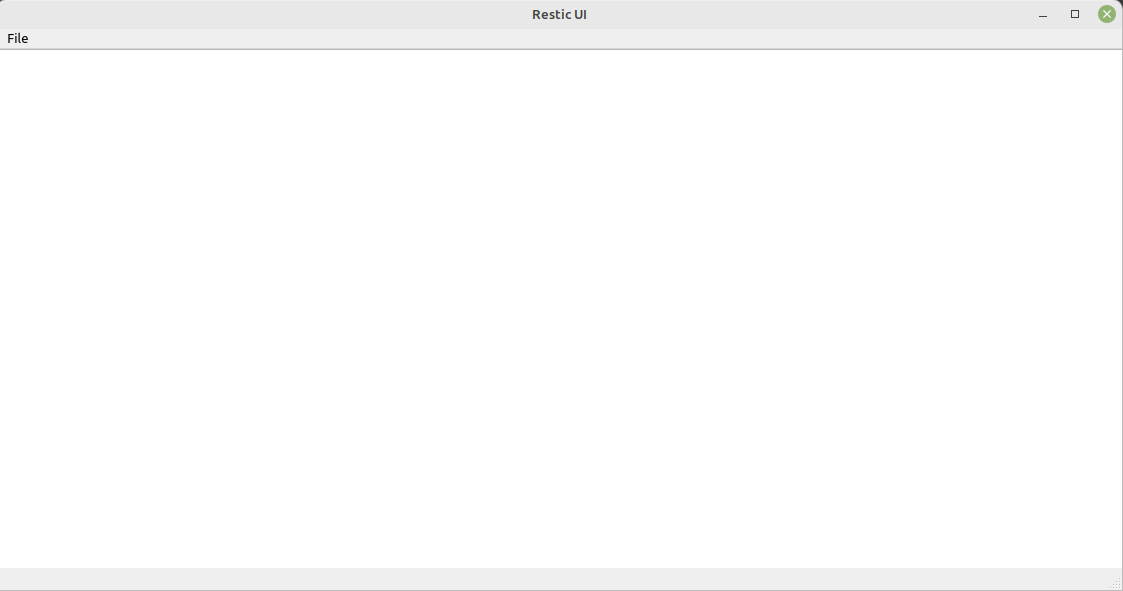
    Mein kleines Testprogramm, was nichts anderes macht, als das UI zu laden und anzuzeigen.

    from PyQt6 import QtWidgets, uic
    import sys
    
    class Ui(QtWidgets.QMainWindow):
        def __init__(self):
            super(Ui, self).__init__() # Call the inherited classes __init__ method
            uic.loadUi('test.ui', self) # Load the .ui file
            self.show() # Show the GUI
    
    app = QtWidgets.QApplication(sys.argv) # Create an instance of QtWidgets.QApplication
    window = Ui() # Create an instance of our class
    app.exec() # Start the application
    

    Das UI sieht so aus test.ui

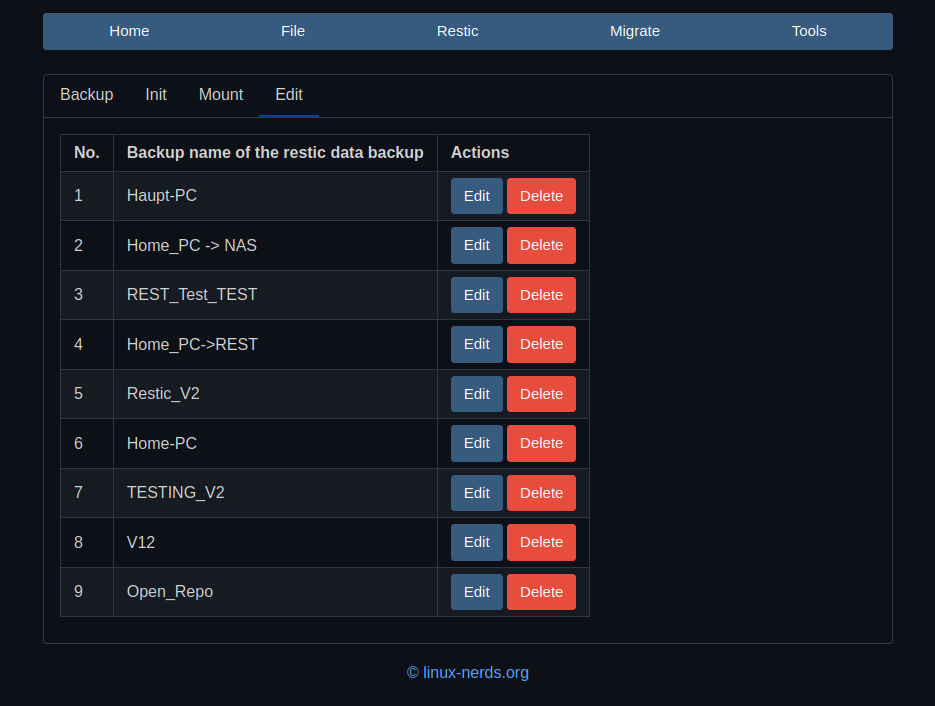
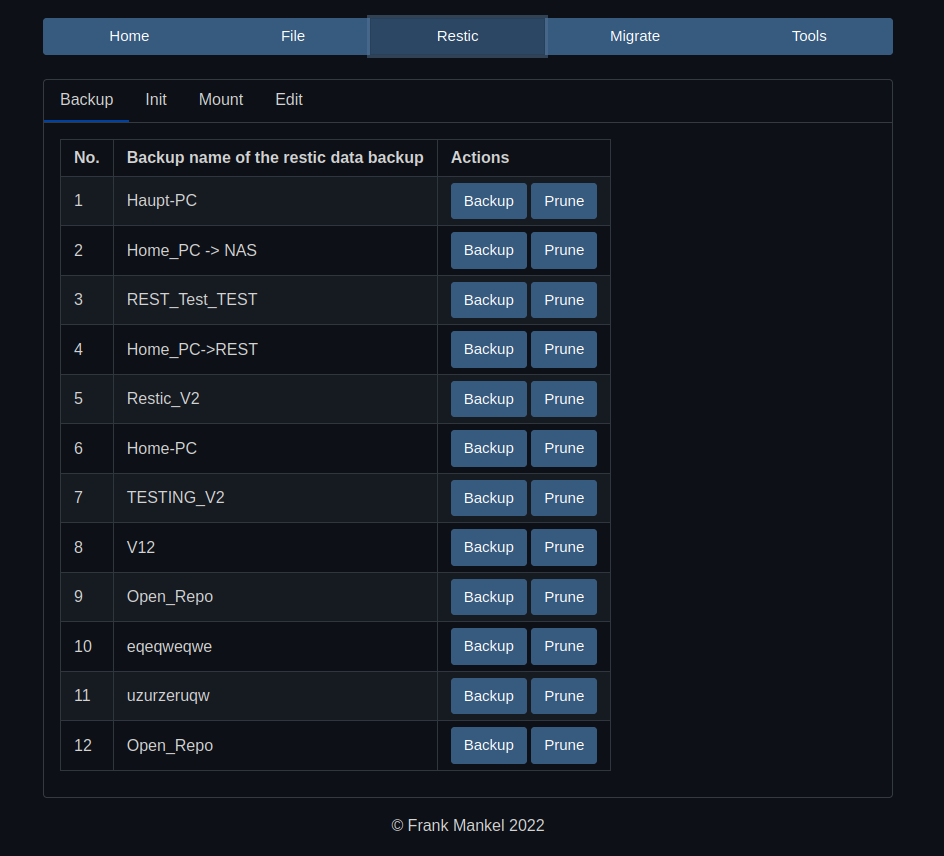
      GNU nano 4.8                                                                                                                                               test.ui                                                                                                                                                          
       <string>Restic UI</string>
      </property>
      <widget class="QWidget" name="centralwidget">
       <widget class="QListView" name="listView">
        <property name="geometry">
         <rect>
          <x>0</x>
          <y>0</y>
          <width>1131</width>
          <height>551</height>
         </rect>
        </property>
       </widget>
       <widget class="QWidget" name="horizontalLayoutWidget">
        <property name="geometry">
         <rect>
          <x>0</x>
          <y>0</y>
          <width>1131</width>
          <height>541</height>
         </rect>
        </property>
        <layout class="QHBoxLayout" name="horizontalLayout">
         <property name="sizeConstraint">
          <enum>QLayout::SetDefaultConstraint</enum>
         </property>
        </layout>
       </widget>
       <zorder>horizontalLayoutWidget</zorder>
       <zorder>listView</zorder>
      </widget>
      <widget class="QMenuBar" name="menubar">
       <property name="geometry">
        <rect>
         <x>0</x>
         <y>0</y>
         <width>1125</width>
         <height>21</height>
        </rect>
       </property>
       <widget class="QMenu" name="menuTest">
        <property name="title">
         <string>File</string>
        </property>
        <addaction name="actionLoad_File"/>
        <addaction name="actionAdd_Backup"/>
        <addaction name="actionEdit_Backup"/>
        <addaction name="actionDelete_Backup"/>
       </widget>
       <addaction name="menuTest"/>
      </widget>
      <widget class="QStatusBar" name="statusbar"/>
      <action name="actionLoad_File">
       <property name="text">
        <string>Load File</string>
       </property>
      </action>
      <action name="actionAdd_Backup">
       <property name="text">
        <string>Add Backup</string>
       </property>
      </action>
      <action name="actionEdit_Backup">
       <property name="text">
        <string>Edit Backup</string>
       </property>
      </action>
      <action name="actionDelete_Backup">
       <property name="text">
        <string>Delete Backup</string>
       </property>
      </action>
     </widget>
     <resources/>
     <connections/>
    </ui>
    

    Das gestartete Programm sieht so aus

    e7603057-14e9-4c06-b383-748768119084-grafik.png

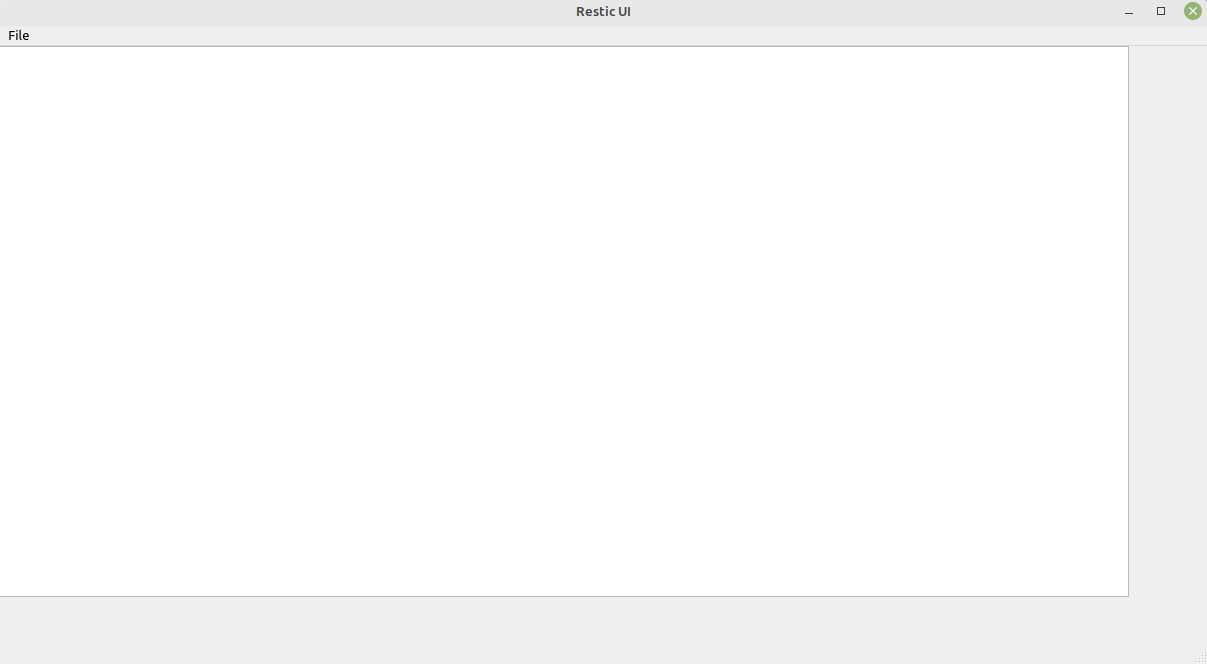
    Was mich bei einem kurzen Test etwas verwirrt hat ist, das UI ist nicht responsiv. In dem Beispiel ist ein List View. Wenn ich das Fenster größer ziehe, bleibt die Größe des List View fix. In meinem Restic UI, erstellt mit PyQt6, ändert sich das so wie man es erwartet. Ich habe vermutlich nicht das Konzept dahinter verstanden, kommt aber noch - hoffe ich.

    eaf34d13-5298-4fd5-9370-d3bf11dd8a02-grafik.png

  • Python - Interessante Packages

    Python3 python linux
    1
    0 Stimmen
    1 Beiträge
    133 Aufrufe
    Niemand hat geantwortet
  • Portfolio - mein kleines Flask Projekt

    Python3 python flask bootstrap ki-generiert
    5
    0 Stimmen
    5 Beiträge
    313 Aufrufe
    FrankMF
    Hab ChatGPT nochmal nach der Installation auf einem Production Server befragt. ChatGPT Certainly! Here's a short example of the steps you can follow to deploy a Flask application on a production server using Nginx and Gunicorn: Prepare your server: Set up a server (e.g., using a cloud provider like AWS, DigitalOcean, or a dedicated server) and ensure it has a clean, up-to-date installation of a Linux distribution (e.g., Ubuntu or CentOS). Install required software: Install necessary software packages on your server. You'll need Python, pip (Python package manager), Nginx, and Gunicorn. You can use your distribution's package manager (e.g., apt for Ubuntu or yum for CentOS) to install these dependencies. Deploy your Flask application: Copy your Flask application code and any required dependencies to your server. Set up a virtual environment (optional but recommended): Create a virtual environment for your Flask application to isolate its dependencies. You can use venv or virtualenv for this purpose. Install Flask and any required Python packages within your virtual environment: pip install flask Test your Flask application: Ensure your Flask application runs correctly within your server's virtual environment. Configure Gunicorn: Create a Gunicorn configuration file (e.g., gunicorn_config.py) to specify the settings for running your Flask application. Here's a simple example: workers = 4 # Number of Gunicorn worker processes bind = '0.0.0.0:8000' # The address and port Gunicorn should listen on Start Gunicorn: Start Gunicorn with your Flask application: gunicorn -c gunicorn_config.py your_app:app Configure Nginx: Create an Nginx server block (often located in /etc/nginx/sites-available) to define how Nginx should handle incoming requests. Here's a simplified example: server { listen 80; server_name your_domain.com www.your_domain.com; location / { proxy_pass http://127.0.0.1:8000; # Pass requests to Gunicorn proxy_set_header Host $host; proxy_set_header X-Real-IP $remote_addr; } } Enable the Nginx server block and restart Nginx: sudo ln -s /etc/nginx/sites-available/your_config /etc/nginx/sites-enabled/ sudo nginx -t # Test Nginx configuration sudo systemctl restart nginx Configure your DNS: Point your domain name to your server's IP address. Secure your server (optional but recommended): Set up SSL/TLS certificates for your domain to enable HTTPS. You can use Let's Encrypt for free SSL certificates. Monitor your application: Set up monitoring tools and logs to keep track of your application's performance and troubleshoot any issues. These are the basic steps to deploy a Flask application on a production server with Nginx and Gunicorn. Please note that this is a simplified example, and there are many additional considerations, such as database configuration, security, and optimization, depending on your specific application and requirements. It's also important to keep your server and software up to date and follow security best practices to ensure the stability and security of your production environment. Das werde ich doch mal ausprobieren
  • Pycharm - Umzug auf neuen Rechner

    Linux pycharm linux python
    1
    0 Stimmen
    1 Beiträge
    127 Aufrufe
    Niemand hat geantwortet
  • Python & Redis-Datenbank

    Verschoben Linux python redis
    3
    0 Stimmen
    3 Beiträge
    185 Aufrufe
    FrankMF
    Heute dann die nächste Herausforderung. Mein JSON soll so aussehen, damit ich das entsprechend erweitern kann. Stocks {0: {'stockname': 'Deutsche Telekom Aktie', 'wkn1': '4534543534', 'wkn2': 'sfsdfsdfsfdfd', 'quantity': 100}, 1: {'stockname': 'Henkel', 'wkn1': '4534543534', 'wkn2': 'sfsdfsdfsfdfd', 'quantity': 50}} Die Daten sollen wie oben schon ausprobiert, in einer Redis Datenbank liegen. So weit auch kein großes Problem. ABER, der Zugriff auf diese Daten war dann meine nächste Hürde Ok, ich habe also mehrere Einträge im JSON File bzw. in der Datenbank. Wie komme ich da nun wieder dran. Ein paar später dann die Lösung. Wie komme ich an den einzelnen Eintrag, also über den Index?? r1.json().get('stocks', 1) Gibt als Ergebnis {'stockname': 'Henkel', 'wkn1': '4534543534', 'wkn2': 'sfsdfsdfsfdfd', 'quantity': 50} Ok, das passt schon mal. Somit kann man dann gewohnt auf die einzelnen Elemente zugreifen. print("TESTING", testing['stockname']) Ausgabe TESTING Henkel Ok, Teil 1 erledigt. Jetzt habe ich ja irgendwann mehrere Elemente in der Liste und brauch dann den letzten Index , um damit was machen zu können. Also, z.B. durch die Daten zu loopen. objkeys = r1.json().objkeys('stocks') print("Objkeys", objkeys) Ausgabe Objkeys ['0', '1'] Ok, kommt eine Liste des Index zurück. Damit kann man arbeiten Ich hatte dann zum Testen mittels einer while Schleife die Daten geladen, aber jetzt beim Tippen klingelt es und wir machen das schön mit enumerate @staticmethod def load(): data = {} for count, value in enumerate(objkeys): testing = r1.json().get('stocks', count) data[count] = { "stockname": testing['stockname'], "wkn1": testing['wkn1'], "wkn2": testing['wkn2'], "quantity": testing['quantity']} return data Somit habe ich die Daten aus der Redis Datenbank in einem Objekt und kann damit arbeiten.
  • Restic UI - Stand Januar 2023

    PyWebIO restic-ui pywebio python
    1
    0 Stimmen
    1 Beiträge
    145 Aufrufe
    Niemand hat geantwortet
  • List comprehensions

    Python3 python
    1
    2
    0 Stimmen
    1 Beiträge
    101 Aufrufe
    Niemand hat geantwortet
  • Python - Match-Case Statement

    Python3 python
    1
    0 Stimmen
    1 Beiträge
    146 Aufrufe
    Niemand hat geantwortet
  • PyQt6 - QSettings

    Python3 python
    3
    0 Stimmen
    3 Beiträge
    444 Aufrufe
    FrankMF
    Möglichkeit 1 Das hier settings = QSettings("Frank_Mankel", "Restic_UI") erzeugt unter /home/frank/.config/Frank_Mankel/Restic_UI.conf die Konfigurationsdatei. Möglichkeit 2 Das hier settings = QSettings("Restic_UI") erzeugt unter /home/frank/.config/Restic_UI.conf die Konfigurationsdatei. Damit habe ich die grundlegenden Dinge, hoffentlich , verstanden. Für den Rest mal in die Dokumentation schauen. Sehr hilfreich war auch mal ein Blick auf die Definition der Klasse. Rechtsklick auf QSettings und dann Go to Definition class QSettings(QObject): class Scope(enum.Enum): UserScope = ... # type: QSettings.Scope SystemScope = ... # type: QSettings.Scope class Format(enum.Enum): NativeFormat = ... # type: QSettings.Format IniFormat = ... # type: QSettings.Format InvalidFormat = ... # type: QSettings.Format class Status(enum.Enum): NoError = ... # type: QSettings.Status AccessError = ... # type: QSettings.Status FormatError = ... # type: QSettings.Status [..gekürzt..]