ROCKPro64 - Übersicht
-
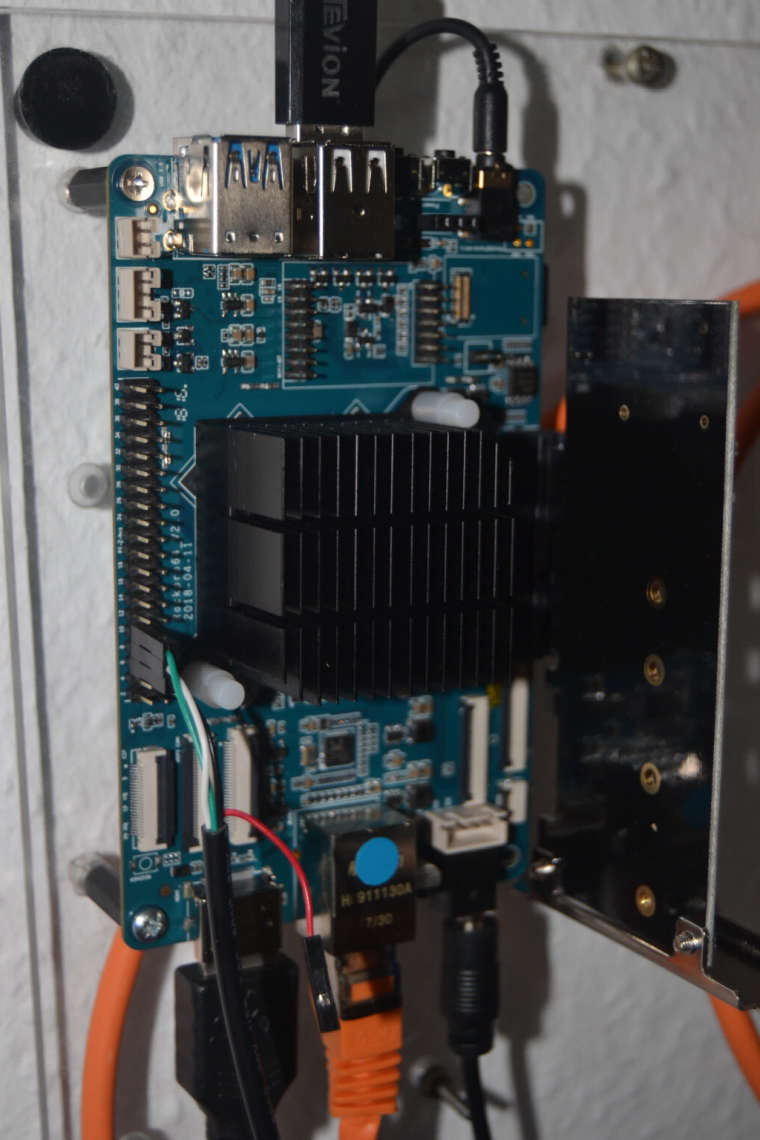
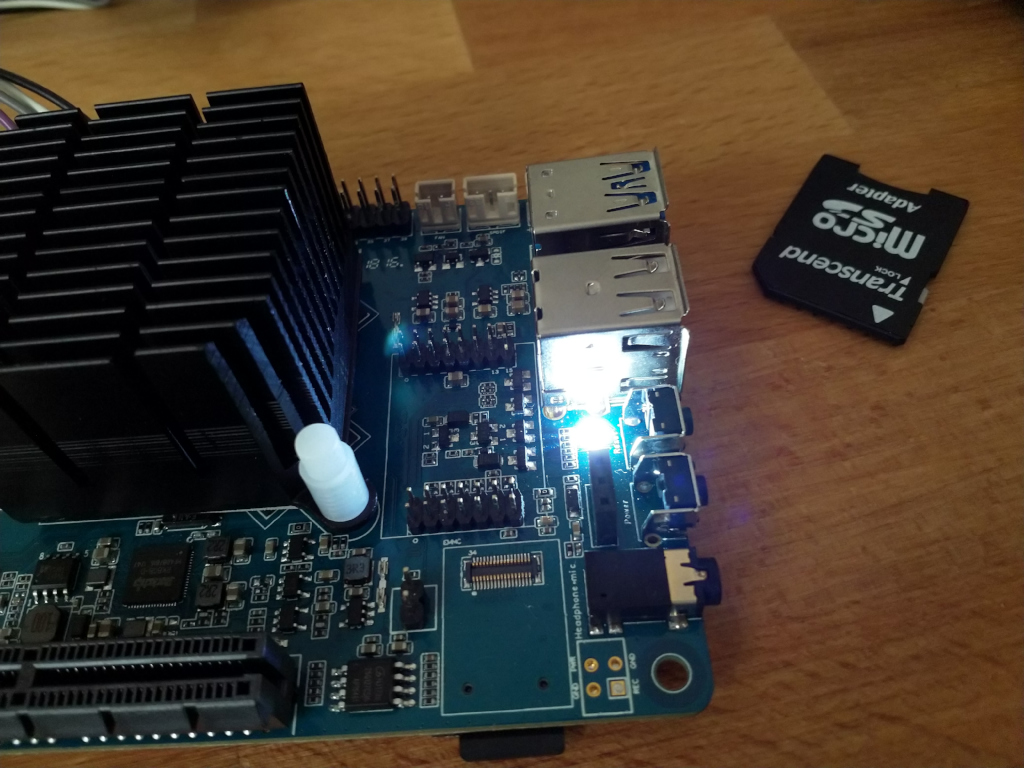
Das nächste Spielzeug (bestellt)
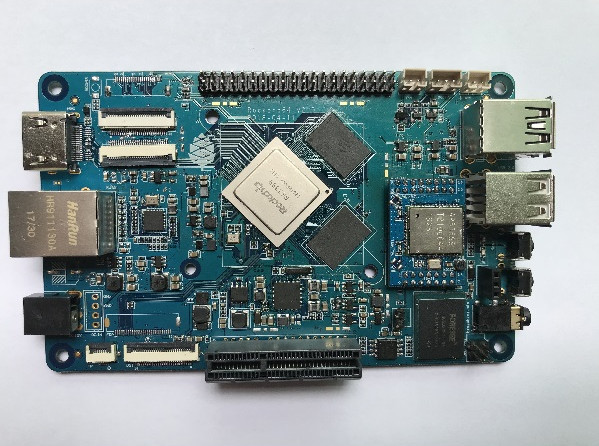
Bildquelle: https://www.pine64.org/?product=rockpro64-4gb-single-board-computer
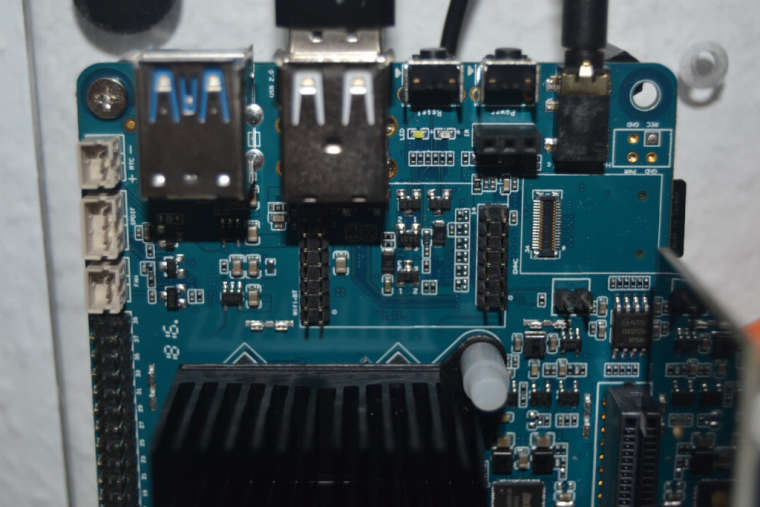
- CPU: Rockchip RK3399 Hexa-Core (dual ARM Cortex A72 and quad ARM Cortex A53) 64-Bit Processor
- GPU: MALI T-860 Quad-Core GPU
- RAM: 4GB LPDDR4 system memory and 128Mb SPI boot Flash
- eMMC: yes, up to 128GB
- microSD: yes
- PCIe x4
- 1x USB 3.0 type C Host with DP 1.2
- 1x USB 3.0 type A Host
- 2x USB 2.0 Host
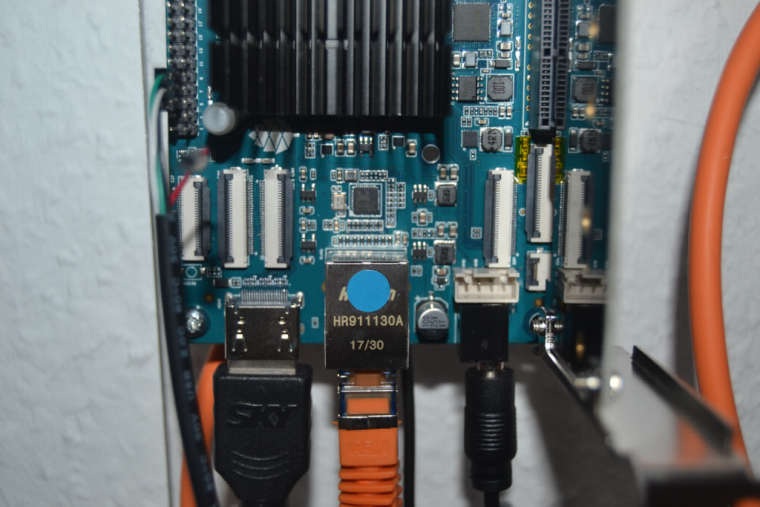
- Gigabit Ethernet
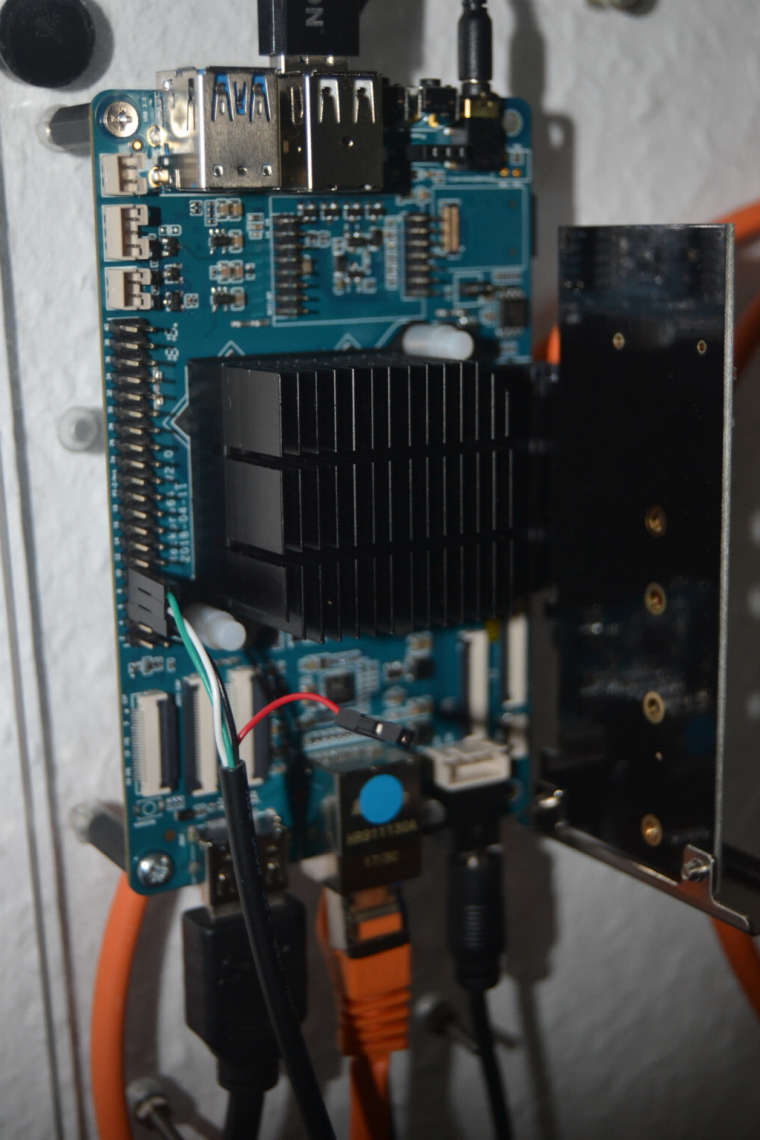
- PI-2 GPIO Bus
- MiPi DSI interface
- eDP interface
- touch Panel interface
- stereo MiPi CSI interface
- and many other peripheral device interface such as UART, SPI, I2C.
Webseite: https://www.pine64.org
Forum: https://forum.pine64.org
Wiki: http://wiki.pine64.org/index.php/ROCKPro64_Main_Page
Support: https://www.pine64.org/?page_id=702
Schaltdiagramm V2.0: http://files.pine64.org/doc/rockpro64/rockpro64_v20-SCH.pdf
Schaltdiagramm V2.1: http://files.pine64.org/doc/rockpro64/rockpro64_v21-SCH.pdf
Platinendesign: http://files.pine64.org/doc/rockpro64/RockPro64_Boardoutline Model.pdf
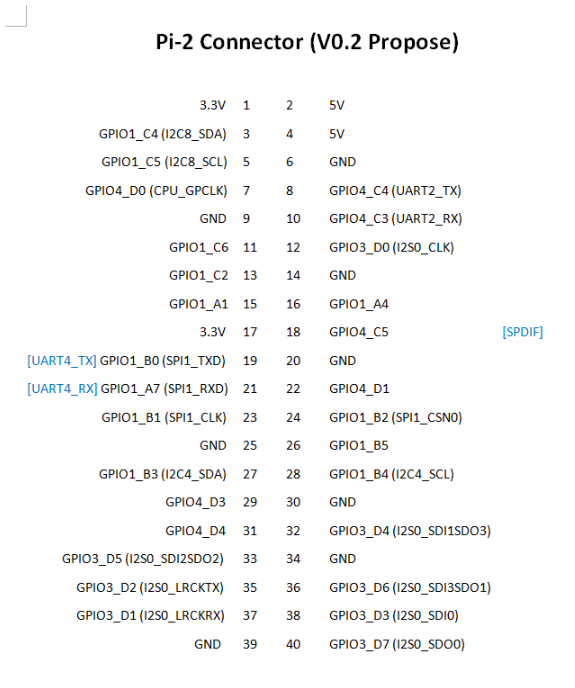
Expansions-Schnittstelle: http://files.pine64.org/doc/rockpro64/Rockpro64 Pi-2 Connector ver0.2.png
SOC:
http://opensource.rock-chips.com/wiki_RK3399
http://rockchip.wikidot.com/linux-user-guide
http://opensource.rock-chips.com/wiki_Boot_option
Github:
https://github.com/ayufan-rock64/
https://github.com/rockchip-linux -
LPDDR4
Der Speicher ist LPDDR4, der laut einer Samsung Webseite 1,2x schneller als LPDDR3 sein soll und 37% weniger Strom verbrauchen soll.
The new feature is the LPDDR4 upgrade from LPDDR3, this increase overall system memory and IO (DMA) performance. However, the LPDDR4 driver still in tuning stage, the performance increase still not yet calculated. This ROCKPro64 is the first and only RK3399 SBC in current market using LPDDR4.
-
SPI Boot Flash
Some of PINE64 devices, such as the Rock64 and SOPine, are equipped with SPI Flash. This allows users to flash u-boot onto the SPI and boot from an external USB 2.0 or USB 3.0 SSD/HDD/thumb-drive, thereby forgoing using eMMC or an microSD card.
Quelle: http://wiki.pine64.org/index.php/NOOB#Flashing_u-boot_to_SPI_FlashKurze Erklärung:
Serial EEPROMs are low power, non-volatile memory devices with robust operating ranges, small size and byte alterability, making them ideal for data and program storage. Serial EEPROMs can be written more than 1 Million times.
Quelle: https://www.microchip.com/design-centers/memoryAlso für Laien, so ähnlich wie Euer BIOS in einem normalen Rechner. Dort liegt dann der u-boot, das Bootprogramm. Vorteil, man braucht dann keine SD-Karte mehr zum Booten, sondern kann direkt von z.B. einer HDD oder SDD booten.
Boot Reihenfolge:
- SPI flash
- eMMC (disable with jumper)
- microSD
- USB drive
- PXE
Quellen:
http://wiki.pine64.org/index.php/NOOB#Flashing_u-boot_to_SPI_Flashlinux-build/recipes/flash-spi.md at master · ayufan-rock64/linux-build
Rock64 Linux build scripts, tools and instructions - linux-build/recipes/flash-spi.md at master · ayufan-rock64/linux-build

GitHub (github.com)
-
Der ROCKPro64 würde sich ja evt. mal richtig gut als NAS machen. Gute Software vorausgesetzt. Da wäre aber auch noch wichtig, wie viel er an der Steckdose zieht. Hier mal was aus den Datenblättern.

Quelle: http://opensource.rock-chips.com/images/6/60/Rockchip_RK3399_Datasheet_V1.6-20170301.pdf
-
Der ROCKPro64 hat kein WLan / BT on Board. Dafür kann man ein Modul kaufen, was man direkt auf's SOC stecken kann.

PINE64 Community
PINE64 is a large, vibrant and diverse community and creates software, documentation and projects. Founded in 2015, it is known for affordable devices that promote user freedom.

PINE64 (www.pine64.org)
Kosten: 16$
Das Modul basiert auf einem AMPAK AP6356
Für mich praktisch, da ich WLan usw. im Normalfall nicht nutze.
-
Bericht der Zeitschrift Make.

-
-
-
-
-
-
Image 0.6.57 - NVMe paar Notizen
Verschoben Archiv -
-