Skip to content

Restic v0.13.0 released

Restic
  • Gestern kam die v0.1.13.0 raus. Das Update gestaltet sich mit der eingebauten Update-Funktion als kinderleicht. Dazu macht man als Root auf der Konsole folgendes.

    root@frank-MS-7C37:~# restic self-update
    writing restic to /usr/bin/restic
    find latest release of restic at GitHub
    latest version is 0.13.0
    download SHA256SUMS
    download SHA256SUMS.asc
    GPG signature verification succeeded
    download restic_0.13.0_linux_amd64.bz2
    downloaded restic_0.13.0_linux_amd64.bz2
    saved 18472960 bytes in /usr/bin/restic
    successfully updated restic to version 0.13.0
    root@frank-MS-7C37:~# restic version
    restic 0.13.0 compiled with go1.18 on linux/amd64
    root@frank-MS-7C37:~# 
    

    Außer ganz vielen Beseitigungen von Fehlern sind auch ein paar Dinge dazu gekommen, eines davon ist diese Option bei der Funktion backup

      -n, --dry-run                do not upload or write any data, just show what would be done
    

    Das kann einem die Möglichkeit geben, z.B. die exclude Filter zu testen, ohne eine Änderung am Repo durchzuführen.

    Aus dem Changelog

    Enhancement #1542: Add --dry-run/-n option to backup command

    Testing exclude filters and other configuration options was error prone as wrong filters could cause files to be uploaded unintentionally. It was also not possible to estimate beforehand how much data would be uploaded.

    The backup command now has a --dry-run/-n option, which performs all the normal steps of a backup without actually writing anything to the repository.

    Passing -vv will log information about files that would be added, allowing for verification of source and exclusion options before running the real backup.

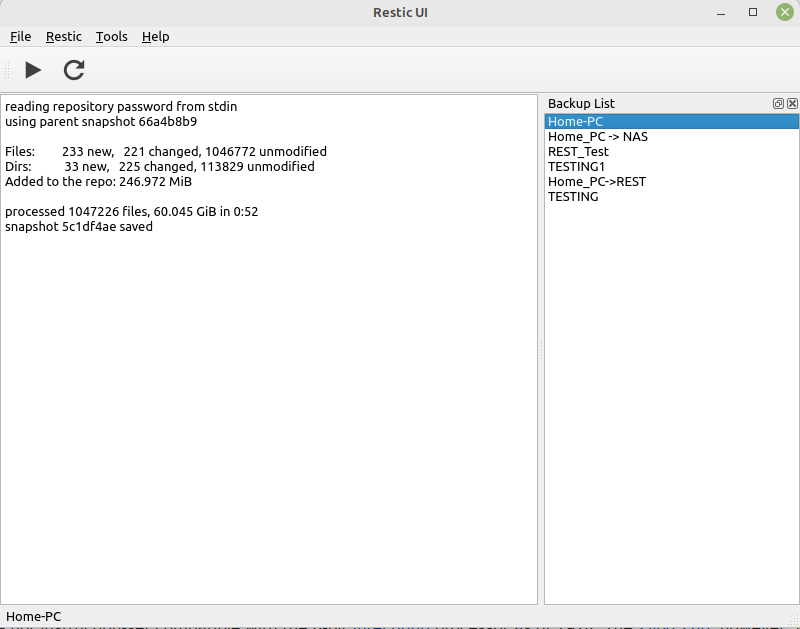
    Da ich Sonntags sowieso immer meine Backups mit meinem Restic UI mache, konnte ich auch mal kurz testen, ob noch alles funktioniert 😉 Das ist aber bei diesem Tool normal, da alle neuen Versionen backwards compatibility sein müssen.
    73a90483-7216-4633-b01d-03e83b690467-grafik.png

    Quelle: https://github.com/restic/restic/releases/tag/v0.13.0
  • 0 Stimmen
    1 Beiträge
    62 Aufrufe
    Niemand hat geantwortet
  • Restic - Migrate

    Restic
    1
    0 Stimmen
    1 Beiträge
    154 Aufrufe
    Niemand hat geantwortet
  • 0 Stimmen
    2 Beiträge
    207 Aufrufe
    FrankMF

    Der Autor hat meine Anpassungen um ein paar Änderungen erweitert und in sein Repo eingepflegt. Der QtWaitingSpinenr ist jetzt auch 3.10 kompatibel 🤓

    1b268980-92ca-42a4-89a0-a6e4b7ab9378-grafik.png

  • 0 Stimmen
    1 Beiträge
    168 Aufrufe
    Niemand hat geantwortet
  • Restic - Backblaze B2 Cloud Storage

    Restic
    1
    0 Stimmen
    1 Beiträge
    364 Aufrufe
    Niemand hat geantwortet
  • Restic - Update

    Restic
    1
    0 Stimmen
    1 Beiträge
    391 Aufrufe
    Niemand hat geantwortet
  • Restic - Rootserver als Datenablage nutzen

    Restic
    2
    0 Stimmen
    2 Beiträge
    680 Aufrufe
    FrankMF

    Ok, das erste Backup dauert immer was länger 😉 In meinem Fall 5 Std. 16 Minuten.

    Files: 33408 new, 0 changed, 0 unmodified Dirs: 1 new, 0 changed, 0 unmodified Data Blobs: 20849 new Tree Blobs: 2 new Added to the repo: 6.278 GiB processed 33408 files, 8.604 GiB in 5:16:03 snapshot 5beg1cb3 saved

    Aber, das Schöne ist, das die Backups inkrementell angelegt werden. Das nächste geht schneller 🙂

    open repository repository 3gg202a2 opened successfully, password is correct lock repository load index files using parent snapshot 5beg1cb3 start scan on [/home/frank] start backup on [/home/frank] scan finished in 3.791s: 33788 files, 8.611 GiB Files: 496 new, 74 changed, 33218 unmodified Dirs: 0 new, 1 changed, 0 unmodified Data Blobs: 292 new Tree Blobs: 2 new Added to the repo: 43.661 MiB processed 33788 files, 8.611 GiB in 2:15 snapshot fag41bf7 saved

    Eine tägliche Sicherung sollte dann wohl reichen.

  • 0 Stimmen
    2 Beiträge
    786 Aufrufe
    FrankMF

    So, dann mal das Ganze testen wenn man seinen Haupt-PC neu installiert hat und ein paar Daten braucht.

    0_1534692578537_IMG_20180819_090116_ergebnis.jpg

    Also, mal Restic installiert.

    sudo apt-get install restic

    Nach erfolgter Installation ein Test

    frank@frank-MS-7A34:~/restic$ restic version restic 0.8.3 compiled with go1.10 on linux/amd64

    Geht so weit.

    Snapshots auflisten. restic -r sftp:rock64@IP:/home/rock64/backup snapshots

    Sieht dann so aus.

    frank@frank-MS-7A34:~$ sudo restic -r sftp:rock64@192.168.3.207:/home/rock64/backup snapshots [sudo] Passwort für frank: rock64@192.168.3.207's password: enter password for repository: password is correct ID Date Host Tags Directory ---------------------------------------------------------------------- 7e2eddcb 2018-08-18 10:10:40 frank-MS-7A34 /home/frank/Bilder 073b7cb4 2018-08-18 14:21:17 frank-MS-7A34 /home/frank 6bc9b21b 2018-08-18 16:11:19 frank-MS-7A34 /home/frank ---------------------------------------------------------------------- 3 snapshots Snapshot wiederherstellen sudo restic -r sftp:rock64@IP:/home/rock64/backup restore latest --target /tmp/backup

    Hiermit stellen wir das Backup im temporären Ordner /tmp/backup wieder her. Hat ewig gedauert, aber ging !?!?!?