Skip to content

Python3 - HTML Text ausgeben

Python3
  •                 # Wir bauen den Text, den wir ausgeben wollen!
                    text = """
                    <table>
                    <tr>
                    <td style="padding: 4px;"><b>Backup_Name</b></td>
                    <td style="padding: 4px;">""" + backup_data[row].name + """ </td>
                    </tr>
                    <tr>
                        <td style="padding: 4px;"><b>Repository</b></td>
                        <td style="padding: 4px;">""" + backup_data[row].repository + """ </td>
                    </tr>
                    <tr>
                        <td style="padding: 4px;"><b>Source</b></td>
                        <td style="padding: 4px;">""" + backup_data[row].source + """ </td>
                    </tr>
                    <tr>
                        <td style="padding: 4px;"><b>Password</b></td>
                        <td style="padding: 4px;">""" + password_x +""" </td>
                    </tr>
                    <tr>
                        <td style="padding: 4px;"><b>Init_Status</b></td>
                        <td style="padding: 4px;">""" + backup_data[row].init + """ </td>
                    </tr>
                    <tr>
                        <td style="padding: 4px;"><b>Exclude List</b></td>
                        <td style="padding: 4px;">""" + backup_data[row].exclude + """ </td>
                    </tr>
                    </table>
                    """
    

    Und dasselbe als mehrzeilige Textausgabe für ein QPlainTextEdit

    text = """Backup_Name:\t %s\n
    Repository:\t\t %s\n\n Source:\t\t %s\n\n Password:\t\t %s\n\n Init_Status:\t\t %s\n\n Exclude List:\t\t %s"""%(backup_data[row].name, backup_data[row].repository, backup_data[row].source, password_x, backup_data[row].init, backup_data[row].exclude)
    

  • Python3 - enumerate()

    Python3
    2
    0 Stimmen
    2 Beiträge
    113 Aufrufe
    FrankMF

    Ich habe noch was Code gefunden, den ich mal dringend aufräumen musste 🙂 Wenn ich mit dem Restic UI die Snapshots anzeige, dann sieht das so aus.

    reading repository password from stdin ID Time Host Tags Paths ---------------------------------------------------------------------------- 4e769748 2021-12-31 21:48:34 frank-MS-7C37 /home/frank/Bilder 34298934 2022-01-26 20:15:53 frank-MS-7C37 /home/frank/Bilder 0d5d88f2 2022-01-27 21:05:07 frank-MS-7C37 /home/frank/Bilder f0e7d5a7 2022-01-29 13:46:12 frank-MS-7C37 /home/frank/Bilder 79918d70 2022-01-29 13:52:56 frank-MS-7C37 /home/frank/Bilder d74272a3 2022-01-30 11:54:20 frank-MS-7C37 /home/frank/Bilder 11b0b5ad 2022-01-30 11:57:44 frank-MS-7C37 /home/frank/Bilder 4a7450d2 2022-02-20 09:35:56 frank-MS-7C37 /home/frank/Bilder c1a4a51d 2022-02-20 09:36:43 frank-MS-7C37 /home/frank/Bilder d178ded5 2022-02-20 09:38:53 frank-MS-7C37 /home/frank/Bilder 997e2259 2022-02-20 16:35:57 frank-MS-7C37 /home/frank/Bilder 3320ad5c 2022-02-20 16:49:19 frank-MS-7C37 /home/frank/Bilder ---------------------------------------------------------------------------- 12 snapshots

    Mich interessieren die IDs, weil ich bei der Eingabe der IDs überprüfen möchte, ob die eingegebene ID existiert. Also muss ich das irgendwie auslesen und speichern. Das habe ich bis jetzt so gemacht.

    def id_append(self, result): # We split the result into individual lines. # Result was passed. And create an list. result_list = result.split('\n') # We count the number of repositories and search for 'source'. count = result.count(backup_data[row].source) # Offset added, first interesting line is line 3! count = count + 3 # We loop through the list and output the ID's and store in snapshot_id x = 3 while x < count: a = result_list[x] y = a[0:8] snapshot_id.append(y) x = x + 1

    Das erschien mir heute, beim erneuten Betrachten, Spaghetticode zu sein. Machen wir das mal etwas ordentlicher.

    Ich nehme die Ausgabe (stdout) und erzeuge eine Liste, jede Zeile ein Element.

    result_list = result.split('\n')

    Sieht so aus

    ['reading repository password from stdin', 'ID Time Host Tags Paths', '----------------------------------------------------------------------------', '4e769748 2021-12-31 21:48:34 frank-MS-7C37 /home/frank/Bilder', '34298934 2022-01-26 20:15:53 frank-MS-7C37 /home/frank/Bilder', '0d5d88f2 2022-01-27 21:05:07 frank-MS-7C37 /home/frank/Bilder', 'f0e7d5a7 2022-01-29 13:46:12 frank-MS-7C37 /home/frank/Bilder', '79918d70 2022-01-29 13:52:56 frank-MS-7C37 /home/frank/Bilder', 'd74272a3 2022-01-30 11:54:20 frank-MS-7C37 /home/frank/Bilder', '11b0b5ad 2022-01-30 11:57:44 frank-MS-7C37 /home/frank/Bilder', '4a7450d2 2022-02-20 09:35:56 frank-MS-7C37 /home/frank/Bilder', 'c1a4a51d 2022-02-20 09:36:43 frank-MS-7C37 /home/frank/Bilder', 'd178ded5 2022-02-20 09:38:53 frank-MS-7C37 /home/frank/Bilder', '997e2259 2022-02-20 16:35:57 frank-MS-7C37 /home/frank/Bilder', '3320ad5c 2022-02-20 16:49:19 frank-MS-7C37 /home/frank/Bilder', '----------------------------------------------------------------------------', '12 snapshots', '']

    Diesmal benutzen wir die enumerate() Funktion

    for count, value in enumerate(result_list): print(count, value)

    Das was raus kommt, sieht so aus

    0 reading repository password from stdin 1 ID Time Host Tags Paths 2 ---------------------------------------------------------------------------- 3 4e769748 2021-12-31 21:48:34 frank-MS-7C37 /home/frank/Bilder 4 34298934 2022-01-26 20:15:53 frank-MS-7C37 /home/frank/Bilder 5 0d5d88f2 2022-01-27 21:05:07 frank-MS-7C37 /home/frank/Bilder 6 f0e7d5a7 2022-01-29 13:46:12 frank-MS-7C37 /home/frank/Bilder 7 79918d70 2022-01-29 13:52:56 frank-MS-7C37 /home/frank/Bilder 8 d74272a3 2022-01-30 11:54:20 frank-MS-7C37 /home/frank/Bilder 9 11b0b5ad 2022-01-30 11:57:44 frank-MS-7C37 /home/frank/Bilder 10 4a7450d2 2022-02-20 09:35:56 frank-MS-7C37 /home/frank/Bilder 11 c1a4a51d 2022-02-20 09:36:43 frank-MS-7C37 /home/frank/Bilder 12 d178ded5 2022-02-20 09:38:53 frank-MS-7C37 /home/frank/Bilder 13 997e2259 2022-02-20 16:35:57 frank-MS-7C37 /home/frank/Bilder 14 3320ad5c 2022-02-20 16:49:19 frank-MS-7C37 /home/frank/Bilder 15 ---------------------------------------------------------------------------- 16 12 snapshots 17

    Mich interessieren nur die Zeilen mit /home/frank/Bilder Das kann man so abfragen

    if backup_data[row].source in value:

    Und jetzt nur die ID entsprechend abspeichern

    snapshot_id.append(value[0:8])

    Sieht jetzt komplett so aus

    result_list = result.split('\n') for count, value in enumerate(result_list): if backup_data[row].source in value: snapshot_id.append(value[0:8]) print(count, value[0:8])

    Somit speichert er jetzt nur noch die IDs, der folgenden Ausgabe.

    3 4e769748 4 34298934 5 0d5d88f2 6 f0e7d5a7 7 79918d70 8 d74272a3 9 11b0b5ad 10 4a7450d2 11 c1a4a51d 12 d178ded5 13 997e2259 14 3320ad5c

    Diese IDs, kann ich dann weiterverarbeiten.

  • PyQt6 - QRegularExpressionValidator

    Python3
    1
    0 Stimmen
    1 Beiträge
    520 Aufrufe
    Niemand hat geantwortet
  • Python3 - Popen und seine Geheimnisse ;)

    Python3
    1
    0 Stimmen
    1 Beiträge
    186 Aufrufe
    Niemand hat geantwortet
  • Python3 - QSettings

    Python3
    1
    0 Stimmen
    1 Beiträge
    148 Aufrufe
    Niemand hat geantwortet
  • Restic UI - mein zweites Python3 Projekt

    Python3
    5
    0 Stimmen
    5 Beiträge
    741 Aufrufe
    FrankMF

    @berthold Hallo Berthold. Ich bin eigentlich immer noch nicht mit meinem Code zufrieden. Ist man das jemals? Da ich auch noch ein kleines Problem habe, würde ich da ungerne jemanden reinschauen lassen. Der Code ist stellenweise in deutsch kommentiert, stellenweise in englisch. Kennt man ja, man will es irgendwann mal ordentlich machen und dann kommt das nächste Problem auf einen zu.

    Hast Du Python3 Vorkenntnisse? Wenn Du "brennend" dran interessiert bist, könnte ich Dir evt. Zugang zu meinem Gitlab-Projekt geben.

    Wenn Du interessiert bist und ich dich nicht los werde :), dann schreib mir eine PN.

  • Python3 - Globale Variablen

    Python3
    1
    0 Stimmen
    1 Beiträge
    133 Aufrufe
    Niemand hat geantwortet
  • Wireguard UI - mein erstes Python3 Projekt

    Python3
    2
    0 Stimmen
    2 Beiträge
    225 Aufrufe
    FrankMF

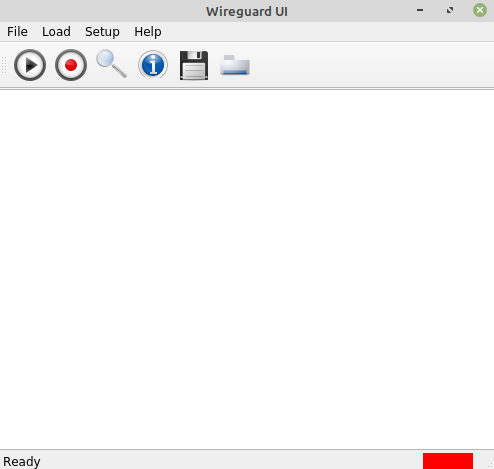
    Dinge entwickeln sich. Es sieht alles schon wieder was anders aus 🙂

    Hauptfenster
    270b5c68-3d64-44ca-9a01-e3f24ba4a26c-grafik.png

    Setup Fenster zum Erstellen der wg0.conf
    27c3cb28-50f5-4e00-b03d-de47c07372a0-grafik.png

    Und alles funktioniert so weit 🤓

  • Wichtige Links

    Angeheftet Python3
    1
    0 Stimmen
    1 Beiträge
    179 Aufrufe
    Niemand hat geantwortet