Skip to content

Rockpro64: Boot von SSD statt SD(bootloader)

ROCKPro64
  • Hallo Leute,

    ich habe Rockpro64 SBC und wollte ich NAS setup mit openmediavault aufbauen.

    Mein Ziel : boot von SSD statt sd karte.

    ich habe schon Marvell88SE9128 pci-e chip mit zwei SSD verbunden.

    Die Zwei SSD ist in RAID 1 Konfiguration.

    Jetzt wollte ich gern die Boot von SSD machen. ich habe schon ein partition innerhalb SSD erstellt. Aber ich weiß nicht wie kann ich machen.

    Können Sie mir helfen?
    ich habe schon die folgende artikel gelesen. aber ich weiß nicht, wie kann ich OMV von SSD (partition-1) booten. wie sollte ich die konfiguration ändern? ich habe ein paar video rasperry pi 4 boot von SSD angeschaut. aber das ist ganz anders wie OMV(Rockpro64)
    https://forum.frank-mankel.org/topic/747/sata-booten-jetzt-möglich
    https://forum.frank-mankel.org/topic/609/rockpro64-booten-von-usb3

    Vielen Dank.

    PS: ich bin nicht deutsch muttersprachler.

  • Update: ich habe diese post gefunden und habe versucht
    (https://forum.frank-mankel.org/topic/208/booten-von-der-nvme-platte)

    Leider könnte ich nicht booten. es gibt ein fehler. ich habe LVM benützt um ein partition zuerstellen. Dann habe ich alle root folders/files kopiert. Aber das ist nicht geklappt.

    Hat jemand eine Lösung finden?

  • Hallo,

    die RAID1 Konfiguration müsste ein bootbares System enthalten, damit der u-boot von dort bootet.
    Dazu muss dann der u-boot im SPI Speicher sein.

    1. u-boot im SPI ?
    2. Bootbares System auf dem RAID1 ?

    Alternativ, könnte man ein vorhandenes OMV-Image auf eine SD_Karte schreiben und die Daten auf dem RAID1 ablegen.

    Die Frage ist wie immer, was möchte man erreichen.

  • @FrankM sagte in Rockpro64: Boot von SSD statt SD(bootloader):

    die RAID1 Konfiguration müsste ein bootbares System enthalten, damit der u-boot von dort bootet.
    In welche file kann ich ändern oder meinst du der U-boot im SPI?

    sollte ich mit diese quelle (https://github.com/sigmaris/u-boot/wiki/Flashing-U-Boot-to-SPI) weitermachen?

    VG,
    Siva

  • So, If I boot from SSD using U-boot-spi, then I can't use my SSD to save other files I think. because entire disk will occupying the OS if I enlarge it. I just want to create a partition for OS and boot the OS only from that and the remaining part of the disk, I would like to use it for user storage or docker config/container files.
    I would like to have the OS boot in raid 1 setup.

    Another thing is, Normally once I flash the OMV to my sd card. I need to add pci=nomsi and marvel-99.rules to make my PCI available to use ssd drives.

    How will I boot from SSD after flashing the U-boot-to-SPI? I dont think the rockpro64 boots from ssd.

    I looked into this post: https://forum.frank-mankel.org/topic/735/nvme-booten-jetzt-möglich/7

    Maybe should I copy the os into the partition which I already have in raid 1 setup using DD command and will it boot from the partition?

    I am afraid, i dont wanna mess it up with SPI-boot. I dont have any serial controller to see the error message and not sure how would make it back to boot from sd if something goes wrong.

    Since I am using differnt PCI-e. Not sure how to enable it and make it boot from ssd after this u-boot-spi thing?

    Please let me know.
    Thanks.

    PS: you can write me in german. Its totally fine.

  • Wo fang ich an?

    Für deine Partitionsprobleme mit OMV musst du bitte woanders suchen. Ich nutze kein OMV und setze meine ROCKPro64 auch anders ein.

    Die Marvel SATA Karte ist etwas eigenwillig ☹ Einer der Gründe, warum ich die Karte nicht mehr in meinem NAS einsetze. Link

    Diese Karte bootet übrigens kein Betriebssystem von einer angeschlossenen SSD / HDD.

    Was geht, kann man hier nachlesen. Ich fasse mal zusammen.

    OHNE U-BOOT IM SPI

    • SD-Karte JA
    • eMMC (kann ich nicht mehr testen)

    MIT U-BOOT IM SPI

    • USB2 JA
    • USB3 NEIN
    • PCIe NVMe SSD JA
    • PCIe SATA JMS-585 JA

    Um von einem Laufwerk zu booten, muss auf diesem auch ein Betriebssystem drauf sein, von dem man starten kann. Ich nutze fast ausschließlich dieses Image.

    https://github.com/ayufan-rock64/linux-build/releases/download/0.10.12/buster-minimal-rockpro64-0.10.12-1184-arm64.img.xz

    Man kann den SPI abschalten. Dazu brückt man die Kontakte 23 & 25
    https://wiki.pine64.org/index.php?title=ROCKPro64#Disable_SPI_.28while_booting.29

    Das hatte ich schon mal zur Marvel Karte geschrieben.

    Aber auch hiermit ist ein Boot von der SATA Platte nicht möglich.
    
    Ich möchte hier noch was vom kamil zitieren.
    
        (11:44:09) ayufanWithPM: will look later, but this controller is tricky, also on x86 as well
        (11:44:16) ayufanWithPM: jms585 seems to be significantly more stable
    
    Evt. bekommt er das gefixt
    

    Ich hoffe du kommst jetzt damit klar. Brücken auf dem Board, sollte man nur dann machen, wenn man genau weiß was man macht! Für Schäden übernehme ich keine Haftung. Bitte vorher das Gehirn einschalten.

    Ich hoffe, das die Infos noch aktuell sind, ein kurzer Test eben, brachte nix Neues.

    P.S: Mein NAS läuft seit Monaten stabil 🙂

  • Hallo Frank,
    danke für die infos.

    ich habe https://github.com/ayufan-rock64/linux-build/releases/download/0.10.12/buster-minimal-rockpro64-0.10.12-1184-arm64.img.xz image benützt.

    Leider könnte ich Ip addrese nicht bekommen. DHCP is schon eth0.yaml (True) und kein internet.

    eth0 port 1GB ist schon drin. (UP link enabled)

    Ich weiß nicht was passiert

  • So I was trying to install Armbian based image (Raspian Buster). After installing, I have to manually enable the network
    using the following command and then I got the IP address.
    sudo nmtui

    Then I have enabled by marvel Pci-e by adding a rule in /udev/ and also added pci=nomsi in kernal boot parameters. But my SSD drives dint show up.

    Anything you could recommend inorder to solve this issue?

    Thanks

  • I have tried the same image which you posted above. 0.10.12-1184-arm64.img.

    I could see my eth 1Gb shows up. But there is no static IP set. I followed this guide https://forum.frank-mankel.org/topic/211/die-ersten-schritte-nach-der-installation
    to setup after that.

    But I can't able to get the IP nor the internet.

    Could you please suggest me something which I can use to solve this issue.
    Thanks.

  • Das Image ist ein Debian. Das zieht ganz normal per DHCP eine Adresse. Das sollte auch bei Dir so funktionieren. Es sei denn, bei dir läuft kein DHCP-Server!?

    Netplan benutzen die bei Ubuntu, das steht auch in dem Artikel so drin. Bitte fang mal mit den Basics an, danach dann PCIe usw.

  • Yeah it should pull dhcp address automatically. But it dint. It was working when I use Armbian image or OMV (stretch-openmediavault-rockpro64-0.8.3-1141-armhf.img). It automatically pulled the ip address. Only for this distro. It doesn't work.

    I use pfsense as firewall and dhcp is set for all my ports. i dont understand why it doesn't work for this.

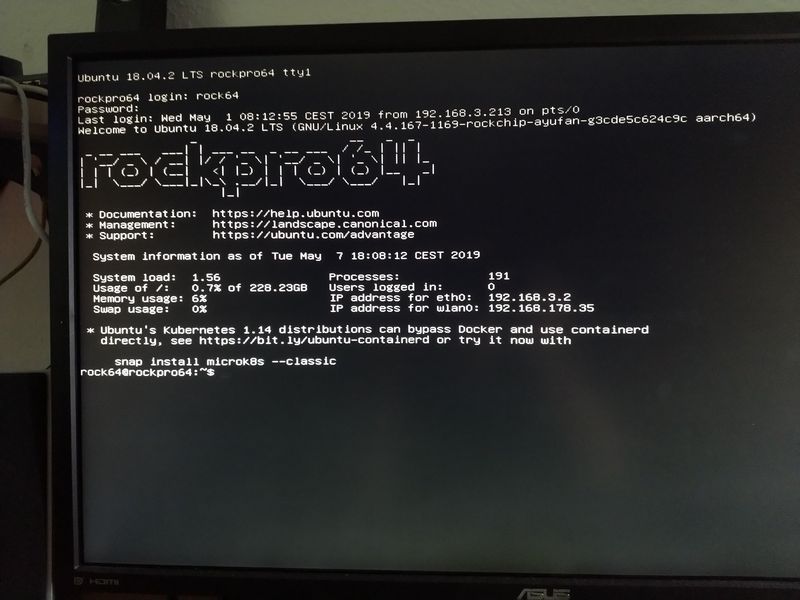
    One thing I notices is eth0 Link is UP - 1Gbps/full. It is the first time I am seeing this on the command line.

    Before that it used to be eth0 Link is up - 10/100 mbps..

  • update: I used the cat 6e cable which is capable of delivering 1 gbps and it worked. Isn't it strange?

    the normal rj45 cable doesn't work. Now dhcp gave the address and everything looks fine.

    Do you think this is a stable version? Can It be use for a homeserver? Because in the github it mentioned as testing purpose and not stable.

    Thanks

  • Nice workaround 😊

    I am only using this image. My NAS is running since months with an PCIe SATA Card JMS585.
    Two Raid 1 and an SSD for system.
    https://forum.frank-mankel.org/topic/789/rockpro64-pcie-sata-karte-mit-jmicron-jms585-chip/13

  • 0 Stimmen
    13 Beiträge
    804 Aufrufe
    N

    @frankm Alles Klar!
    Wie schon erwähnt, für meine Zwecke rechts! Die Jahre über hat gute Dienste geleistet (PCI-e und HDD) und wird hoffentlich auch noch ein paar Jahre bis zum nächsten Umbau tun!
    Vielen Dank!

  • ROCKPro64 - Booten von USB3

    ROCKPro64
    3
    0 Stimmen
    3 Beiträge
    368 Aufrufe
    FrankMF

    Yeah, genau das worauf ich auch warte.

    Wenn ich das richtig mitbekommen habe, könnte das Kamil's nächster Punkt auf seiner Liste sein.

  • NVMe SSD Speed auf Kernel 5.0 von Kamil

    Verschoben ROCKPro64
    11
    0 Stimmen
    11 Beiträge
    866 Aufrufe
    W

    @FrankM sagte in NVMe SSD Speed auf Kernel 5.0 von Kamil:

    Kurz was zum Nanopc-t4, das war das Board, wo ich damals schon geschrieben habe, wie man da die Wärme weg bekommt!? Ok, bleiben wir beim ROCKPro64 😉

    Hmm .. nix dazu im Forum bei dir gefunden .. nach wärme , nano usw. gesucht ..

    Den Teil verstehe ich nicht. Woher soll er denn das 0.7er Image laden???

    Von seiner SD .. ein bisschen wirr von mir beschrieben.

    Nackter Rockpro, ohne USB-Devices, ohne NVMe, ohne emmc, ..

    Ablauf 1:
    SD Karte mit 0.7er Image (das bisher immer funktioniert hatte) rein -> Rockpro geht an, beide LEDs gehen an (was aber bisher nur die weisse war), kein weiterer Boot-Vorgang.

    Ablauf 2:
    SD Karte mit 0.8er Image (gleiche SD Karte) rein -> Rockpro geht an, perfekter Boot Vorgang.

    Das Monitor "Problem" und das 0.7er scheinen hier ggf. zusammen zu hängen, jedoch - mehr debugging nur mit der RS232 möglich, ggf. Mist im First-Stage-Loader ..

    (Erase SPI , etc. alles hatte nichts verändert ..)

    Wenn jemand richtig Zeit und Lust hätte könnte man sich ja am Armbian nand-sata Script orientieren:

    Da habe ich auch schon mal drüber nachgedacht....

    Ich würde 5$ Patreon Money dazu geben 🙂

    Einen schönen Sonntag.

  • VON USB 4TB HD BOOTEN GEHT NICHT

    ROCKPro64
    5
    0 Stimmen
    5 Beiträge
    563 Aufrufe
    W

    Hallo FrankM,
    schade das Du mir nicht weiter helfen kannst, aber danke für Deine schnelle Antwort.
    Mit dem Bugreport kenne ich nicht aus, bin noch leihe.

    Einen schönen Abend noch.

    Winne

  • 0 Stimmen
    8 Beiträge
    1k Aufrufe
    FrankMF

    Die Verlinkung hatte ich überlesen, sorry.

    Es gibt nur eine Handvoll Karten, die im PCIe Port funktionieren. Warum, kann ich dir leider nicht beantworten. Es liegt aber mit Sicherheit an falschen Einstellungen im Kernel und an fehlenden Treibern. Ich habe hier auch eine andere Karte rumliegen, die erzeugt immer nur eine Kernel Panic 😞

    In diesem Thread steht einiges was geht und was nicht.
    https://forum.pine64.org/showthread.php?tid=6459

  • ROCKPro64 - Armbian nand-sata-install

    Verschoben Armbian
    14
    0 Stimmen
    14 Beiträge
    2k Aufrufe
    FrankMF

    Ich habe heute, nachdem es einige Updates von Armbian gab, mal nachgeschaut ob ein spezieller Fehler verschwunden ist.
    Und zwar geht es um das Resizen der Partion nachdem wir Armbian auf eine USB-HDD (USB3) installiert haben.

    Ich setze dafür folgendes System ein.

    Hardware ROCKPro64v2.0 4GB RAM SanDisk 240GB 2,5 Zoll HDD (nix tolles) Software Welcome to ARMBIAN 5.67.181217 nightly Debian GNU/Linux 9 (stretch) 4.4.167-rockchip64

    Was sehe ich nach dem Reboot?

    root@rockpro64:~# df -h Filesystem Size Used Avail Use% Mounted on udev 1.9G 0 1.9G 0% /dev tmpfs 388M 5.3M 383M 2% /run /dev/sda1 220G 1.3G 207G 1% / tmpfs 1.9G 0 1.9G 0% /dev/shm tmpfs 5.0M 4.0K 5.0M 1% /run/lock tmpfs 1.9G 0 1.9G 0% /sys/fs/cgroup tmpfs 1.9G 4.0K 1.9G 1% /tmp /dev/mmcblk0p1 58G 1.3G 57G 3% /media/mmcboot /dev/zram0 49M 3.0M 43M 7% /var/log tmpfs 388M 0 388M 0% /run/user/0

    Korrekt die Größe angepasst!

    Schnell mal den USB3 testen

    root@rockpro64:~# sudo dd if=/dev/zero of=sd.img bs=1M count=4096 conv=fdatasync 4096+0 records in 4096+0 records out 4294967296 bytes (4.3 GB, 4.0 GiB) copied, 38.0723 s, 113 MB/s

    Der Adapter

    root@rockpro64:~# lsusb -vvv Bus 004 Device 002: ID 2109:0715 VIA Labs, Inc. Device Descriptor: bLength 18 bDescriptorType 1 bcdUSB 3.10 bDeviceClass 0 (Defined at Interface level) bDeviceSubClass 0 bDeviceProtocol 0 bMaxPacketSize0 9 idVendor 0x2109 VIA Labs, Inc. idProduct 0x0715 bcdDevice 1.31 iManufacturer 1 VLI Manufacture String iProduct 2 VLI Product String iSerial 3 000000123ADA bNumConfigurations 1 Configuration Descriptor: bLength 9 bDescriptorType 2 wTotalLength 121 bNumInterfaces 1 bConfigurationValue 1 iConfiguration 0 bmAttributes 0x80 (Bus Powered) MaxPower 224mA Interface Descriptor: bLength 9 bDescriptorType 4 bInterfaceNumber 0 bAlternateSetting 0 bNumEndpoints 2 bInterfaceClass 8 Mass Storage bInterfaceSubClass 6 SCSI bInterfaceProtocol 80 Bulk-Only iInterface 0 Endpoint Descriptor: bLength 7 bDescriptorType 5 bEndpointAddress 0x81 EP 1 IN bmAttributes 2 Transfer Type Bulk Synch Type None Usage Type Data wMaxPacketSize 0x0400 1x 1024 bytes bInterval 0 bMaxBurst 15 Endpoint Descriptor: bLength 7 bDescriptorType 5 bEndpointAddress 0x02 EP 2 OUT bmAttributes 2 Transfer Type Bulk Synch Type None Usage Type Data wMaxPacketSize 0x0400 1x 1024 bytes bInterval 0 bMaxBurst 15 Interface Descriptor: bLength 9 bDescriptorType 4 bInterfaceNumber 0 bAlternateSetting 1 bNumEndpoints 4 bInterfaceClass 8 Mass Storage bInterfaceSubClass 6 SCSI bInterfaceProtocol 98 iInterface 0 Endpoint Descriptor: bLength 7 bDescriptorType 5 bEndpointAddress 0x04 EP 4 OUT bmAttributes 2 Transfer Type Bulk Synch Type None Usage Type Data wMaxPacketSize 0x0400 1x 1024 bytes bInterval 0 bMaxBurst 0 Command pipe (0x01) Endpoint Descriptor: bLength 7 bDescriptorType 5 bEndpointAddress 0x85 EP 5 IN bmAttributes 2 Transfer Type Bulk Synch Type None Usage Type Data wMaxPacketSize 0x0400 1x 1024 bytes bInterval 0 bMaxBurst 15 MaxStreams 32 Data-in pipe (0x03) Endpoint Descriptor: bLength 7 bDescriptorType 5 bEndpointAddress 0x06 EP 6 OUT bmAttributes 2 Transfer Type Bulk Synch Type None Usage Type Data wMaxPacketSize 0x0400 1x 1024 bytes bInterval 0 bMaxBurst 15 MaxStreams 32 Data-out pipe (0x04) Endpoint Descriptor: bLength 7 bDescriptorType 5 bEndpointAddress 0x87 EP 7 IN bmAttributes 2 Transfer Type Bulk Synch Type None Usage Type Data wMaxPacketSize 0x0400 1x 1024 bytes bInterval 0 bMaxBurst 0 MaxStreams 32 Status pipe (0x02) Binary Object Store Descriptor: bLength 5 bDescriptorType 15 wTotalLength 70 bNumDeviceCaps 4 FIXME: alloc bigger buffer for device capability descriptors Device Status: 0x0000 (Bus Powered)

    Ein lästiger Fehler weniger. 😉

  • 0 Stimmen
    2 Beiträge
    724 Aufrufe
    FrankMF
    Ergänzung

    Mal ein paar Filme vom meinem aktuellen NAS auf die Platte an der PCIe SATA-Karte geschaufelt.

    0_1535474720924_rp64_copy_NAS_to_SATA.png

    Ok, Geschwindigkeit ist für ein Datengrab noch akzeptabel.

  • ROCKPro64 - Der Bootvorgang

    Verschoben Hardware
    3
    0 Stimmen
    3 Beiträge
    1k Aufrufe
    FrankMF

    Um einen neuen Kernel booten zu können, brauche ich diese 4 Dateien unter /boot

    config-4.19.0-rc4-1065-ayufan-g72e04c7b3e06 initrd.img-4.19.0-rc4-1065-ayufan-g72e04c7b3e06 System.map-4.19.0-rc4-1065-ayufan-g72e04c7b3e06 vmlinuz-4.19.0-rc4-1065-ayufan-g72e04c7b3e06

    Und den Ordner /boot/dtbs/4.19.0-rc4-1065-ayufan-g72e04c7b3e06 mit folgendem Inhalt

    rock64@rockpro64v2_0:/boot/dtbs/4.19.0-rc4-1065-ayufan-g72e04c7b3e06$ ls -la total 104 drwxr-xr-x 26 root root 4096 Sep 30 09:54 . drwxr-xr-x 6 root root 4096 Sep 30 09:55 .. drwxr-xr-x 2 root root 4096 Sep 30 09:54 al drwxr-xr-x 2 root root 4096 Sep 30 09:54 allwinner drwxr-xr-x 2 root root 4096 Sep 30 09:54 altera drwxr-xr-x 2 root root 4096 Sep 30 09:54 amd drwxr-xr-x 2 root root 4096 Sep 30 09:54 amlogic drwxr-xr-x 2 root root 4096 Sep 30 09:54 apm drwxr-xr-x 2 root root 4096 Sep 30 09:54 arm drwxr-xr-x 4 root root 4096 Sep 30 09:54 broadcom drwxr-xr-x 2 root root 4096 Sep 30 09:54 cavium drwxr-xr-x 2 root root 4096 Sep 30 09:54 exynos drwxr-xr-x 2 root root 4096 Sep 30 09:54 freescale drwxr-xr-x 2 root root 4096 Sep 30 09:54 hisilicon drwxr-xr-x 2 root root 4096 Sep 30 09:54 lg drwxr-xr-x 2 root root 4096 Sep 30 09:54 marvell drwxr-xr-x 2 root root 4096 Sep 30 09:54 mediatek drwxr-xr-x 2 root root 4096 Sep 30 09:54 nvidia drwxr-xr-x 2 root root 4096 Sep 30 09:54 qcom drwxr-xr-x 2 root root 4096 Sep 30 09:54 renesas drwxr-xr-x 2 root root 4096 Sep 30 09:54 rockchip drwxr-xr-x 2 root root 4096 Sep 30 09:54 socionext drwxr-xr-x 2 root root 4096 Sep 30 09:54 sprd drwxr-xr-x 2 root root 4096 Sep 30 09:54 synaptics drwxr-xr-x 2 root root 4096 Sep 30 09:54 xilinx drwxr-xr-x 2 root root 4096 Sep 30 09:54 zte

    Unter /boot/extlinux liegt dann die Datei extlinux.conf

    Die sieht bei mir dann so aus

    timeout 10 menu title select kernel label kernel-4.19.0-rc4-1065-ayufan-g72e04c7b3e06 kernel /boot/vmlinuz-4.19.0-rc4-1065-ayufan-g72e04c7b3e06 initrd /boot/initrd.img-4.19.0-rc4-1065-ayufan-g72e04c7b3e06 devicetreedir /boot/dtbs/4.19.0-rc4-1065-ayufan-g72e04c7b3e06 append rw panic=10 init=/sbin/init coherent_pool=1M ethaddr=${ethaddr} eth1addr=${eth1addr} serial=${serial#} cgroup_enable=cpuset cgroup_memory=1 cgroup_enable=memory swapaccount=1 root=LABEL=TEST rootwait rootfstype=ext4 label kernel-4.19.0-rc4-1065-ayufan-g72e04c7b3e06-memtest kernel /boot/vmlinuz-4.19.0-rc4-1065-ayufan-g72e04c7b3e06 initrd /boot/initrd.img-4.19.0-rc4-1065-ayufan-g72e04c7b3e06 devicetreedir /boot/dtbs/4.19.0-rc4-1065-ayufan-g72e04c7b3e06 append rw panic=10 init=/sbin/init coherent_pool=1M ethaddr=${ethaddr} eth1addr=${eth1addr} serial=${serial#} cgroup_enable=cpuset cgroup_memory=1 cgroup_enable=memory swapaccount=1 root=LABEL=TEST rootwait rootfstype=ext4 memtest

    Darunter kommen dann evt. die alten Kernel die installiert waren, das habe ich hier im Beispiel weg gelassen.