Skip to content

ROCKPro64 - Docker Image

ROCKPro64
  • Morgens beim Kaffee mal schnell was ausprobieren 🙂

    Das Docker Image vom Kamil auf eine SD-Karte gebügelt. Ab in den ROCKPro64 und starten.

    Docker ?

    rock64@rockpro64:~$ docker
    
    Usage:	docker [OPTIONS] COMMAND
    
    A self-sufficient runtime for containers
    
    Options:
          --config string      Location of client config files (default
                               "/home/rock64/.docker")
      -D, --debug              Enable debug mode
      -H, --host list          Daemon socket(s) to connect to
      -l, --log-level string   Set the logging level
                               ("debug"|"info"|"warn"|"error"|"fatal")
                               (default "info")
          --tls                Use TLS; implied by --tlsverify
          --tlscacert string   Trust certs signed only by this CA (default
                               "/home/rock64/.docker/ca.pem")
          --tlscert string     Path to TLS certificate file (default
                               "/home/rock64/.docker/cert.pem")
          --tlskey string      Path to TLS key file (default
                               "/home/rock64/.docker/key.pem")
          --tlsverify          Use TLS and verify the remote
      -v, --version            Print version information and quit
    
    Management Commands:
      config      Manage Docker configs
      container   Manage containers
      image       Manage images
      network     Manage networks
      node        Manage Swarm nodes
      plugin      Manage plugins
      secret      Manage Docker secrets
      service     Manage services
      stack       Manage Docker stacks
      swarm       Manage Swarm
      system      Manage Docker
      trust       Manage trust on Docker images
      volume      Manage volumes
    
    Commands:
      attach      Attach local standard input, output, and error streams to a running container
      build       Build an image from a Dockerfile
      commit      Create a new image from a container's changes
      cp          Copy files/folders between a container and the local filesystem
      create      Create a new container
      deploy      Deploy a new stack or update an existing stack
      diff        Inspect changes to files or directories on a container's filesystem
      events      Get real time events from the server
      exec        Run a command in a running container
      export      Export a container's filesystem as a tar archive
      history     Show the history of an image
      images      List images
      import      Import the contents from a tarball to create a filesystem image
      info        Display system-wide information
      inspect     Return low-level information on Docker objects
      kill        Kill one or more running containers
      load        Load an image from a tar archive or STDIN
      login       Log in to a Docker registry
      logout      Log out from a Docker registry
      logs        Fetch the logs of a container
      pause       Pause all processes within one or more containers
      port        List port mappings or a specific mapping for the container
      ps          List containers
      pull        Pull an image or a repository from a registry
      push        Push an image or a repository to a registry
      rename      Rename a container
      restart     Restart one or more containers
      rm          Remove one or more containers
      rmi         Remove one or more images
      run         Run a command in a new container
      save        Save one or more images to a tar archive (streamed to STDOUT by default)
      search      Search the Docker Hub for images
      start       Start one or more stopped containers
      stats       Display a live stream of container(s) resource usage statistics
      stop        Stop one or more running containers
      tag         Create a tag TARGET_IMAGE that refers to SOURCE_IMAGE
      top         Display the running processes of a container
      unpause     Unpause all processes within one or more containers
      update      Update configuration of one or more containers
      version     Show the Docker version information
      wait        Block until one or more containers stop, then print their exit codes
    
    Run 'docker COMMAND --help' for more information on a command.
    

    Ok, Docker ist installiert und läuft.

    Hello World

    rock64@rockpro64:~$ sudo docker run -t ubuntu:18.04 /bin/echo "Hello World"
    [sudo] password for rock64: 
    Unable to find image 'ubuntu:18.04' locally
    18.04: Pulling from library/ubuntu
    7dc40899884d: Pull complete 
    3c3b1bd6c6b3: Pull complete 
    f2b826692f9c: Pull complete 
    836583884d3e: Pull complete 
    27ede898dd26: Pull complete 
    Digest: sha256:de774a3145f7ca4f0bd144c7d4ffb2931e06634f11529653b23eba85aef8e378
    Status: Downloaded newer image for ubuntu:18.04
    Hello World
    

    Nicht wirklich spannend 😉

    nginx

    rock64@rockpro64:~$ sudo docker run -d --name demo_nginx -p 80:80 nginx
    Unable to find image 'nginx:latest' locally
    latest: Pulling from library/nginx
    8d586fc79193: Pull complete 
    542be7cb76c8: Pull complete 
    4c1ed6d3c37c: Pull complete 
    Digest: sha256:24a0c4b4a4c0eb97a1aabb8e29f18e917d05abfe1b7a7c07857230879ce7d3d3
    Status: Downloaded newer image for nginx:latest
    0b603cb5fa5b4ebf9113eb916b4dbc3d2cf48db8edf5b744d8b40eb6792b22dc
    

    Jetzt haben wir einen Docker Container mit nginx am Laufen. Mit dem Befehl docker ps kann man sich die laufenden Container anzeigen lassen.

    rock64@rockpro64:~$ sudo docker ps
    CONTAINER ID        IMAGE               COMMAND                  CREATED             STATUS              PORTS                NAMES
    0b603cb5fa5b        nginx               "nginx -g 'daemon of…"   8 seconds ago       Up 7 seconds        0.0.0.0:80->80/tcp   demo_nginx
    

    Adminstrieren des Docker Containers

    sudo docker exec -it 0b603cb5fa5b bash
    

    und schwupps, sind wir auf der Konsole.

    Mal eben nano nachinstallieren.

     root@0b603cb5fa5b:/# apt-get update
     Get:1 http://security.debian.org/debian-security stretch/updates InRelease [94.3 kB]
     Ign:2 http://cdn-fastly.deb.debian.org/debian stretch InRelease               
     Get:3 http://cdn-fastly.deb.debian.org/debian stretch-updates InRelease [91.0 kB]
     Get:4 http://cdn-fastly.deb.debian.org/debian stretch Release [118 kB]               
     Get:5 http://cdn-fastly.deb.debian.org/debian stretch Release.gpg [2434 B]
     Get:6 http://security.debian.org/debian-security stretch/updates/main arm64 Packages [421 kB]
     Get:7 http://cdn-fastly.deb.debian.org/debian stretch-updates/main arm64 Packages [5096 B]
     Get:8 http://cdn-fastly.deb.debian.org/debian stretch/main arm64 Packages [6940 kB]
     Fetched 7672 kB in 3s (1962 kB/s)   
     Reading package lists... Done
     root@0b603cb5fa5b:/# apt-get install nano
     Reading package lists... Done
     Building dependency tree       
     Reading state information... Done
     Suggested packages:
       spell
     The following NEW packages will be installed:
       nano
     0 upgraded, 1 newly installed, 0 to remove and 0 not upgraded.
     Need to get 474 kB of archives.
     After this operation, 2088 kB of additional disk space will be used.
     Get:1 http://cdn-fastly.deb.debian.org/debian stretch/main arm64 nano arm64 2.7.4-1 [474 kB]
     Fetched 474 kB in 0s (764 kB/s)
     debconf: delaying package configuration, since apt-utils is not installed
     Selecting previously unselected package nano.
     (Reading database ... 7135 files and directories currently installed.)
     Preparing to unpack .../nano_2.7.4-1_arm64.deb ...
     Unpacking nano (2.7.4-1) ...
     Setting up nano (2.7.4-1) ...
     update-alternatives: using /bin/nano to provide /usr/bin/editor (editor) in auto mode
     update-alternatives: warning: skip creation of /usr/share/man/man1/editor.1.gz because associated file /usr/share/man/man1/nano.1.gz (of link group editor) doesn't exist
     update-alternatives: using /bin/nano to provide /usr/bin/pico (pico) in auto mode
     update-alternatives: warning: skip creation of /usr/share/man/man1/pico.1.gz because associated file /usr/share/man/man1/nano.1.gz (of link group pico) doesn't exist
    

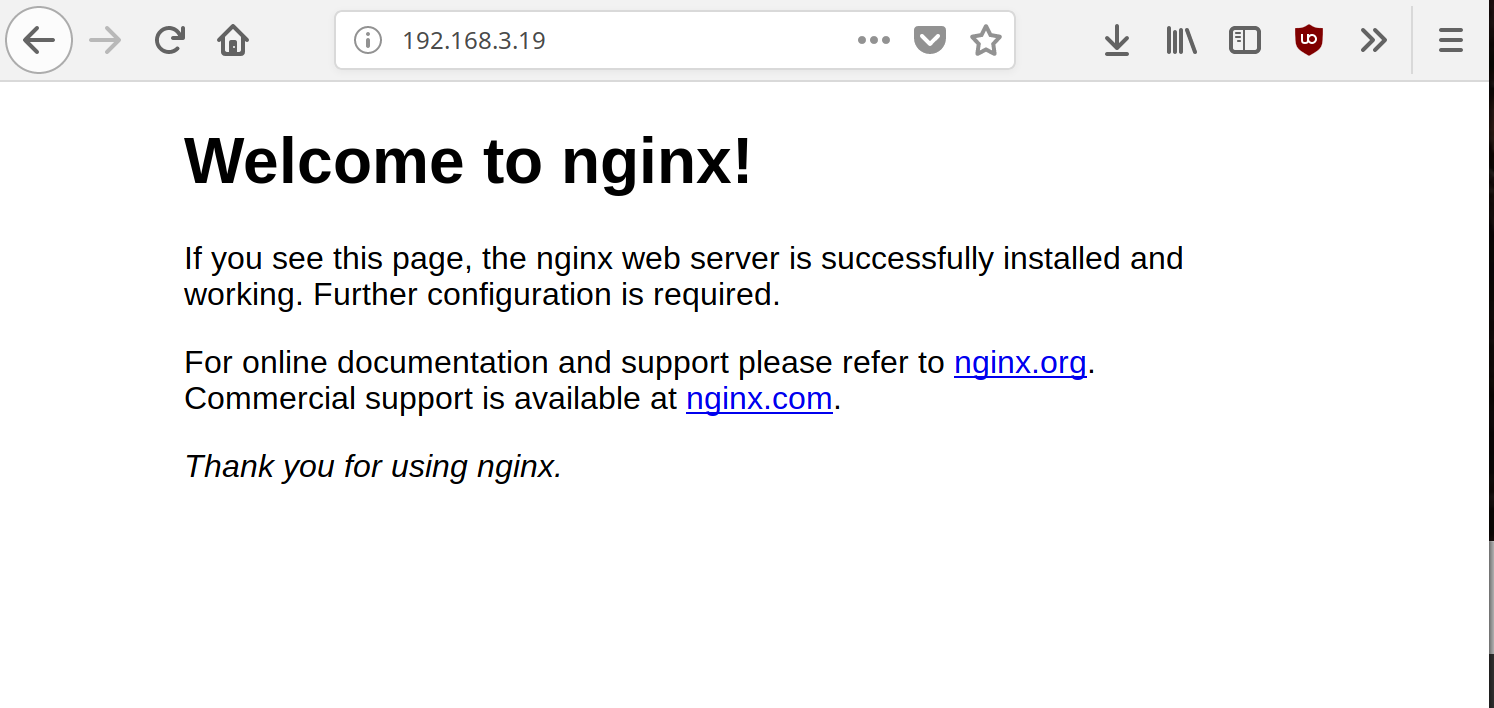
    Was müssen wir noch testen? Ob nginx läuft. Dazu im Webbrowser folgendes eingeben

     http://192.168.3.19/
    

    Das ist jetzt die IP-Adresse, mit der mein ROCKPro64 läuft.
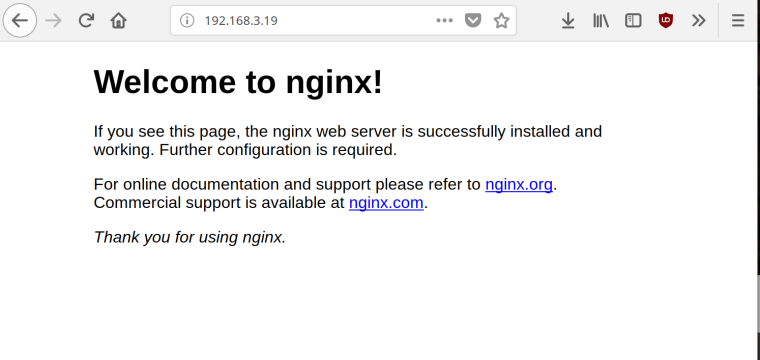
    0_1537611422093_nginx.png

    Soweit, sieht das ja brauchbar aus. Mal ein wenig mit rumspielen 🙂

    Docker Befehle

    Stoppen

    rock64@rockpro64:~$ sudo docker stop 0b603cb5fa5b
    0b603cb5fa5b
    

    Starten

    rock64@rockpro64:~$ sudo docker start 0b603cb5fa5b
    0b603cb5fa5b
    

    Und es gibt noch viel mehr da zu entdecken. Wird fortgesetzt......

  • docker info

    root@rockpro64:/usr/local/sbin# docker info
    Containers: 4
     Running: 0
     Paused: 0
     Stopped: 4
    Images: 4
    Server Version: 18.09.3
    Storage Driver: overlay2
     Backing Filesystem: extfs
     Supports d_type: true
     Native Overlay Diff: true
    Logging Driver: json-file
    Cgroup Driver: cgroupfs
    ....
    

    docker image ls

    Vorhandene Images auflisten.

    root@rockpro64:/usr/local/sbin# docker image ls
    REPOSITORY          TAG                 IMAGE ID            CREATED             SIZE
    my/nginx            latest              d6d53e05e4c8        45 hours ago        103MB
    nginx               latest              c190496bcbad        3 days ago          103MB
    debian              latest              1c2fcfa9d61f        3 days ago          95.8MB
    ubuntu              18.04               0926e73e5245        2 weeks ago         80.4MB
    

    docker Image temporär starten

    root@rockpro64:~/docker_test# docker run -p 4000:80 friendlyhello
     * Serving Flask app "app" (lazy loading)
     * Environment: production
       WARNING: Do not use the development server in a production environment.
       Use a production WSGI server instead.
     * Debug mode: off
     * Running on http://0.0.0.0:80/ (Press CTRL+C to quit)
    192.168.3.213 - - [30/Mar/2019 17:23:38] "GET / HTTP/1.1" 200 -
    192.168.3.213 - - [30/Mar/2019 17:23:38] "GET /favicon.ico HTTP/1.1" 404 -
    

    docker Image als Daemon starten

     root@rockpro64:~/docker_test# docker run -d -p 4000:80 friendlyhello
     0b9d4c5878b50dca6d820b2597a1c5128c176d7d4f7563d4ecbc8203fd28f8b3
    
  • Wir verfeinern das Ganze mal. Den Anfang macht der nginx Docker Container 🙂

    Als Basis dient das Docker-Image vom Kamil.

    Software

    Hier die rc5 Version

    root@rockpro64:~# uname -a
    Linux rockpro64 4.4.167-1161-rockchip-ayufan-g6f1664023387 #1 SMP Fri Mar 22 23:03:38 UTC 2019 aarch64 aarch64 aarch64 GNU/Linux
    

    nginx

    Container holen

    docker pull nginx
    

    Container starten

    docker run -d -p 80:80 nginx
    

    Docker Status

    root@rockpro64:~# docker ps
    CONTAINER ID        IMAGE               COMMAND                  CREATED             STATUS              PORTS                NAMES
    ef0c26f78268        nginx               "nginx -g 'daemon of…"   4 minutes ago       Up 4 minutes        0.0.0.0:80->80/tcp   heuristic_mirzakhani
    

    Docker Container betreten

    docker exec -it ef0c26f78268 bash
    

    Danach befindet man sich auf der Konsole, innerhalb des Containers. Dort kann man dann Änderungen vornehmen, nur blöd, das die nicht permanent sind. Dafür muss man noch was machen.

    Den Container, den man sich holt, dient nur als Grundlage. Also die konsole betreten, die Änderungen eintragen. Beispiel:

    apt update
    apt upgrade
    apt install nano
    nano /usr/share/nginx/html/index.html
    

    In der Datei ändern wir folgendes

    <h1>Welcome to nginx! ***TEST***</h1>
    

    Jetzt kann man die Konsole wieder verlassen.

    exit
    

    Wenn man nun den Container stoppen würde und erneut starten würde, wären alle Änderungen weg. Man bekommt immer den Stand, den man sich mittels pull gezogen hat. OK, das kann man aber auch permanent machen.

    docker commit

    root@rockpro64:~# docker commit ef0c26f78268 nginx_test
    

    Mit diesem Befehl erzeuge ich aus dem Container nginx den neuen Container nginx_test mit allen meinen Änderungen. Das sieht man hier

    root@rockpro64:~# docker image ls
    REPOSITORY          TAG                 IMAGE ID            CREATED             SIZE
    nginx_test          latest              05b57c23e8c5        32 seconds ago      124MB
    nginx               latest              2ba173e8977e        2 days ago          103MB
    

    Nun stoppt man den ersten Container nginx und startet seinen neuen Container nginx_test, mit allen Änderungen.

    nginx default.conf

    Die findet man unter

    nano /etc/nginx/conf.d/default.conf
    
  • Das ganze hat einen furchtbar schönen Vorteil. Mal angenommen, ich habe ein NodeBB-Forum in einem Container laufen. Will das Ding updaten und das crasht einfach mal so. Egal, Container stoppen, Container starten und alles läuft wieder.

    Mit dem Commit sichere ich mir dann den Zustand nachdem ich weiß, das alles klappt 🙂

  • FrankMF FrankM hat am auf dieses Thema verwiesen

  • PyPi - Pakete ein Sicherheitsproblem?

    Python3
    1
    0 Stimmen
    1 Beiträge
    90 Aufrufe
    Niemand hat geantwortet
  • Mainline 5.11.x

    Images
    1
    0 Stimmen
    1 Beiträge
    237 Aufrufe
    Niemand hat geantwortet
  • Armbian 5.4.0-rc1

    Armbian
    5
    0 Stimmen
    5 Beiträge
    371 Aufrufe
    FrankMF

    Gut, ich bin nicht der einzige, der ständig damit Probleme hat. @tkaiser auch 😉

    1036201d-a4b2-47be-a618-36003c07e0ce-grafik.png

  • ROCKPro64 - Netflix?

    ROCKPro64
    2
    0 Stimmen
    2 Beiträge
    409 Aufrufe
    FrankMF

    Anleitung von Kamil

    # Netflix Starting with 0.8.0rc13 it is possible to use Netflix on all **Ubuntu/armf** desktop images using regular Chromium browser. Due to Google policies images do not ship Widevine CDM required by Netflix to decrypt videos. Currently, Widevine CDM is only available for **armhf** and **Ubuntu**. You have to install Widevine CDM with: ```bash install_widevine_drm.sh ``` This will take between 5 to 15 mins depending on the performance of SD-card, and your Internet connection.
  • [HOWTO] Verschlüsseltes NAS aufsetzen

    Verschoben ROCKPro64
    12
    0 Stimmen
    12 Beiträge
    3k Aufrufe
    FrankMF

    Da btrfs bei mir ja nicht so der Bringer war, Fehler im Image vom Kamil?, Fehler in btrfs? Ich weiß es nicht, also weg damit! Da ich das NAS noch richtig produktiv genutzt hatte, waren die Daten schnell gesichert. Danach das NAS neugestartet, nun sind die beiden Platten nicht mehr gemountet und wir können damit arbeiten.

    ACHTUNG! Ich bitte wie immer darum, das Gehirn ab hier einzuschalten! Sonst droht Datenverlust! Aus Sicherheitsgründen gebe ich hier die Laufwerke so an = sdX1 Das X bitte entsprechend austauschen!

    Die beiden Platten mit

    sudo fdisk /dev/sdX

    neu einrichten. Alte Partition weg, neu einrichten usw. Im Detail gehe ich hier jetzt nicht drauf ein. Ich gehe davon aus, das das bekannt ist.

    Der Plan

    raid_pool0 = sdX1 = /dev/mapper/raid_pool0
    raid_pool1 = sdX1 = /dev/mapper/raid_pool1

    Verschlüsseln sudo cryptsetup --key-size 512 --hash sha256 --iter-time 5000 --use-random luksFormat /dev/sdX1 sudo cryptsetup --key-size 512 --hash sha256 --iter-time 5000 --use-random luksFormat /dev/sdX1 Platten entschlüsseln sudo cryptsetup open /dev/sdX1 raid_pool0 sudo cryptsetup open /dev/sdX1 raid_pool1 RAID1 anlegen sudo mdadm --create /dev/md0 --auto md --level=1 --raid-devices=2 /dev/mapper/raid_pool0 /dev/mapper/raid_pool1 sudo mkfs.ext4 /dev/md0 Script zum Entschlüsseln und Mounten crypt.sh #!/bin/bash ###############################################################################$ # Autor: Frank Mankel # Verschlüsseltes Raid1 einbinden! # # Hardware: # ROCKPro64v2.1 # PCIe SATA Karte # 2St. 2,5 Zoll HDD Platten a 2TB # # Software: # bionic-minimal 0.7.9 # Kontakt: frank.mankel@gmail.com # ###############################################################################$ #Passwort abfragen echo "Passwort eingeben!" read -s password echo "Bitte warten......" #Passwörter abfragen echo -n $password | cryptsetup open /dev/sdX1 raid_pool0 -d - echo -n $password | cryptsetup open /dev/sdX1 raid_pool1 -d - #Raid1 mounten mount /dev/md0 /mnt/raid echo "Laufwerke erfolgreich gemountet!"

    Bis jetzt sieht das Raid ok aus, ich werde das die nächsten Tage mal ein wenig im Auge behalten.

    [ 82.430293] device-mapper: uevent: version 1.0.3 [ 82.430430] device-mapper: ioctl: 4.39.0-ioctl (2018-04-03) initialised: dm-devel@redhat.com [ 108.196397] md/raid1:md0: not clean -- starting background reconstruction [ 108.196401] md/raid1:md0: active with 2 out of 2 mirrors [ 108.240395] md0: detected capacity change from 0 to 2000260497408 [ 110.076860] md: resync of RAID array md0 [ 110.385099] EXT4-fs (md0): recovery complete [ 110.431715] EXT4-fs (md0): mounted filesystem with ordered data mode. Opts: (null) [57744.301662] md: md0: resync done.
  • Infrarot Empfänger

    Hardware
    1
    0 Stimmen
    1 Beiträge
    790 Aufrufe
    Niemand hat geantwortet
  • ROCKPro64 wieder vorbestellbar

    ROCKPro64
    5
    0 Stimmen
    5 Beiträge
    1k Aufrufe
    FrankMF

    Meine Lieferung ist unterwegs 🙂

    Hello Mr. Frank Mankel, Order 62068 just shipped on July 18, 2018 from Shenzhen transit to Hong Kong DHL.

  • stretch-minimal-rockpro64

    Verschoben Linux
    3
    0 Stimmen
    3 Beiträge
    1k Aufrufe
    FrankMF

    Mal ein Test was der Speicher so kann.

    rock64@rockpro64:~/tinymembench$ ./tinymembench tinymembench v0.4.9 (simple benchmark for memory throughput and latency) ========================================================================== == Memory bandwidth tests == == == == Note 1: 1MB = 1000000 bytes == == Note 2: Results for 'copy' tests show how many bytes can be == == copied per second (adding together read and writen == == bytes would have provided twice higher numbers) == == Note 3: 2-pass copy means that we are using a small temporary buffer == == to first fetch data into it, and only then write it to the == == destination (source -> L1 cache, L1 cache -> destination) == == Note 4: If sample standard deviation exceeds 0.1%, it is shown in == == brackets == ========================================================================== C copy backwards : 2812.7 MB/s C copy backwards (32 byte blocks) : 2811.9 MB/s C copy backwards (64 byte blocks) : 2632.8 MB/s C copy : 2667.2 MB/s C copy prefetched (32 bytes step) : 2633.5 MB/s C copy prefetched (64 bytes step) : 2640.8 MB/s C 2-pass copy : 2509.8 MB/s C 2-pass copy prefetched (32 bytes step) : 2431.6 MB/s C 2-pass copy prefetched (64 bytes step) : 2424.1 MB/s C fill : 4887.7 MB/s (0.5%) C fill (shuffle within 16 byte blocks) : 4883.0 MB/s C fill (shuffle within 32 byte blocks) : 4889.3 MB/s C fill (shuffle within 64 byte blocks) : 4889.2 MB/s --- standard memcpy : 2807.3 MB/s standard memset : 4890.4 MB/s (0.3%) --- NEON LDP/STP copy : 2803.7 MB/s NEON LDP/STP copy pldl2strm (32 bytes step) : 2802.1 MB/s NEON LDP/STP copy pldl2strm (64 bytes step) : 2800.7 MB/s NEON LDP/STP copy pldl1keep (32 bytes step) : 2745.5 MB/s NEON LDP/STP copy pldl1keep (64 bytes step) : 2745.8 MB/s NEON LD1/ST1 copy : 2801.9 MB/s NEON STP fill : 4888.9 MB/s (0.3%) NEON STNP fill : 4850.1 MB/s ARM LDP/STP copy : 2803.8 MB/s ARM STP fill : 4893.0 MB/s (0.5%) ARM STNP fill : 4851.7 MB/s ========================================================================== == Framebuffer read tests. == == == == Many ARM devices use a part of the system memory as the framebuffer, == == typically mapped as uncached but with write-combining enabled. == == Writes to such framebuffers are quite fast, but reads are much == == slower and very sensitive to the alignment and the selection of == == CPU instructions which are used for accessing memory. == == == == Many x86 systems allocate the framebuffer in the GPU memory, == == accessible for the CPU via a relatively slow PCI-E bus. Moreover, == == PCI-E is asymmetric and handles reads a lot worse than writes. == == == == If uncached framebuffer reads are reasonably fast (at least 100 MB/s == == or preferably >300 MB/s), then using the shadow framebuffer layer == == is not necessary in Xorg DDX drivers, resulting in a nice overall == == performance improvement. For example, the xf86-video-fbturbo DDX == == uses this trick. == ========================================================================== NEON LDP/STP copy (from framebuffer) : 602.5 MB/s NEON LDP/STP 2-pass copy (from framebuffer) : 551.6 MB/s NEON LD1/ST1 copy (from framebuffer) : 667.1 MB/s NEON LD1/ST1 2-pass copy (from framebuffer) : 605.6 MB/s ARM LDP/STP copy (from framebuffer) : 445.3 MB/s ARM LDP/STP 2-pass copy (from framebuffer) : 428.8 MB/s ========================================================================== == Memory latency test == == == == Average time is measured for random memory accesses in the buffers == == of different sizes. The larger is the buffer, the more significant == == are relative contributions of TLB, L1/L2 cache misses and SDRAM == == accesses. For extremely large buffer sizes we are expecting to see == == page table walk with several requests to SDRAM for almost every == == memory access (though 64MiB is not nearly large enough to experience == == this effect to its fullest). == == == == Note 1: All the numbers are representing extra time, which needs to == == be added to L1 cache latency. The cycle timings for L1 cache == == latency can be usually found in the processor documentation. == == Note 2: Dual random read means that we are simultaneously performing == == two independent memory accesses at a time. In the case if == == the memory subsystem can't handle multiple outstanding == == requests, dual random read has the same timings as two == == single reads performed one after another. == ========================================================================== block size : single random read / dual random read 1024 : 0.0 ns / 0.0 ns 2048 : 0.0 ns / 0.0 ns 4096 : 0.0 ns / 0.0 ns 8192 : 0.0 ns / 0.0 ns 16384 : 0.0 ns / 0.0 ns 32768 : 0.0 ns / 0.0 ns 65536 : 4.5 ns / 7.2 ns 131072 : 6.8 ns / 9.7 ns 262144 : 9.8 ns / 12.8 ns 524288 : 11.4 ns / 14.7 ns 1048576 : 16.0 ns / 22.6 ns 2097152 : 114.0 ns / 175.3 ns 4194304 : 161.7 ns / 219.9 ns 8388608 : 190.7 ns / 241.5 ns 16777216 : 205.3 ns / 250.5 ns 33554432 : 212.9 ns / 255.5 ns 67108864 : 222.3 ns / 271.1 ns